
 Before we get to Card #9, the winner of yesterdays daily giveaway is: Marjorie who said, “Loved watching the video – you make it look so easy!”.
Thank you for your kind words and Congratulations Marjorie!
I hope you enjoy your card.
Don’t forget to leave a comment on this post for today’s card. Remember each day you leave a comment, you are entered into the drawing for the Grand Giveaway for all 31 cards. Easy, peasy.
Card #9 – Congratulations card
I started by assembling all my supplies.
 Today was one of those days where this card seemed like it just didn’t want to made. From the very start, I ran into one issue after another. I almost scrapped it (and not the good scrap), but decided to keep going because I didn’t have any backup plans for today.
I used white cardstock (5 1/2″ X 8 1/2″) for my base, sage cardstock (5 1/4″ X 4″) for the frame and watercolor paper (5 1/4″ X 4″) for the design.


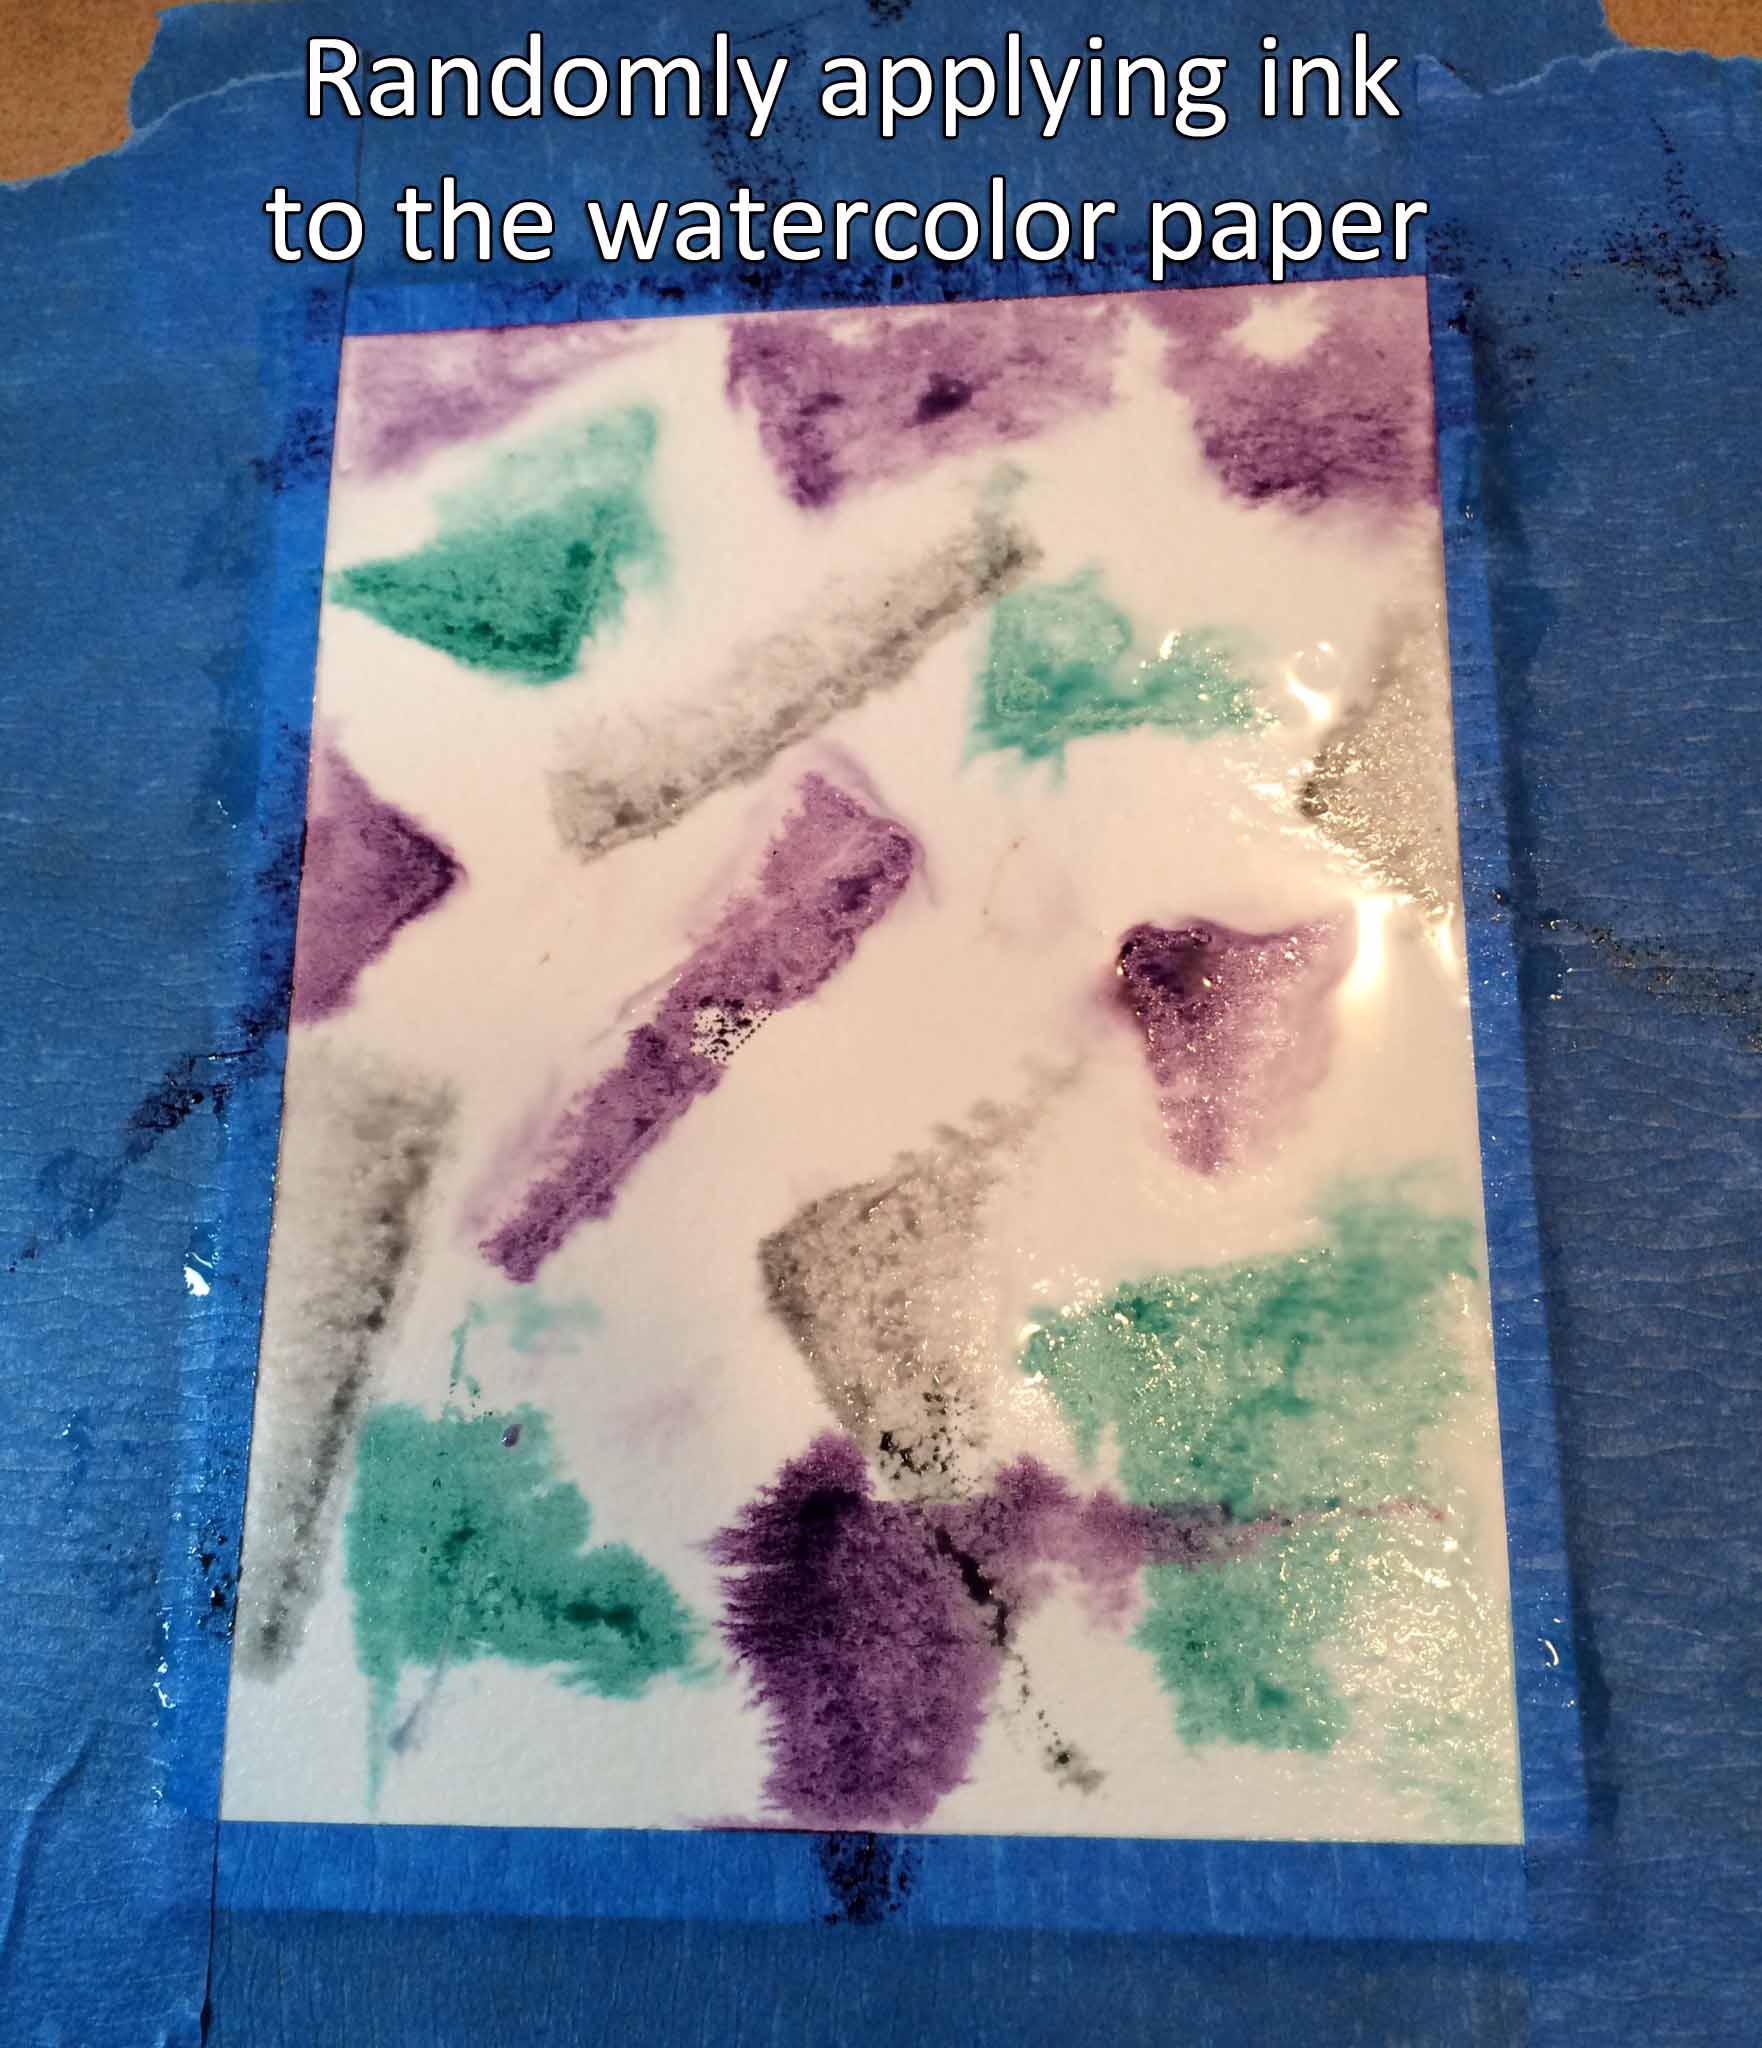

I started by prepping the watercolor paper. I taped the paper to a board using painters tape. I then covered the whole piece of paper with plain water. I wanted a haphazard look so I took my Distress Inks and just randomly applied the ink to the paper. Then I took a big broad brush and started applying more water until I achieved the look I wanted. I used my heat gun to dry the paper (to speed the process up).
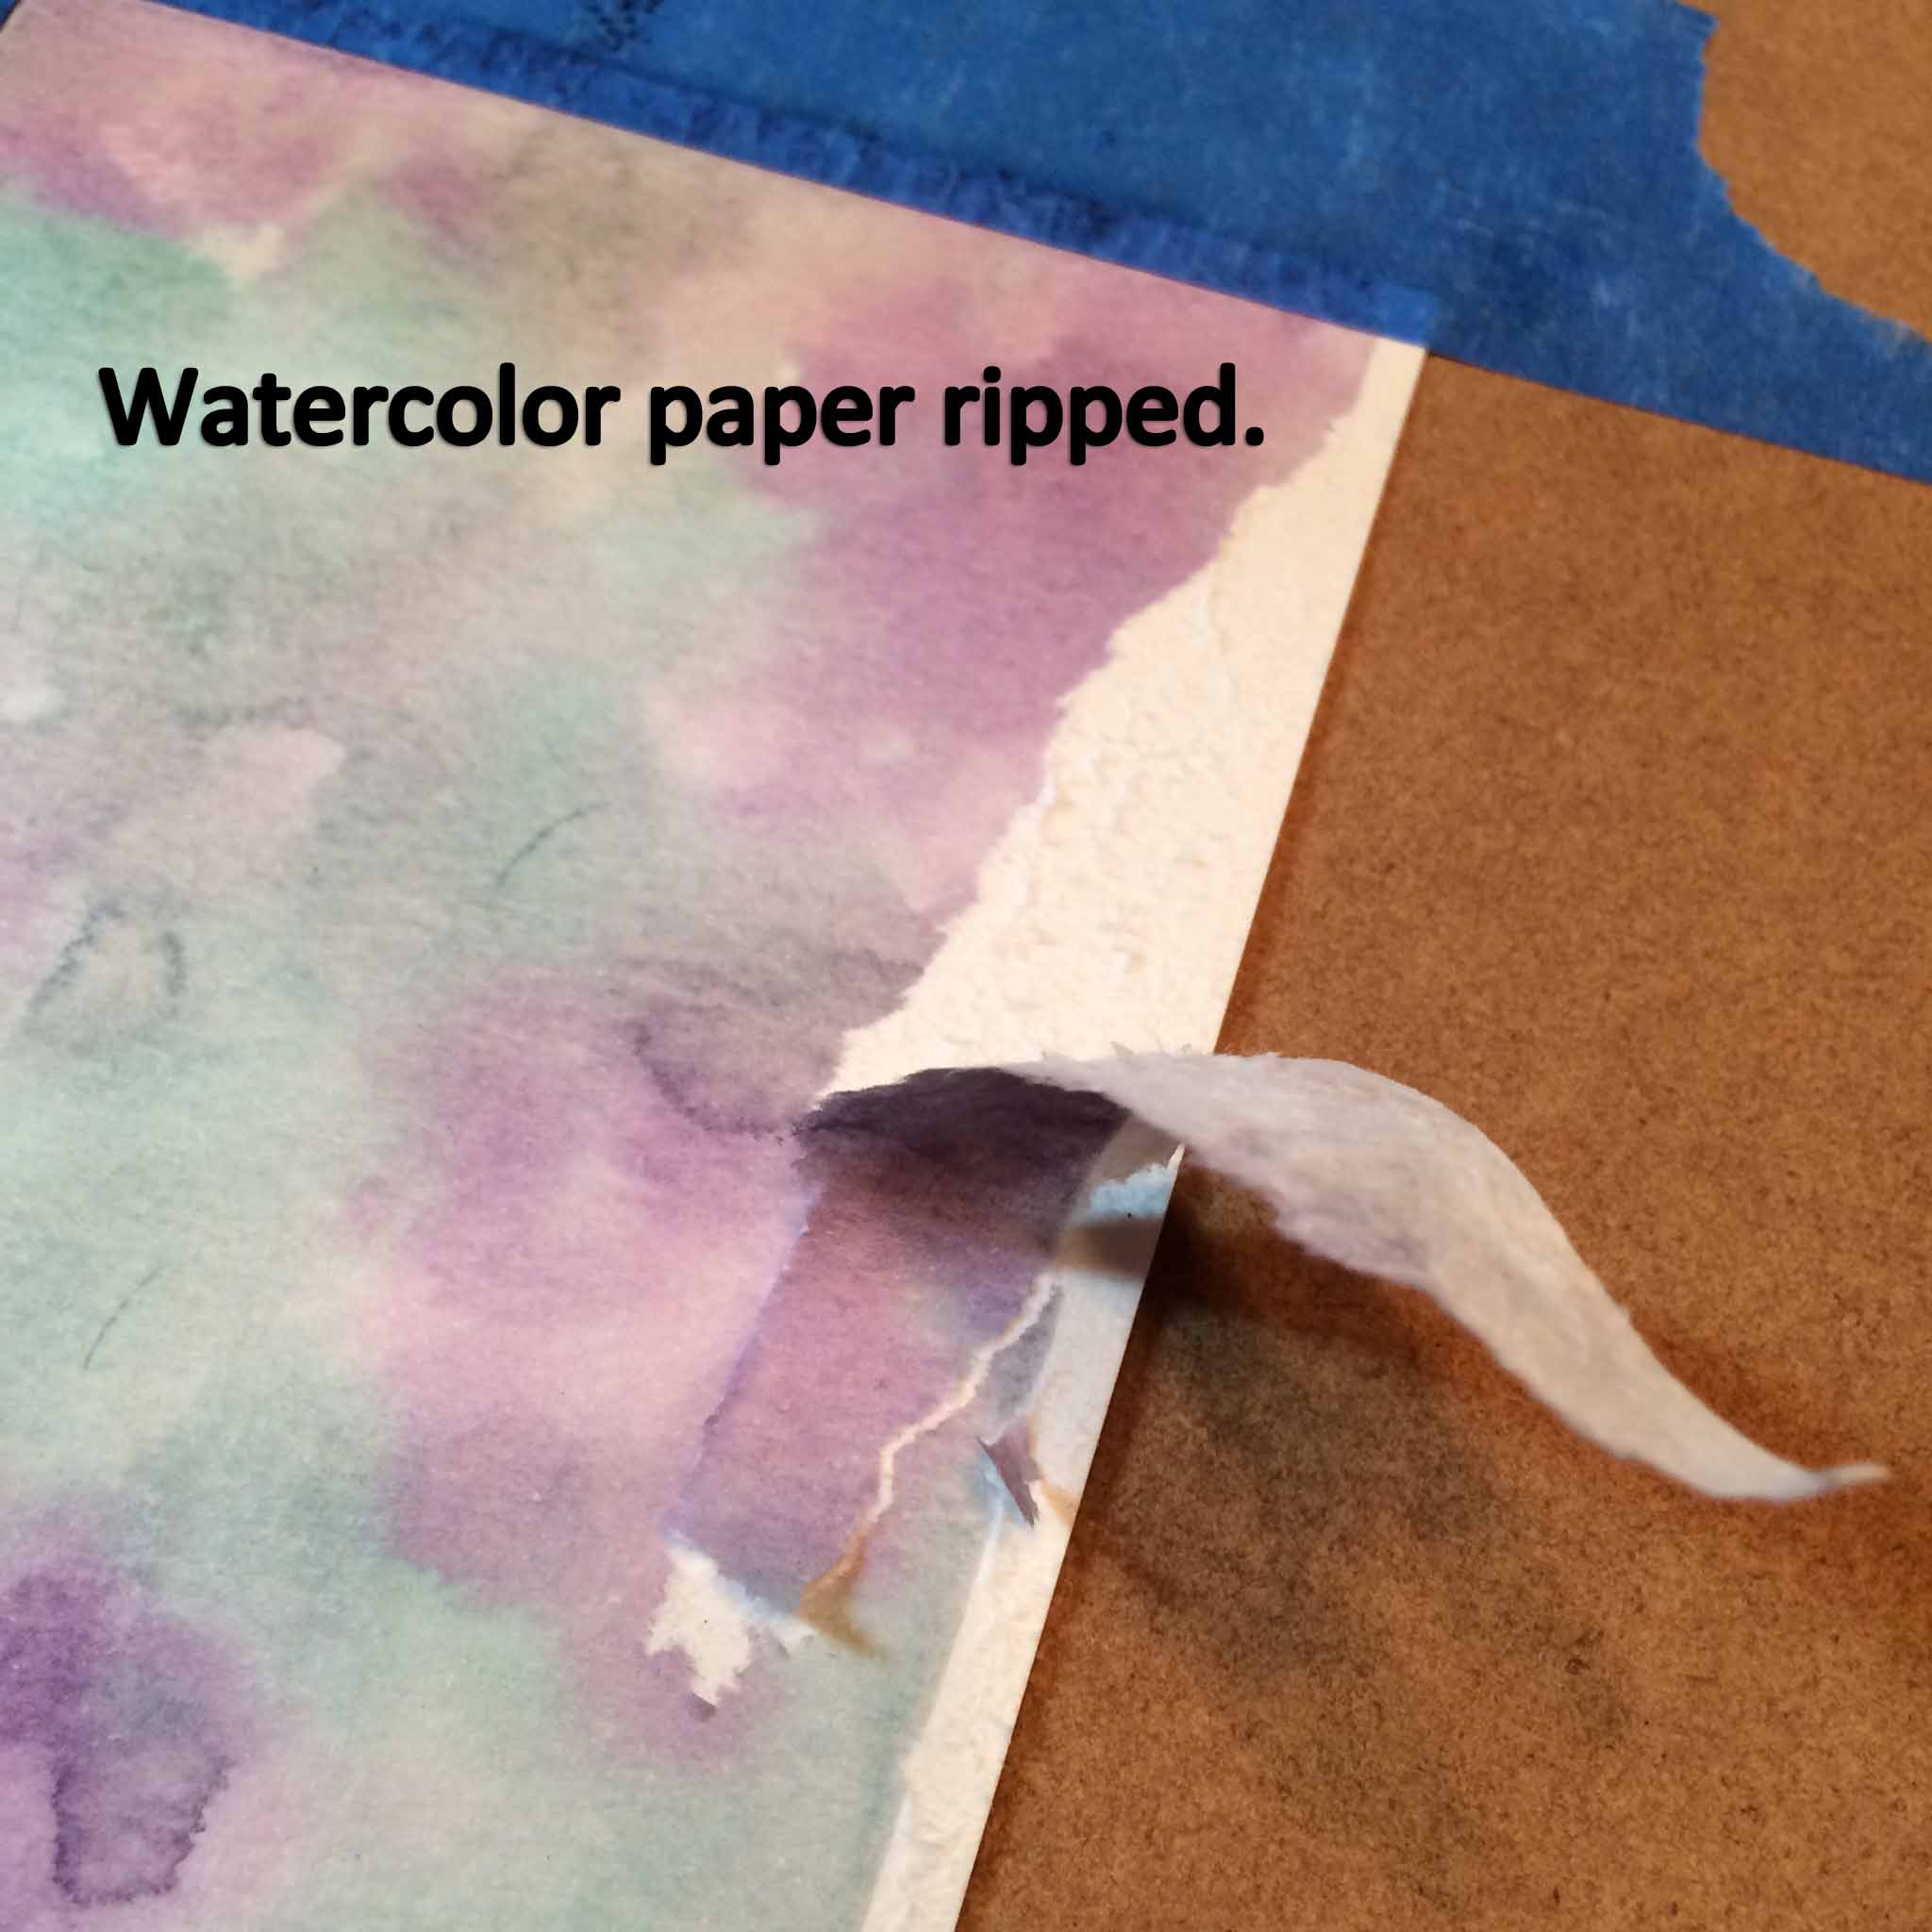 This is when things started to go wrong. I began to remove the painters tape and the watercolor paper ripped on one side. After a small tantrum, I regrouped and decided to keep the background piece, just cut off the ripped section.
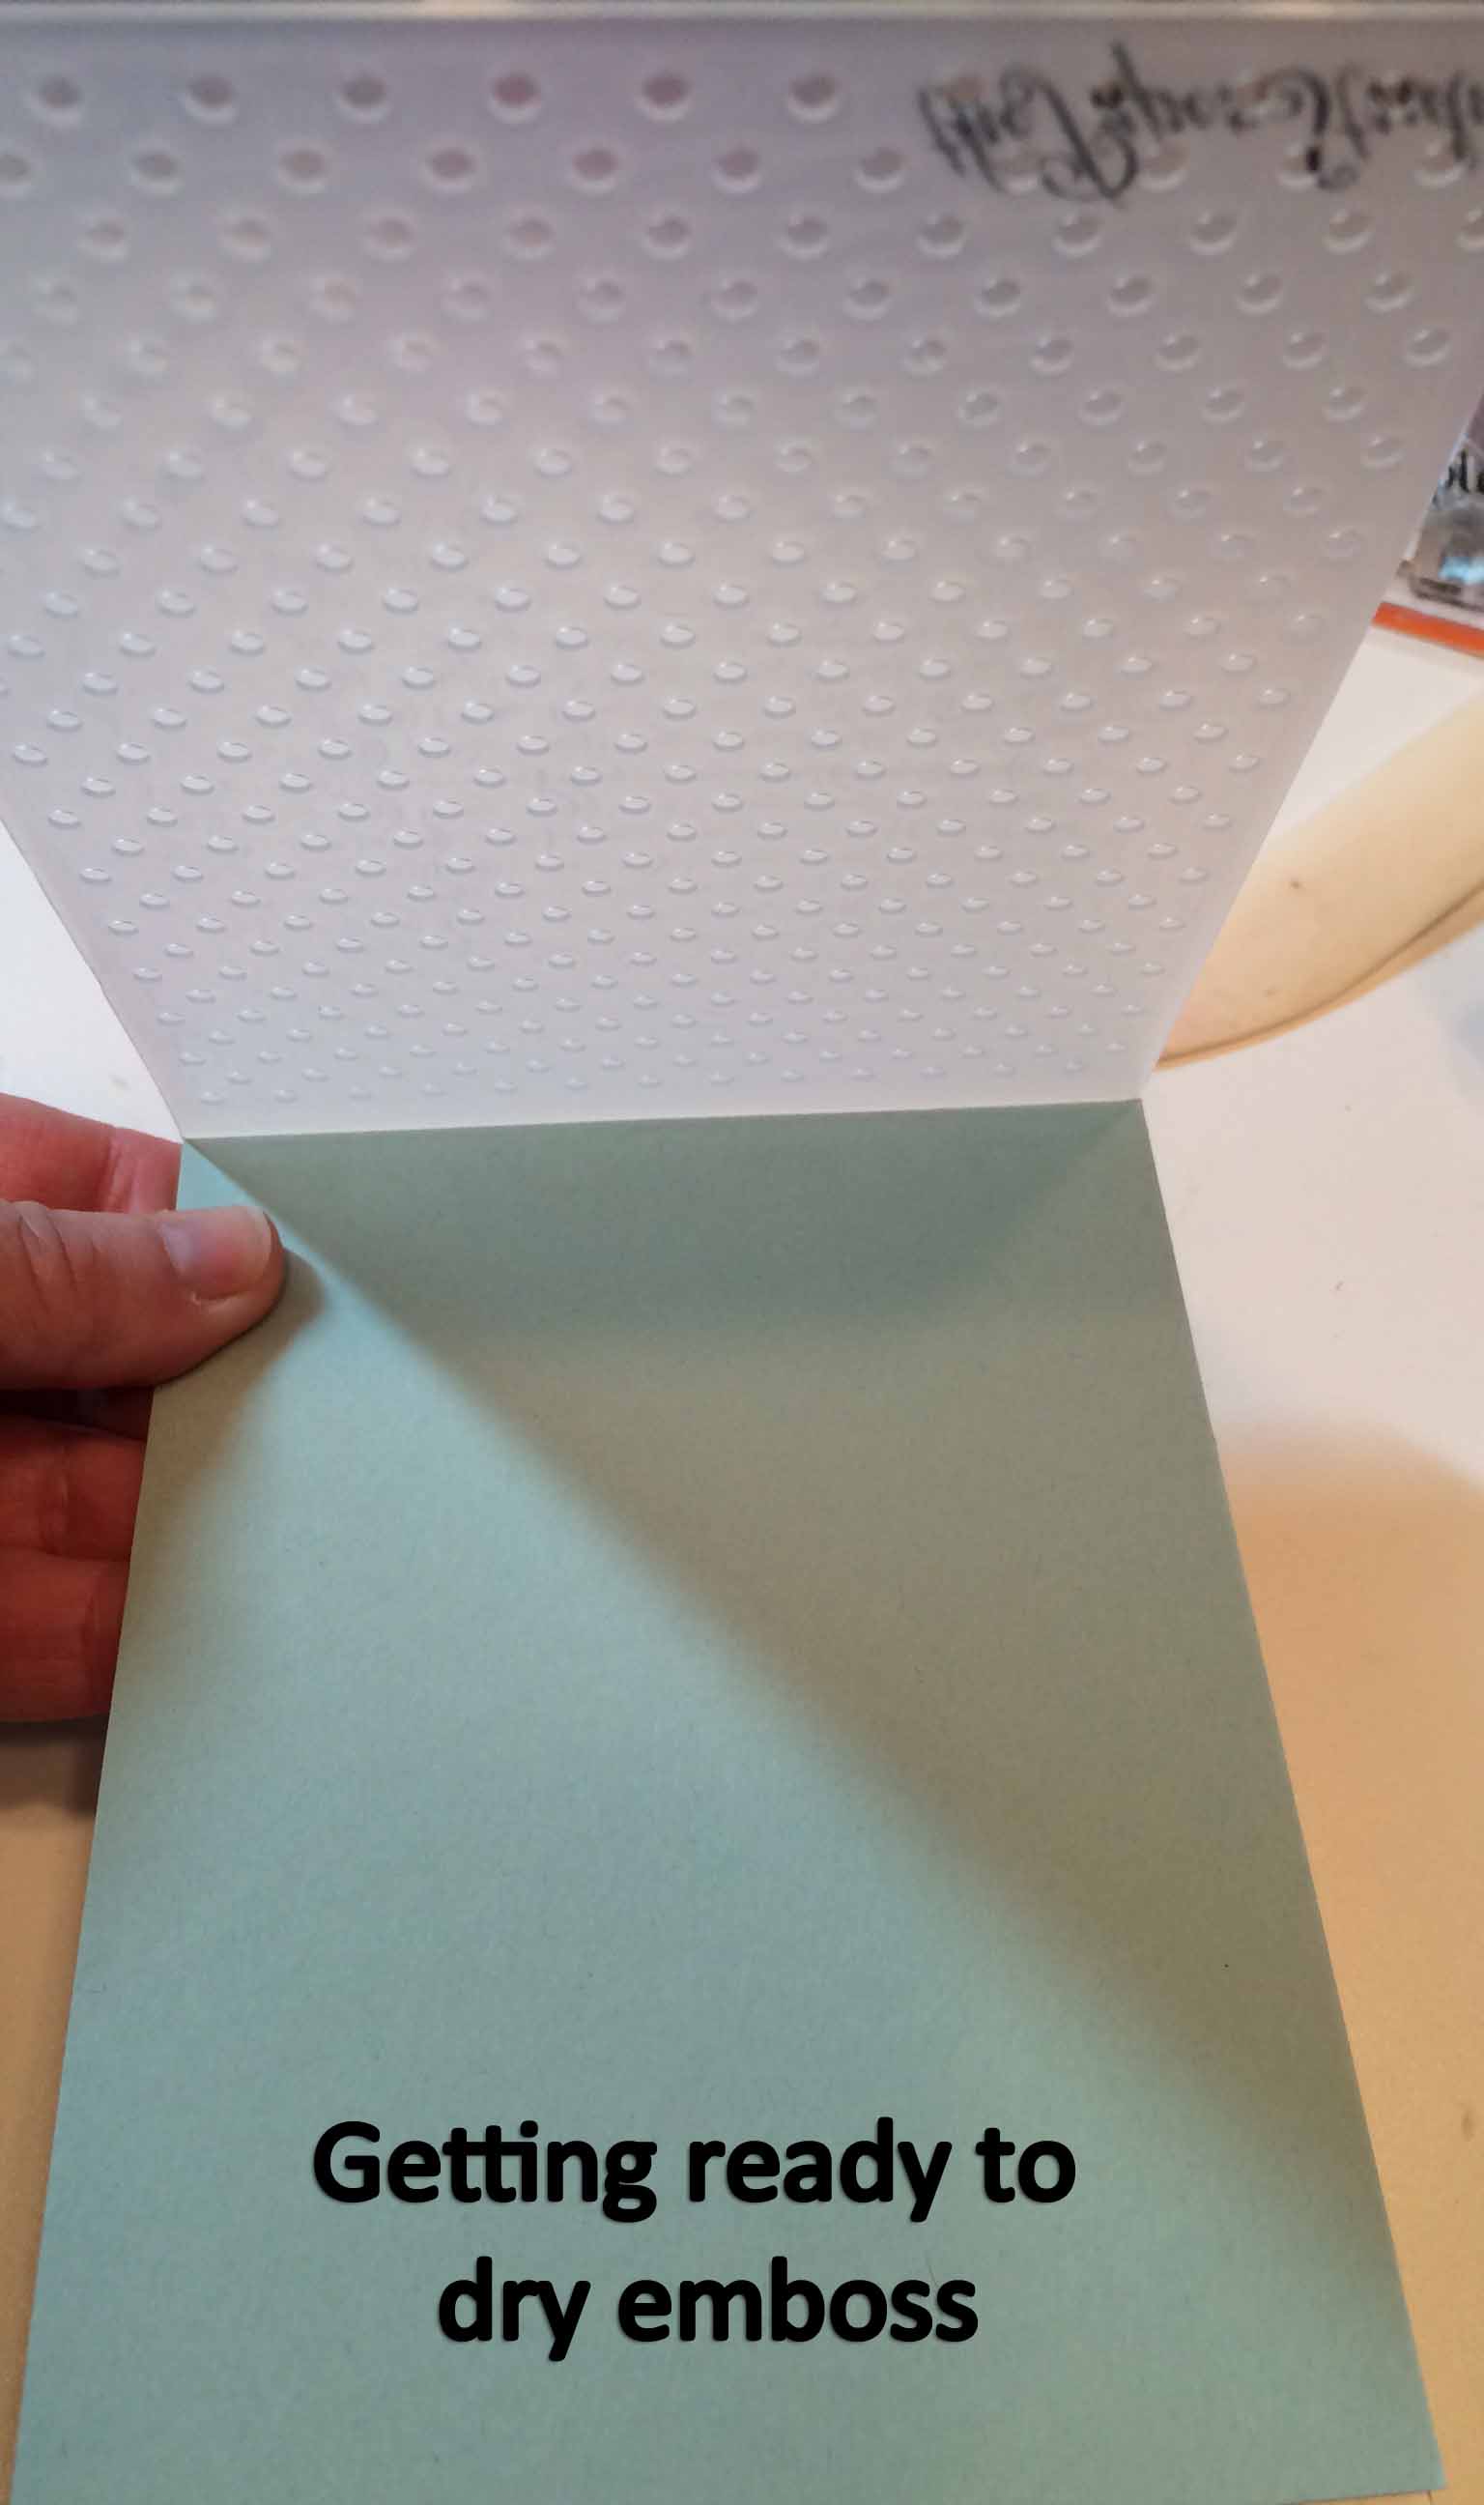
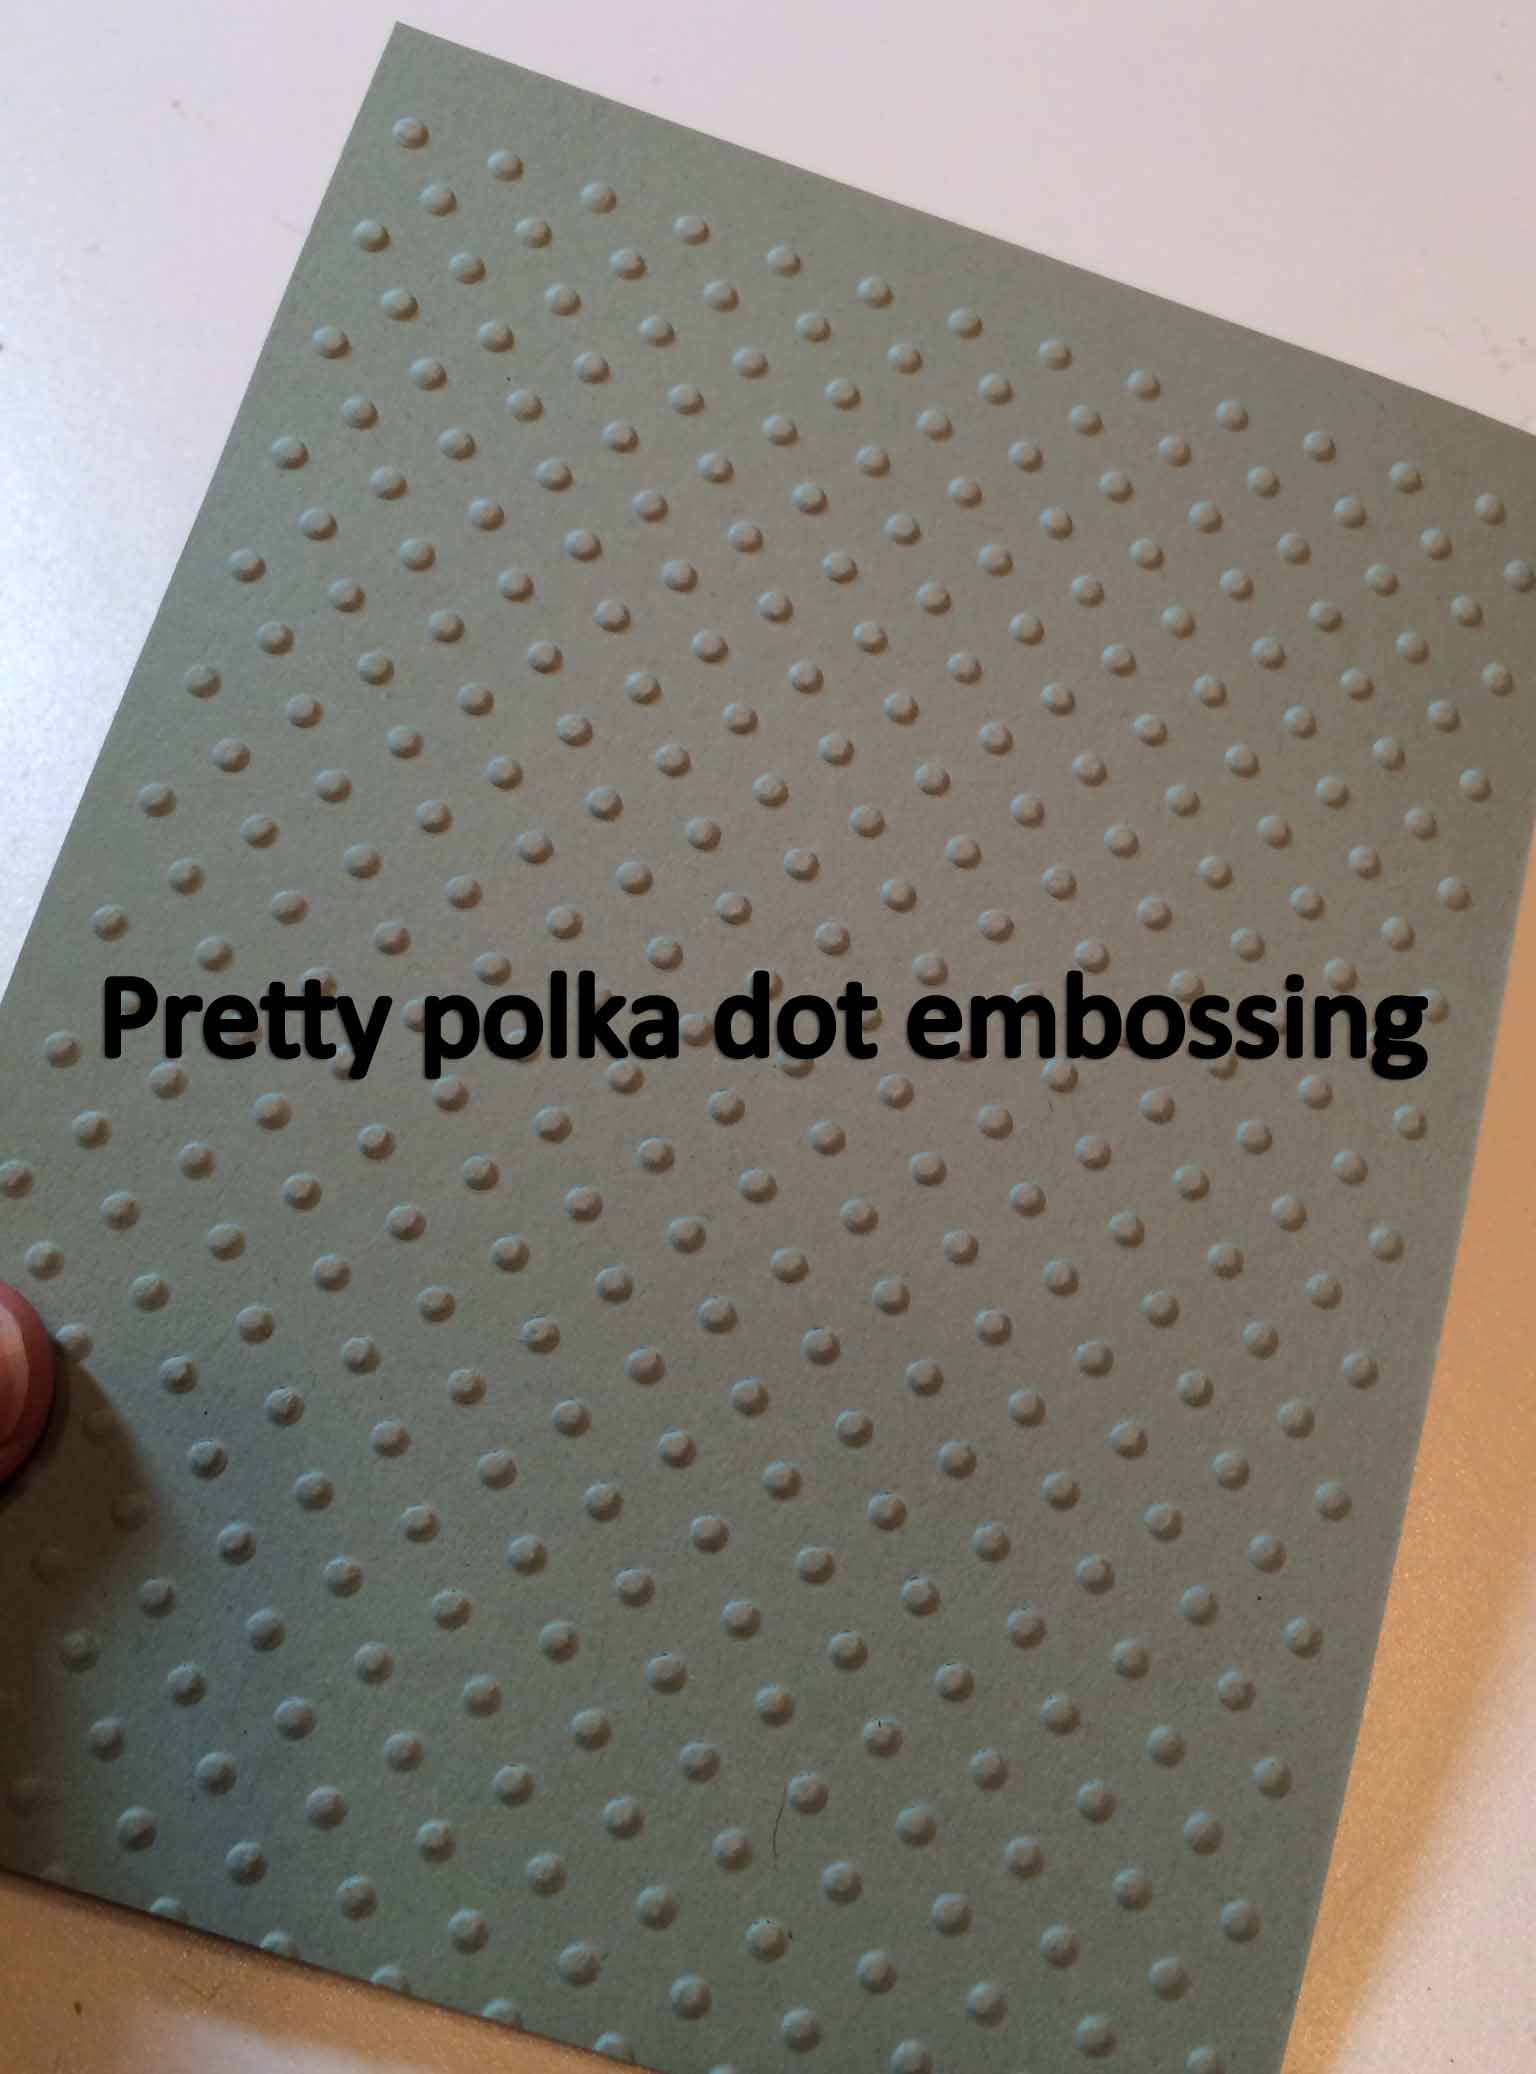
I set the background aside and starting dry embossing the cardstock frame using an embossing folder. I chose a folder with small polka dots. Using my Big Shot machine, I placed the cardstock inside the embossing folder and ran it through.

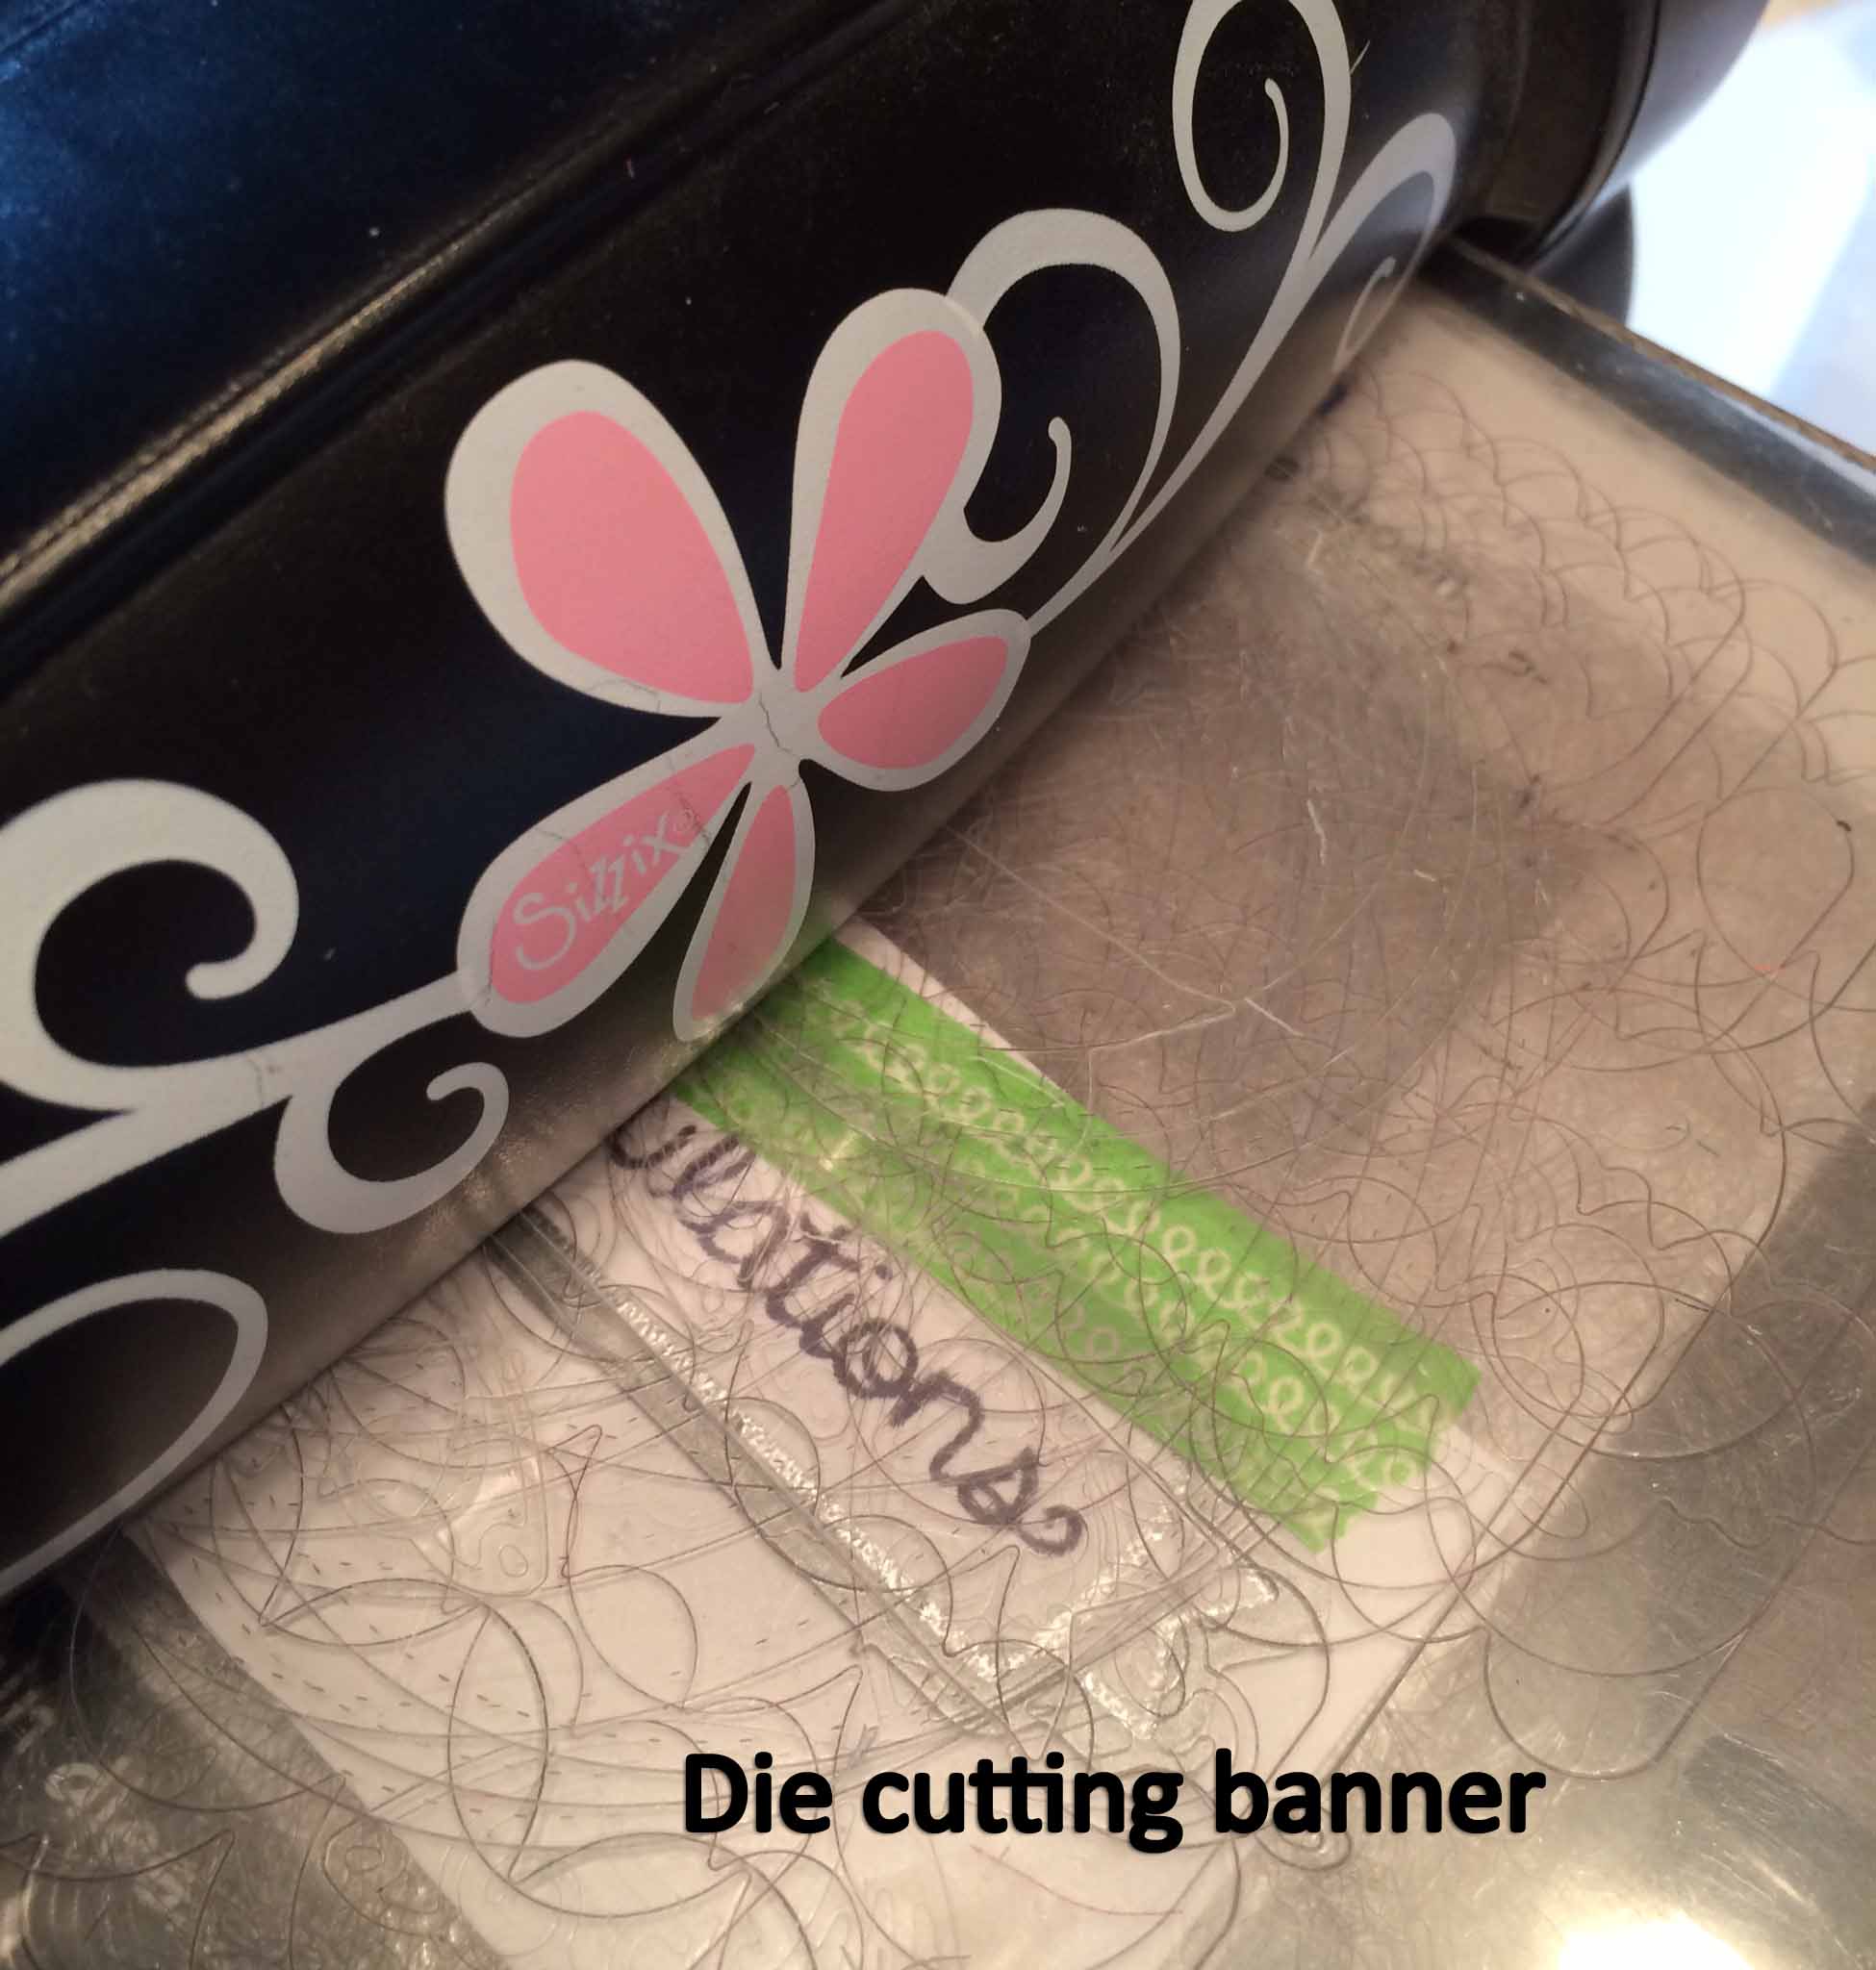
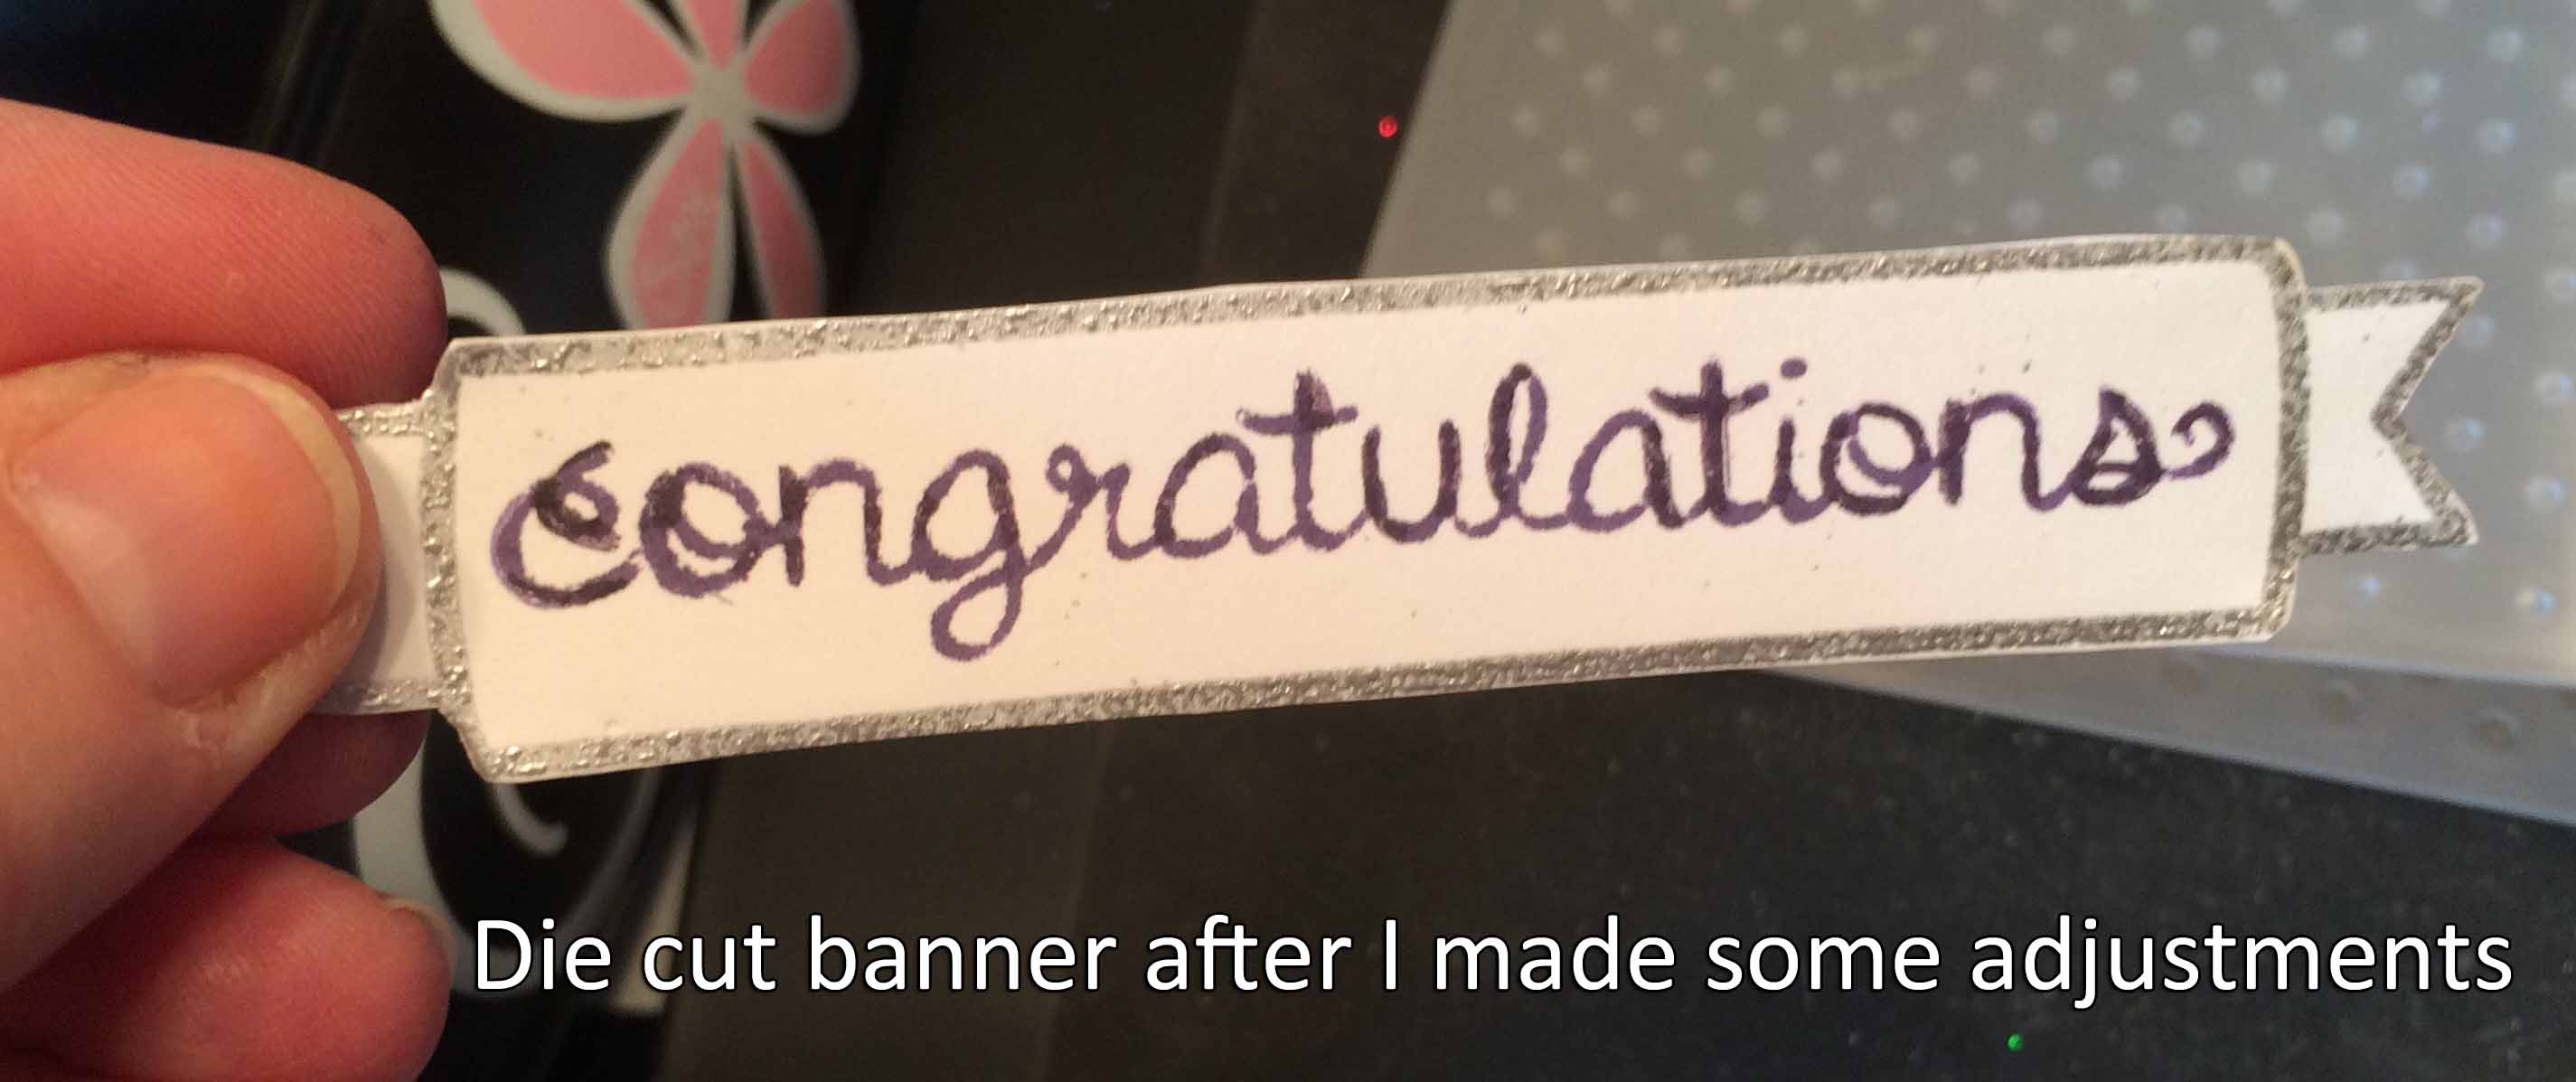
 Now it was time to prepare the sentiment. The sentiment ‘congratulations’ was stamped onto a banner. I stamped the banner using Versamark ink and embossed with silver embossing powder. I then stamped the sentiment on the banner. This stamp kit came with a matching die-cut. This is where the 2nd problem showed up. The die-cut is supposed to leave a thin edge, but that’s only if you line up the die-cut properly. I thought I did, but when I removed the die-cut the edging was skewed. Instead of scrapping the banner, I just used my scissors to remove the edging. I need to spend more time practicing using these die cuts.

 As much as I liked the watercolor background, the piece was a little flat. I stenciled stars with Versamark and a holographic embossing powder. This made the difference.
I used my tape runner to attach the watercolor paper to the cardstock frame then used foam adhesive to attach the banner. To finish off the card, attached the front piece to the base cardstock and glued tiny rhinestones to the background.
Here is the finished card.

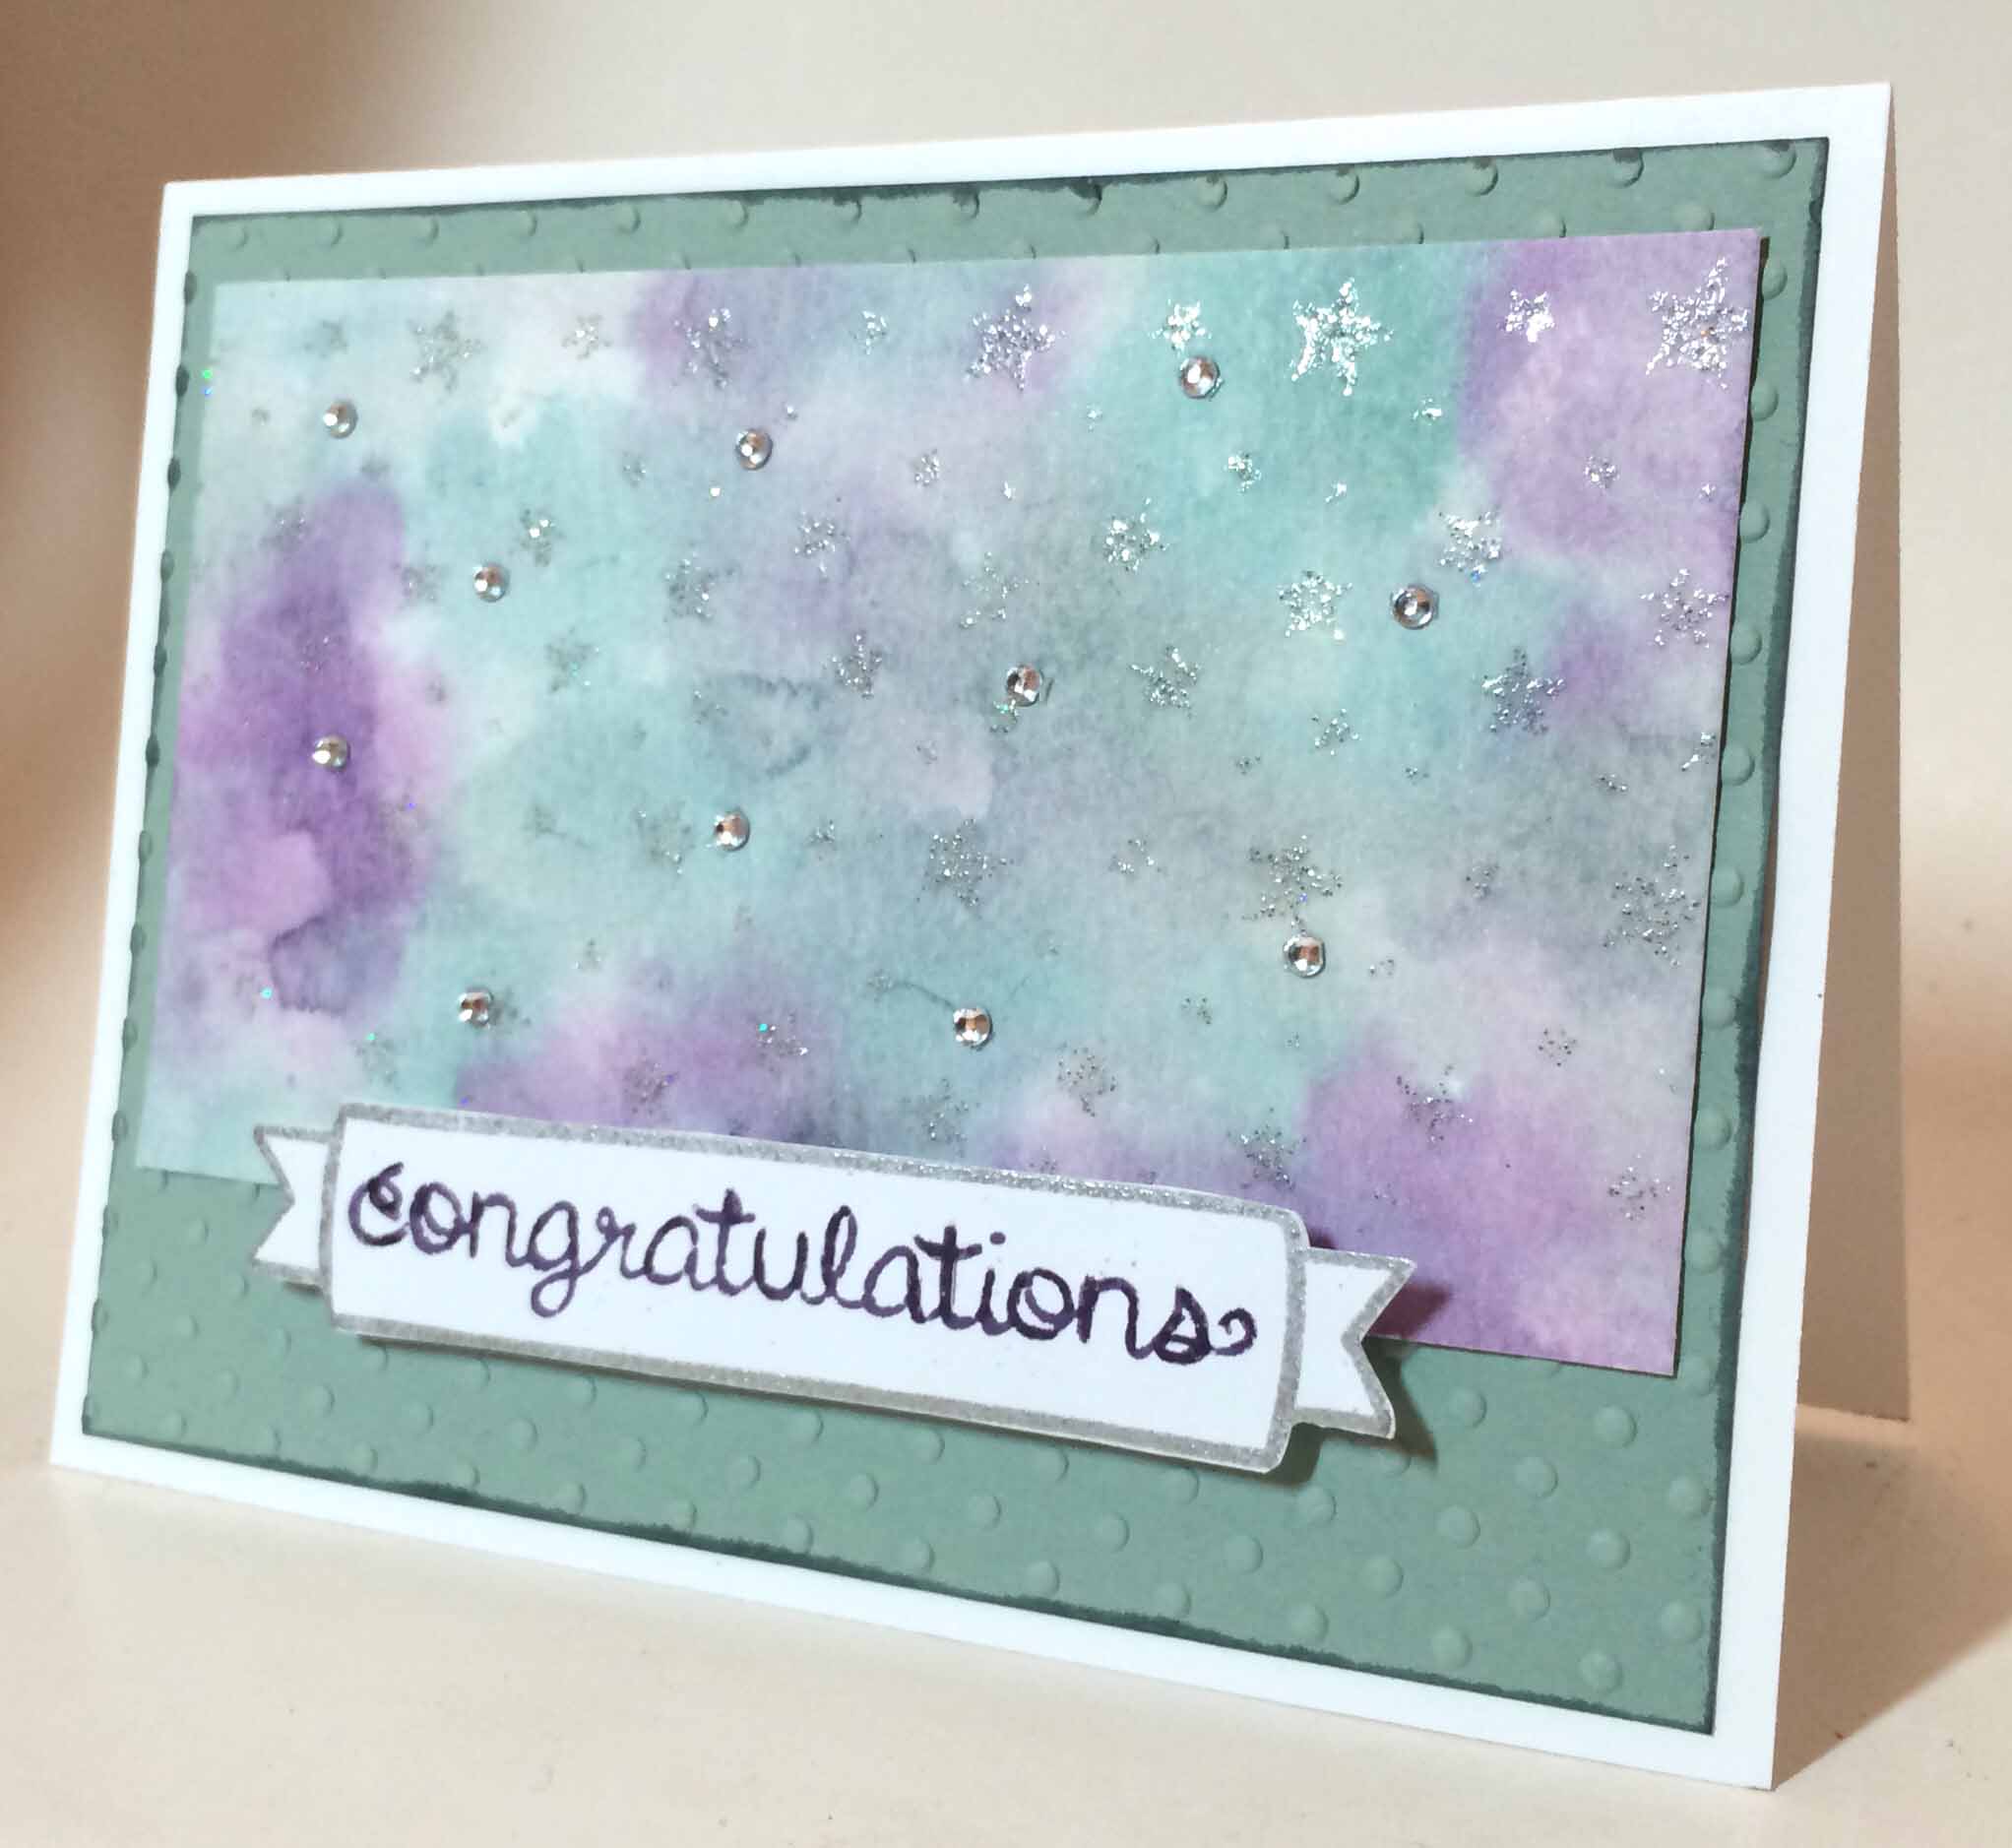

This card could be used for a number of occasions. And you could vary the colors depending of your recipient.
Remember to leave a comment below and be entered to win this card today and possibly the Grand Giveaway of all 31 cards on February 1, 2015.
Until tomorrow,


This is my ‘congratulations’ face.
I take celebration very seriously.

very cool technique love the effect
Beautiful!
Wow that’s really cool!
I love the colors. that is so pretty.
Beautiful card!
Glad you didn’t give up on this card, it is beautiful!
Thank you.
I love this card – it is so beautiful!
Too bad there was no video today to witness the tantrum – might have been fun :o)
You persevered and it came out great!