
 I don’t know about you guys, but we do a lot of ironing and since I’ve been making dog beds and collars, the ironing board is a semi-permanent fixture these days. Last year we bought a new ironing board that was longer and wider, but I felt like I had to settle when it came to the covers. It’s not that I needed something colorful, but I did want one that didn’t look and feel thin and skimpy. And the covers only wrapped around the board maybe a 1/2″ on all sides making it very easy, over time, to scooch off the board.
As I usually do, I thought to myself when we brought it home, “I will make myself a cover.” And then I didn’t – for about a year. As time went on all the things I didn’t like about the cover continued to irk me, but apparently not enough to do anything about it. I was advised to just buy one, but that felt like I had somehow failed in a DIY-crafty fashion. So I plodded on.
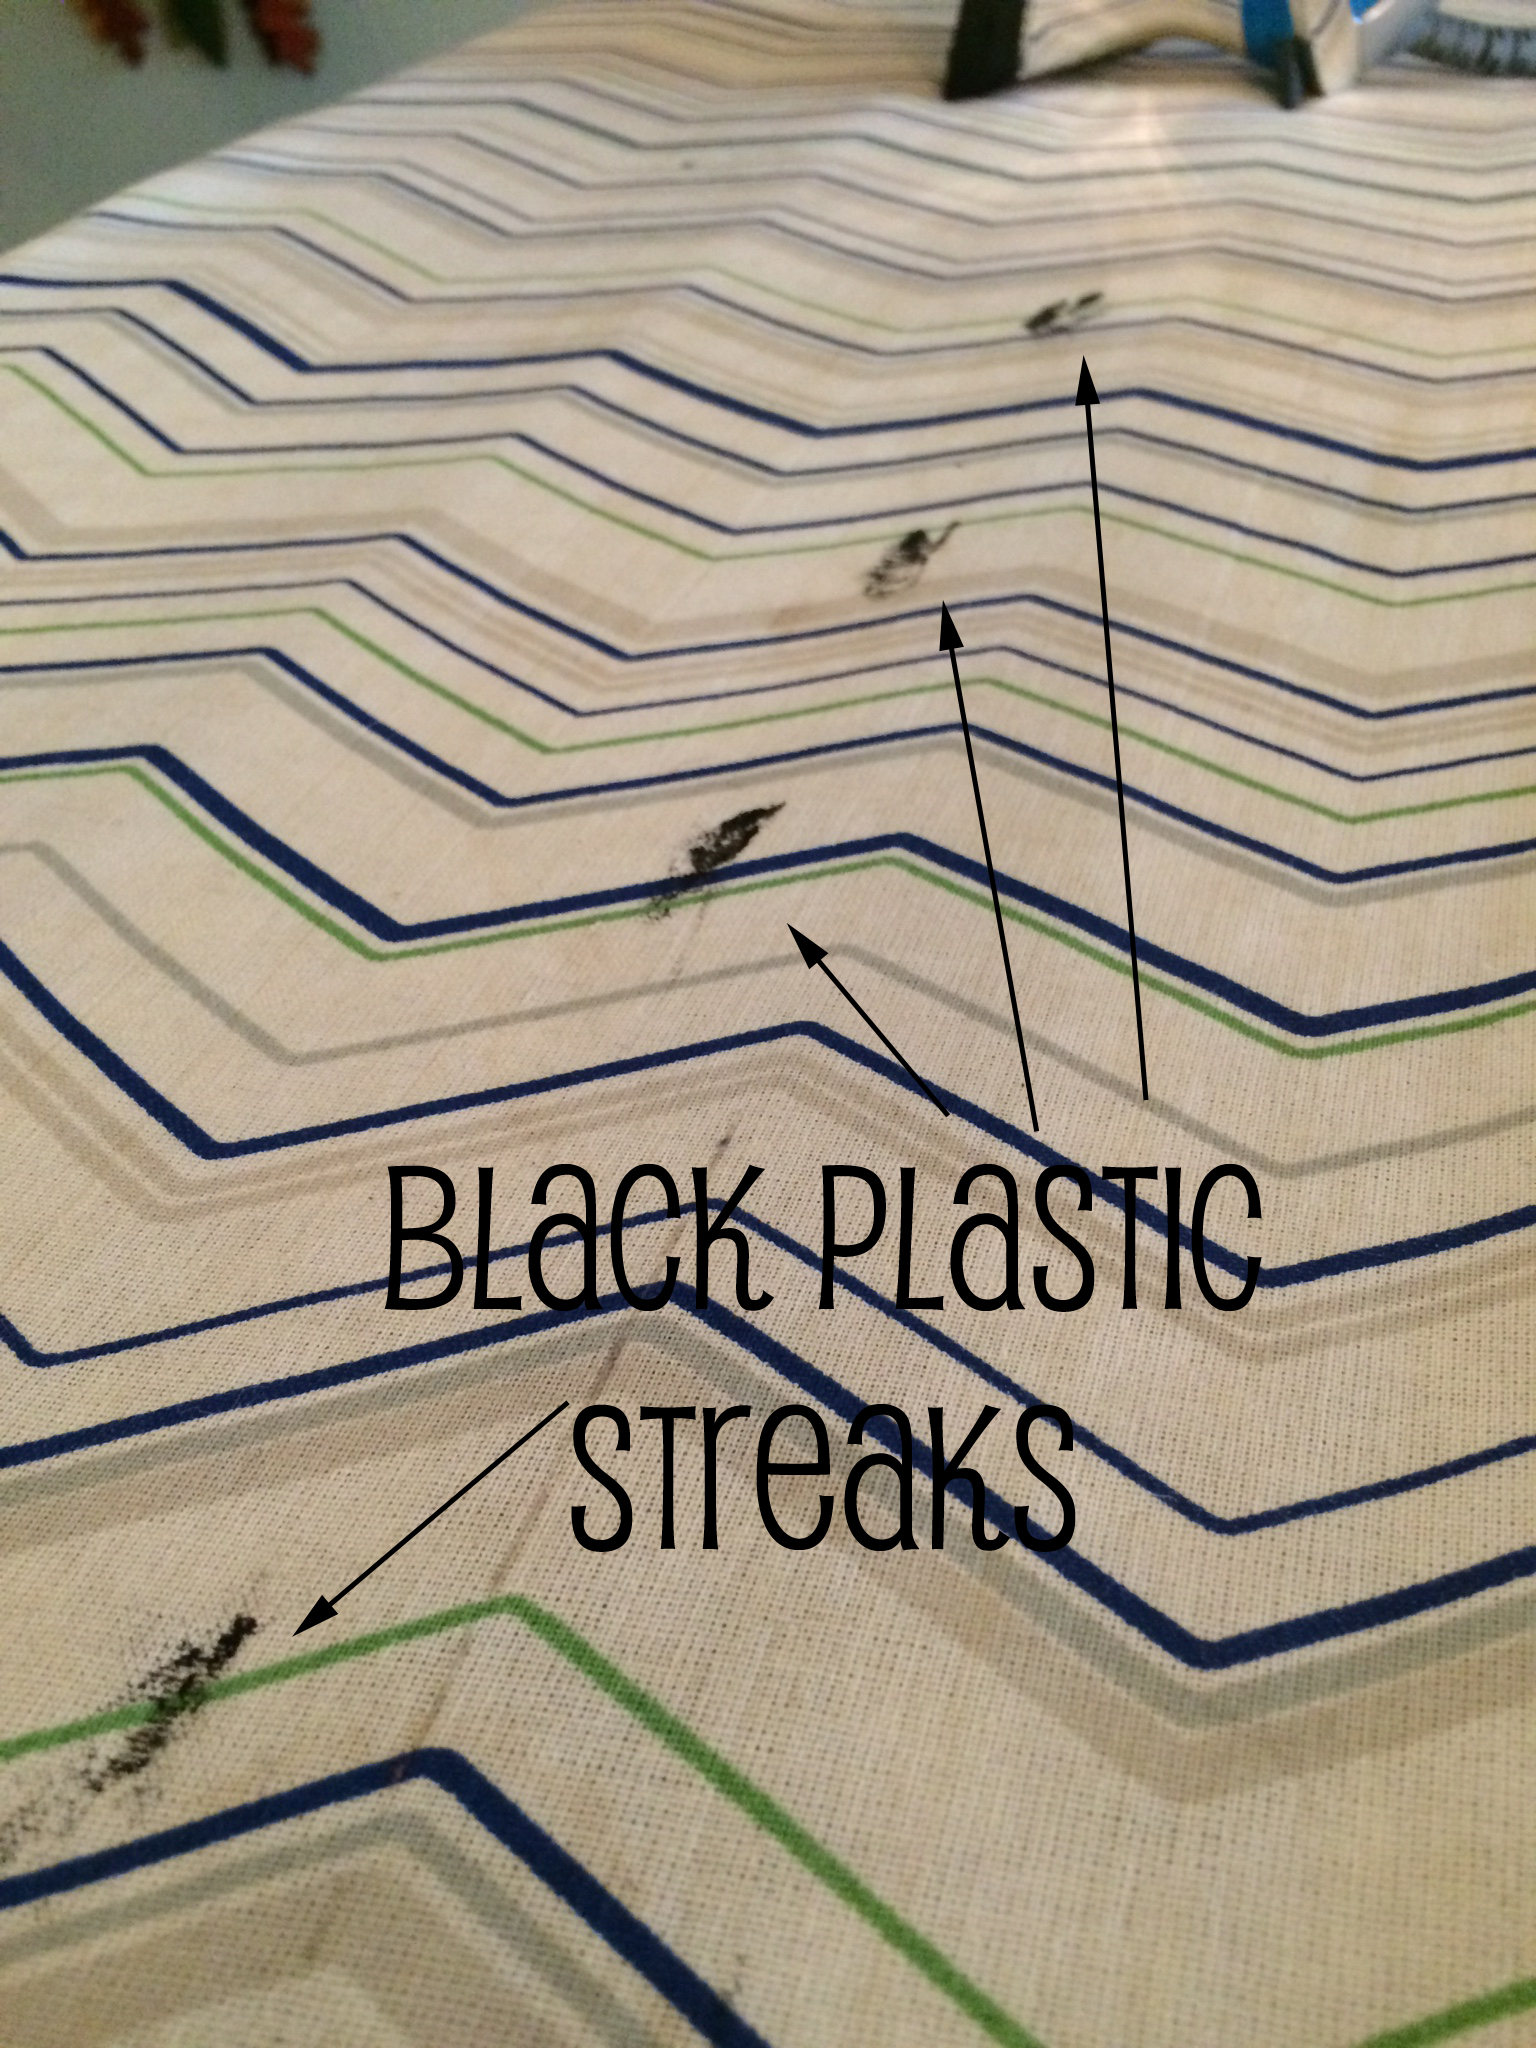 Until 2 days ago. I was ironing away and all of a sudden a black streak of whoknowswhat appeared down the center of the board. It was a complete mystery to me. As it cooled it hardened and felt like plastic. I noticed on the base of our iron there was a chip of the plastic base missing. It must have finally broken loose and I happily ironed over it leaving a lovely mark. The cover was now completely unusable and all my excuses had run out.
 Joann’s was having a sale on utility fabric and they carry an ironing board cover material that has a unique aluminized coating that gives a smooth, resilient surface. I bought 2 yards plus some 1/4″ elastic and with my 20% coupon I was out the door for under $13. I also wanted to add a thicker padding surface under the cover and had quilting batting leftover from previous projects.
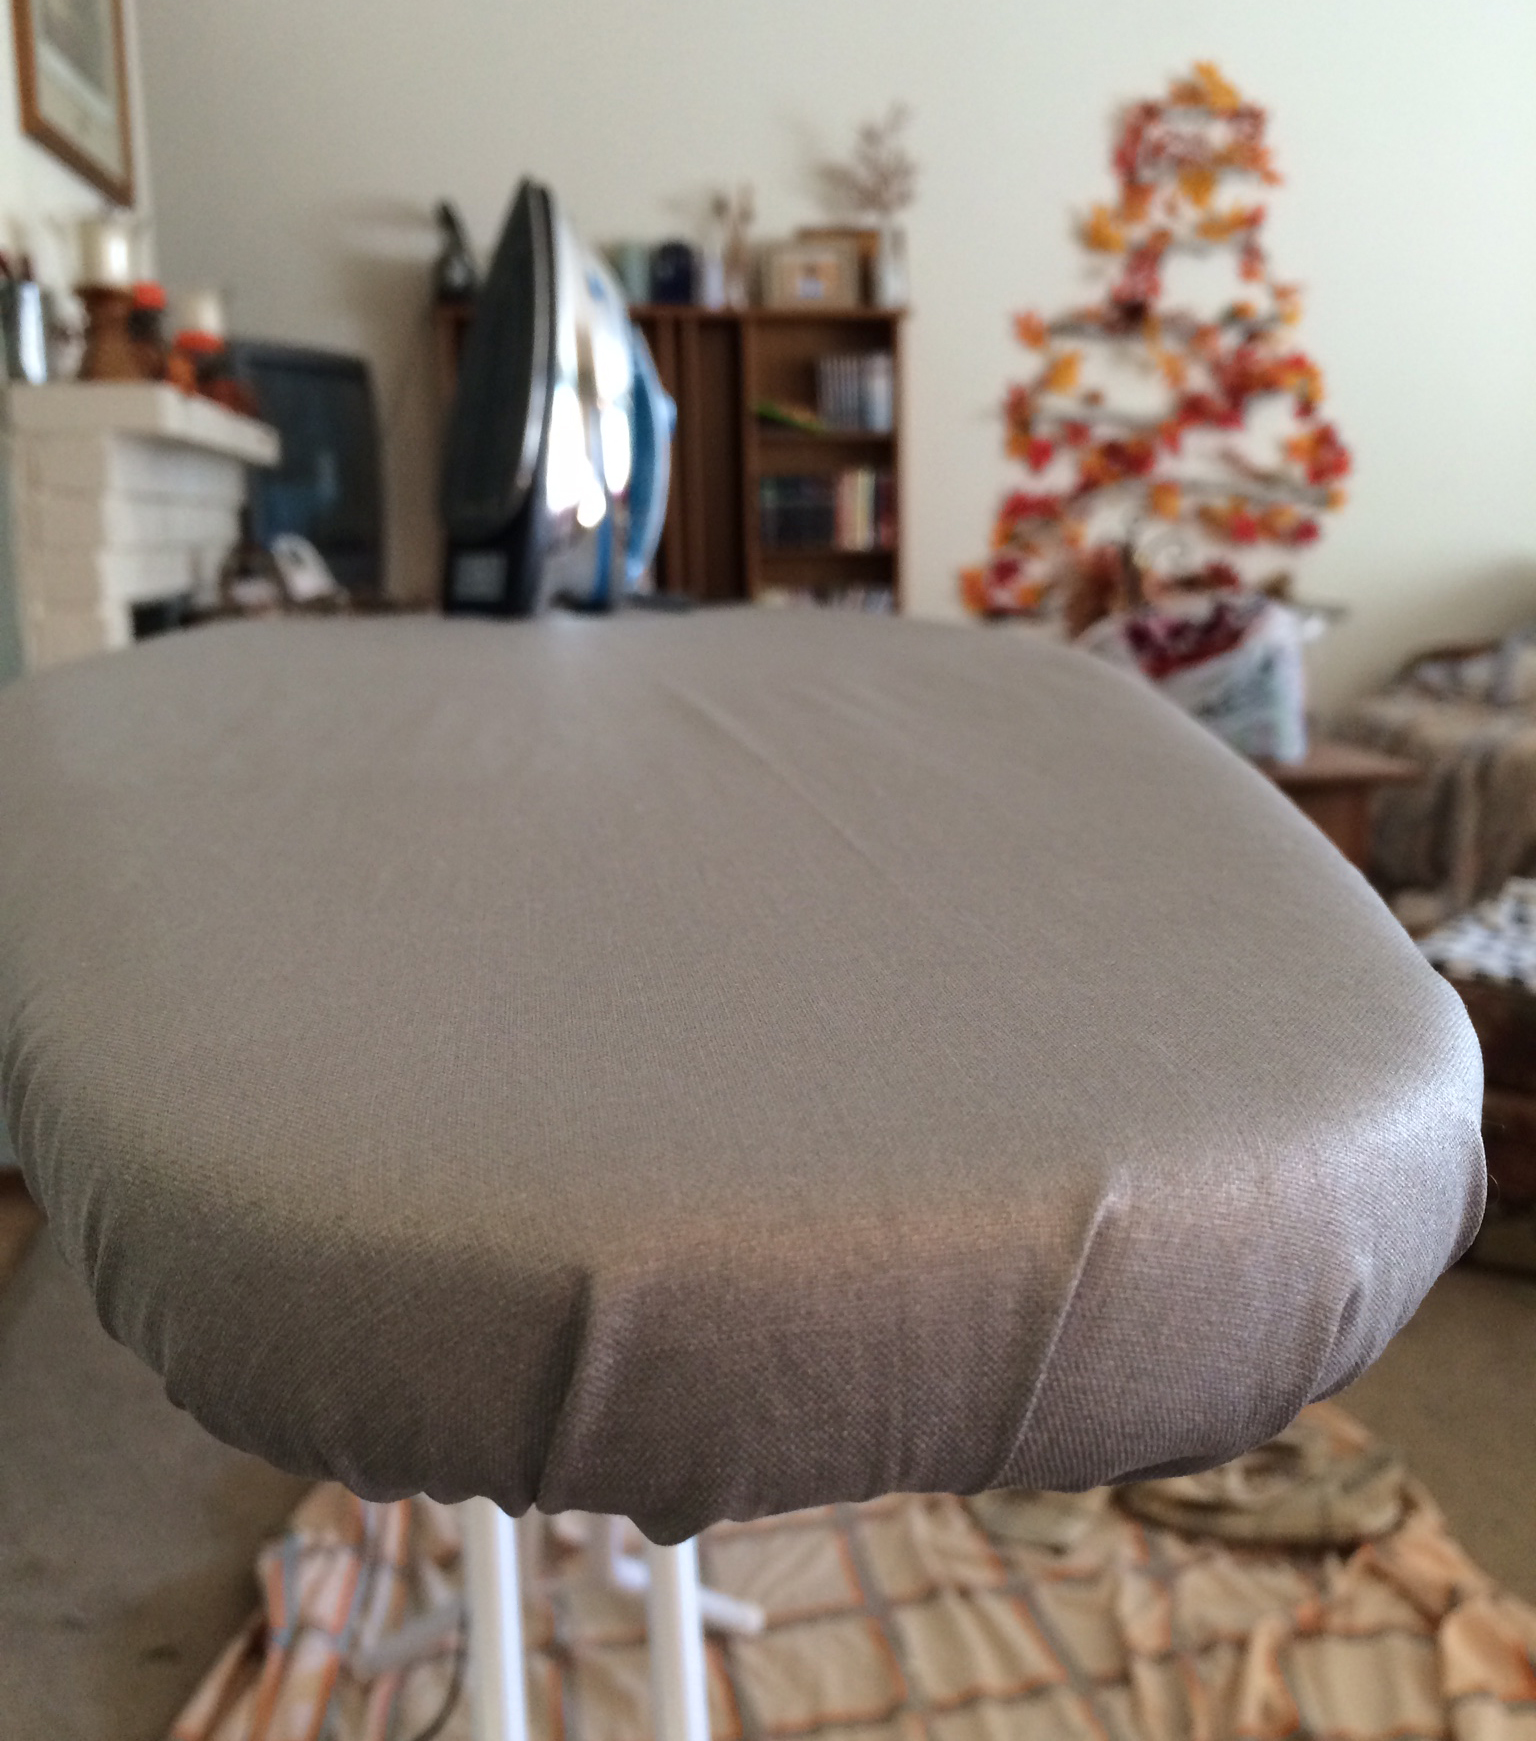 I found a tutorial from The 36th Avenue blog, followed her excellent directions, and voila, our new ironing board.
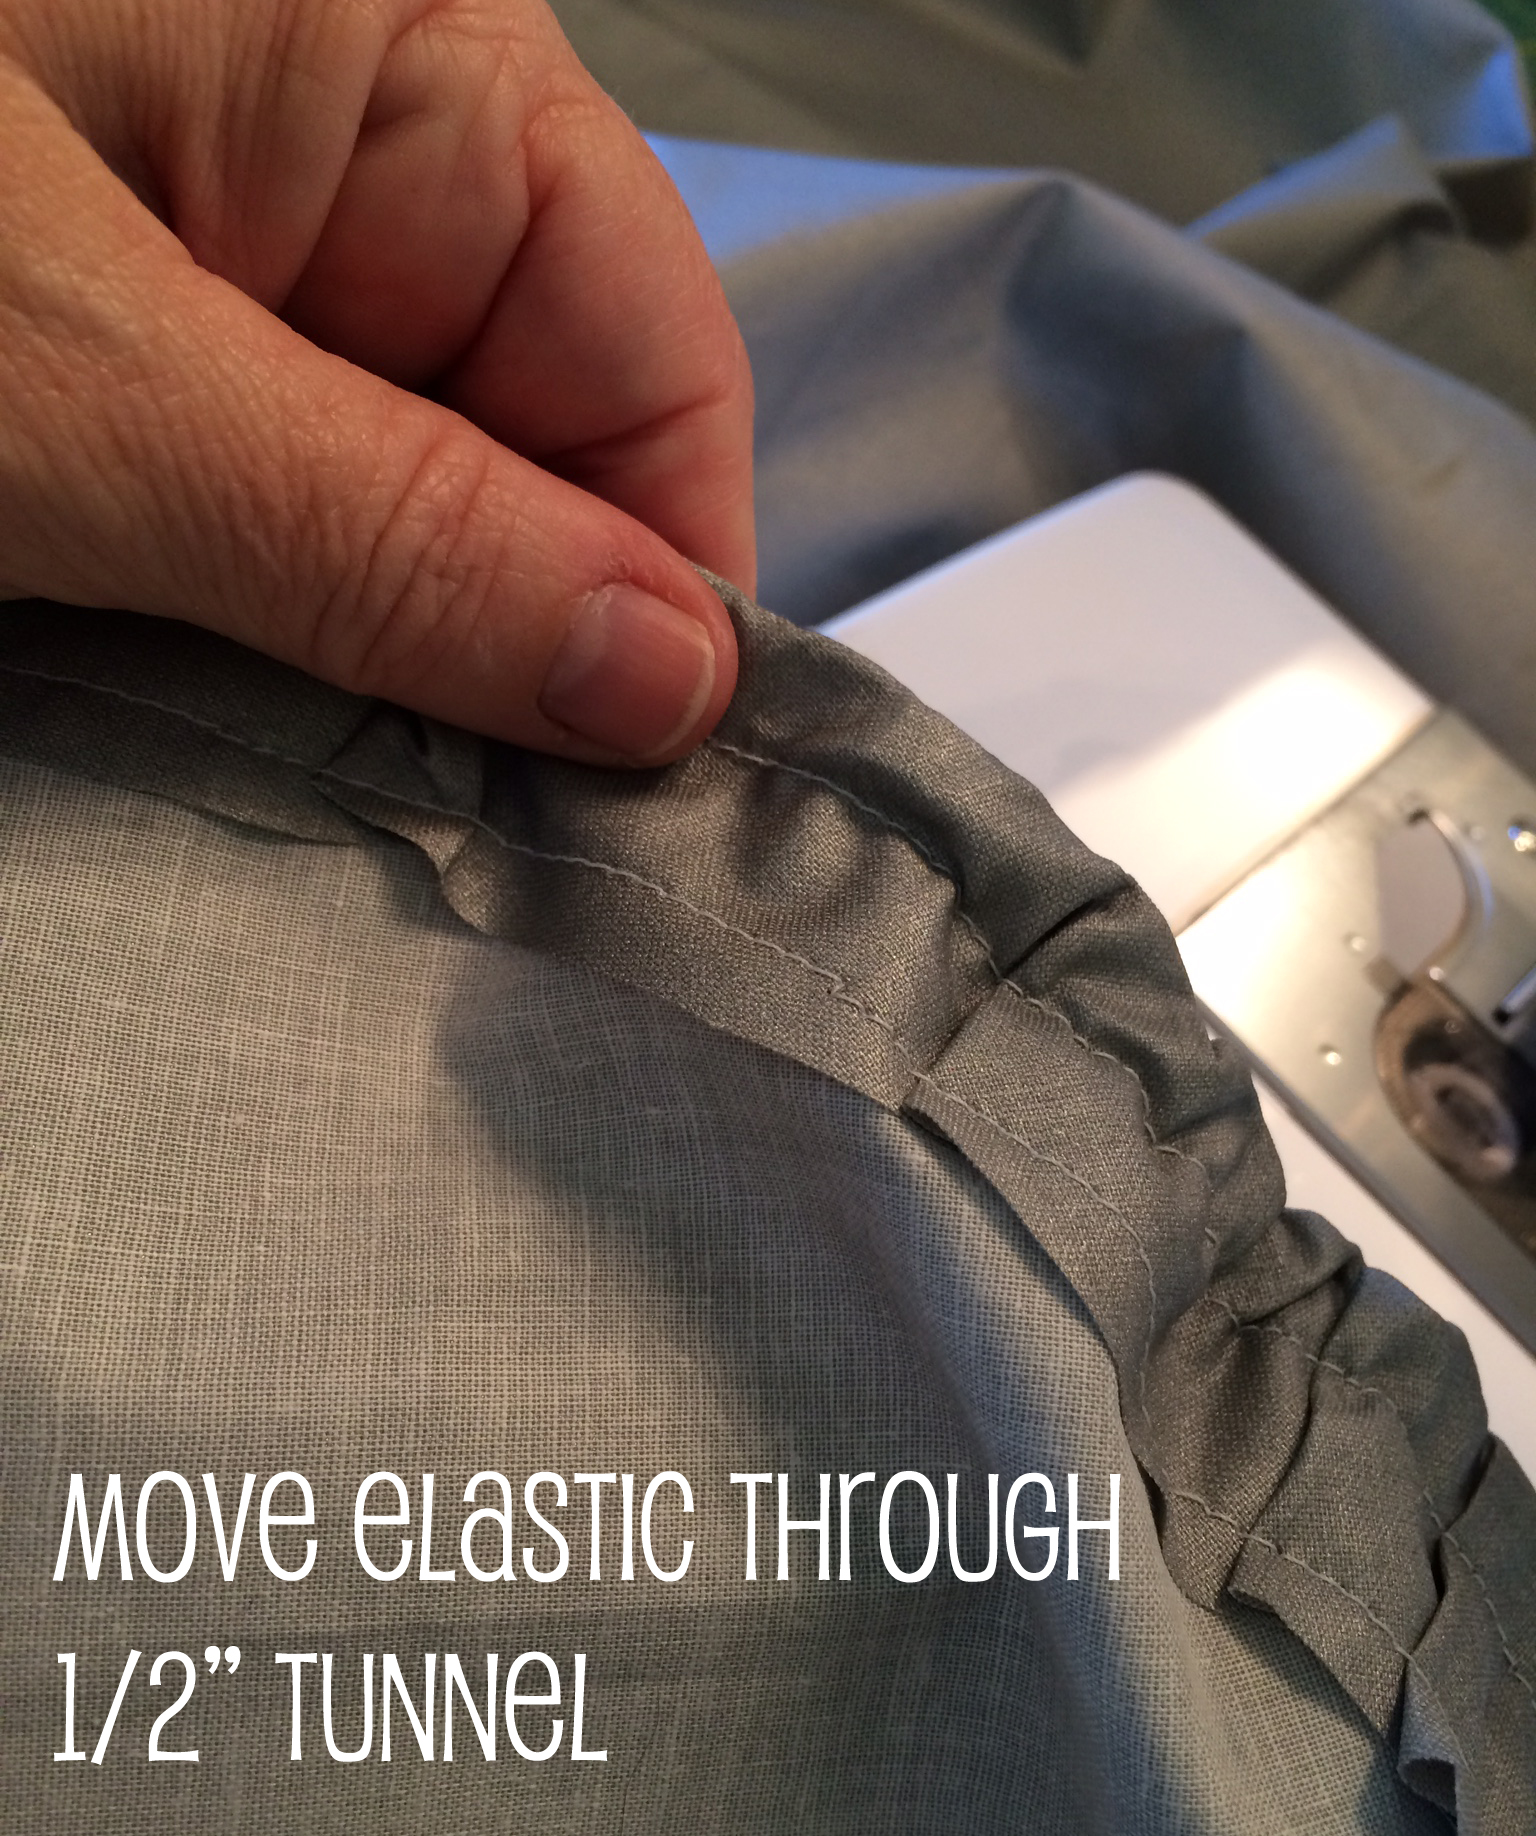
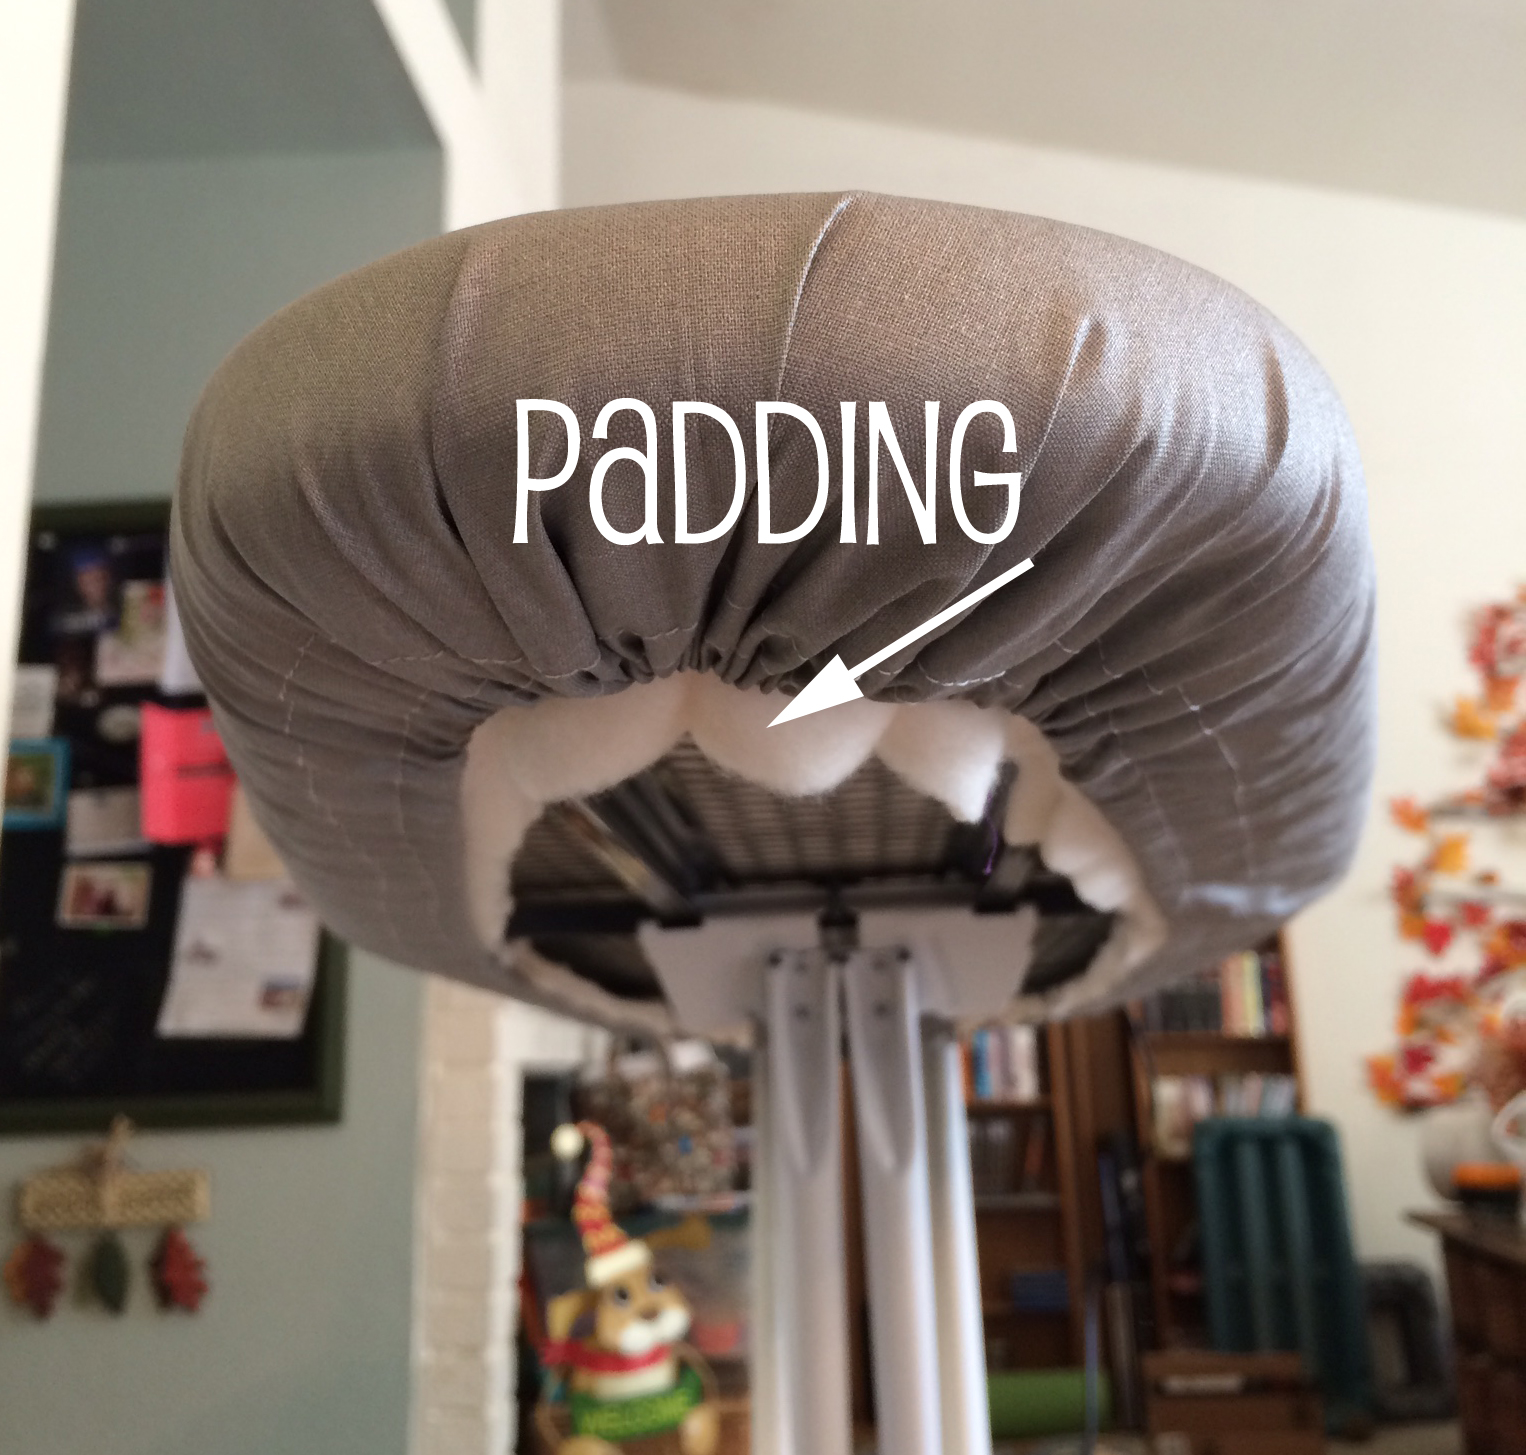
I laid the material on the carpet (over a drop cloth), cut out 3-4″ from the edge of the ironing board, ironed over a 1″ hem, sewed that down then turned the material over and sewed 1/2″ from the hem edge to create a tunnel for the elastic. I used 1/4″ braided elastic attached to a safety pin, thread it around the cover, attached the cover to the board when the elastic was all the way through and tied it off. I wanted to ensure a tight fit before I put down the padding so I popped the cover off, laid the padding on top of the board, replaced the cover and then cut away the excess padding from underneath.


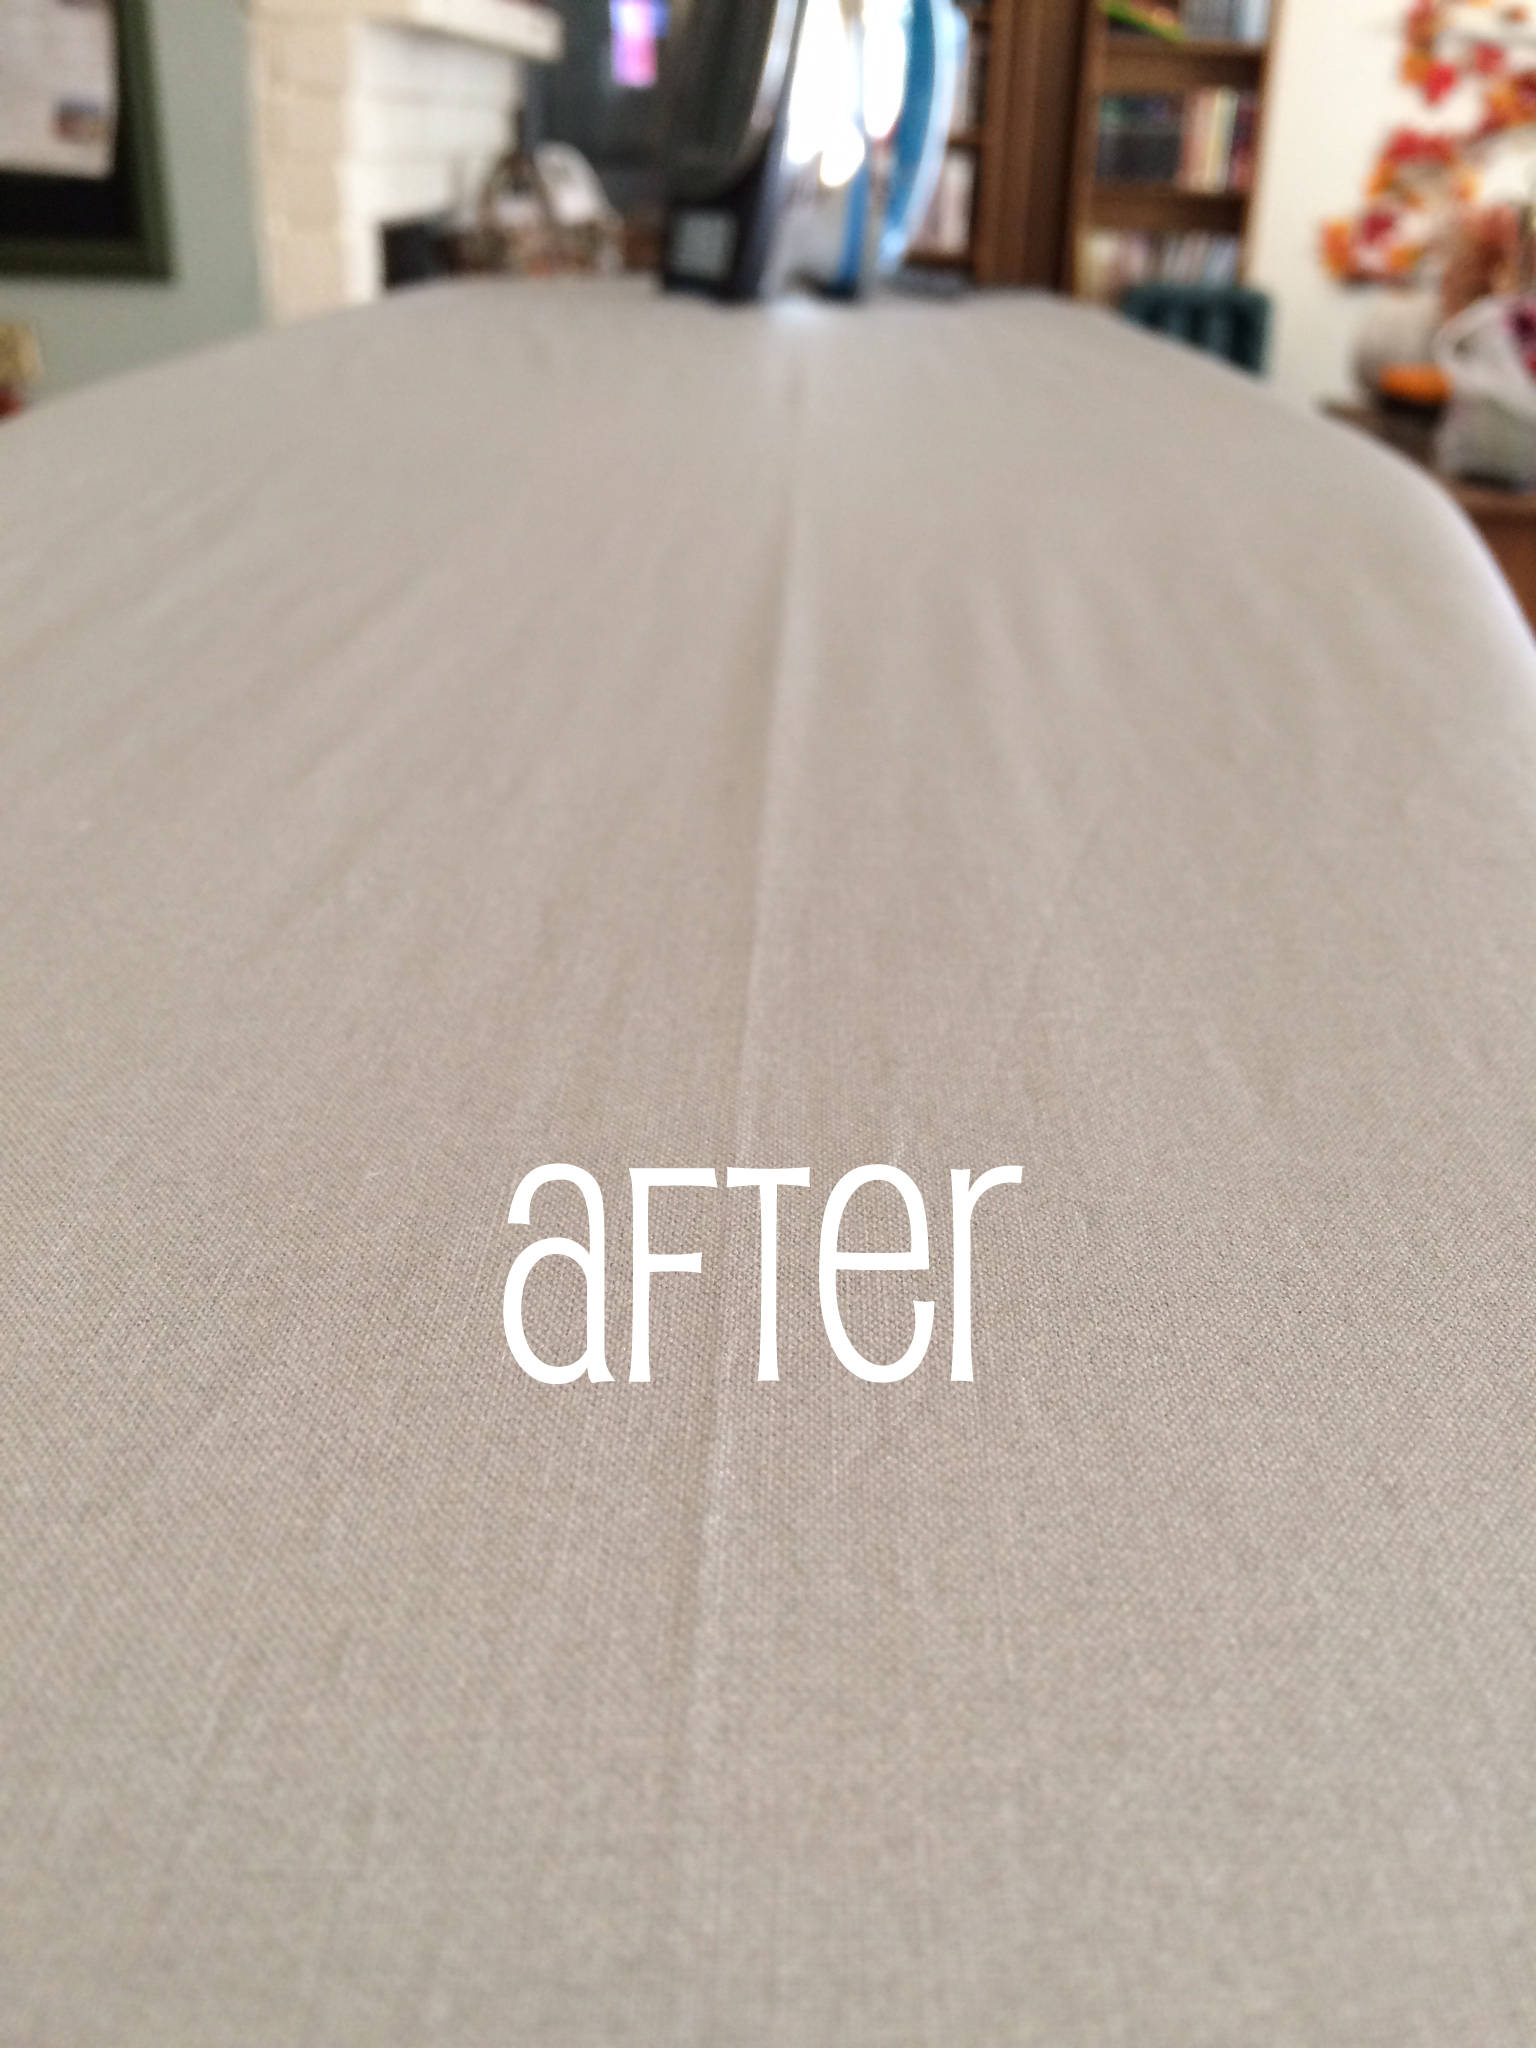
I’m so pleased with the results. And it only took 20 minutes. Once again, one of those projects that feels like it will take 20 years, but in reality is really quick. Like doing the dishes. Obviously, I’m kicking myself for having waited so long.
Do you have any projects that you’ve “been meaning to get to”?

 Item #20. Paint our kitchen cabinets.
This project is another one of those that I “keep meaning to get to”. We’ve lived in this house for 24 years and I’m ready for a change. I already know what I want to do, I just have to do it. So this year, it will be accomplished.

I helped mom by holding the fabric in place on the ground. I really don’t think she could have completed this without my invaluable help. My eyes are closed because I was concentrating on my important task.
