
I don’t know about you, but I find aprons invaluable. Whether it’s while I’m cooking (although I usually forget to wear one) or while I’m crafting, an apron comes in handy for protecting clothes from spills and splashes.
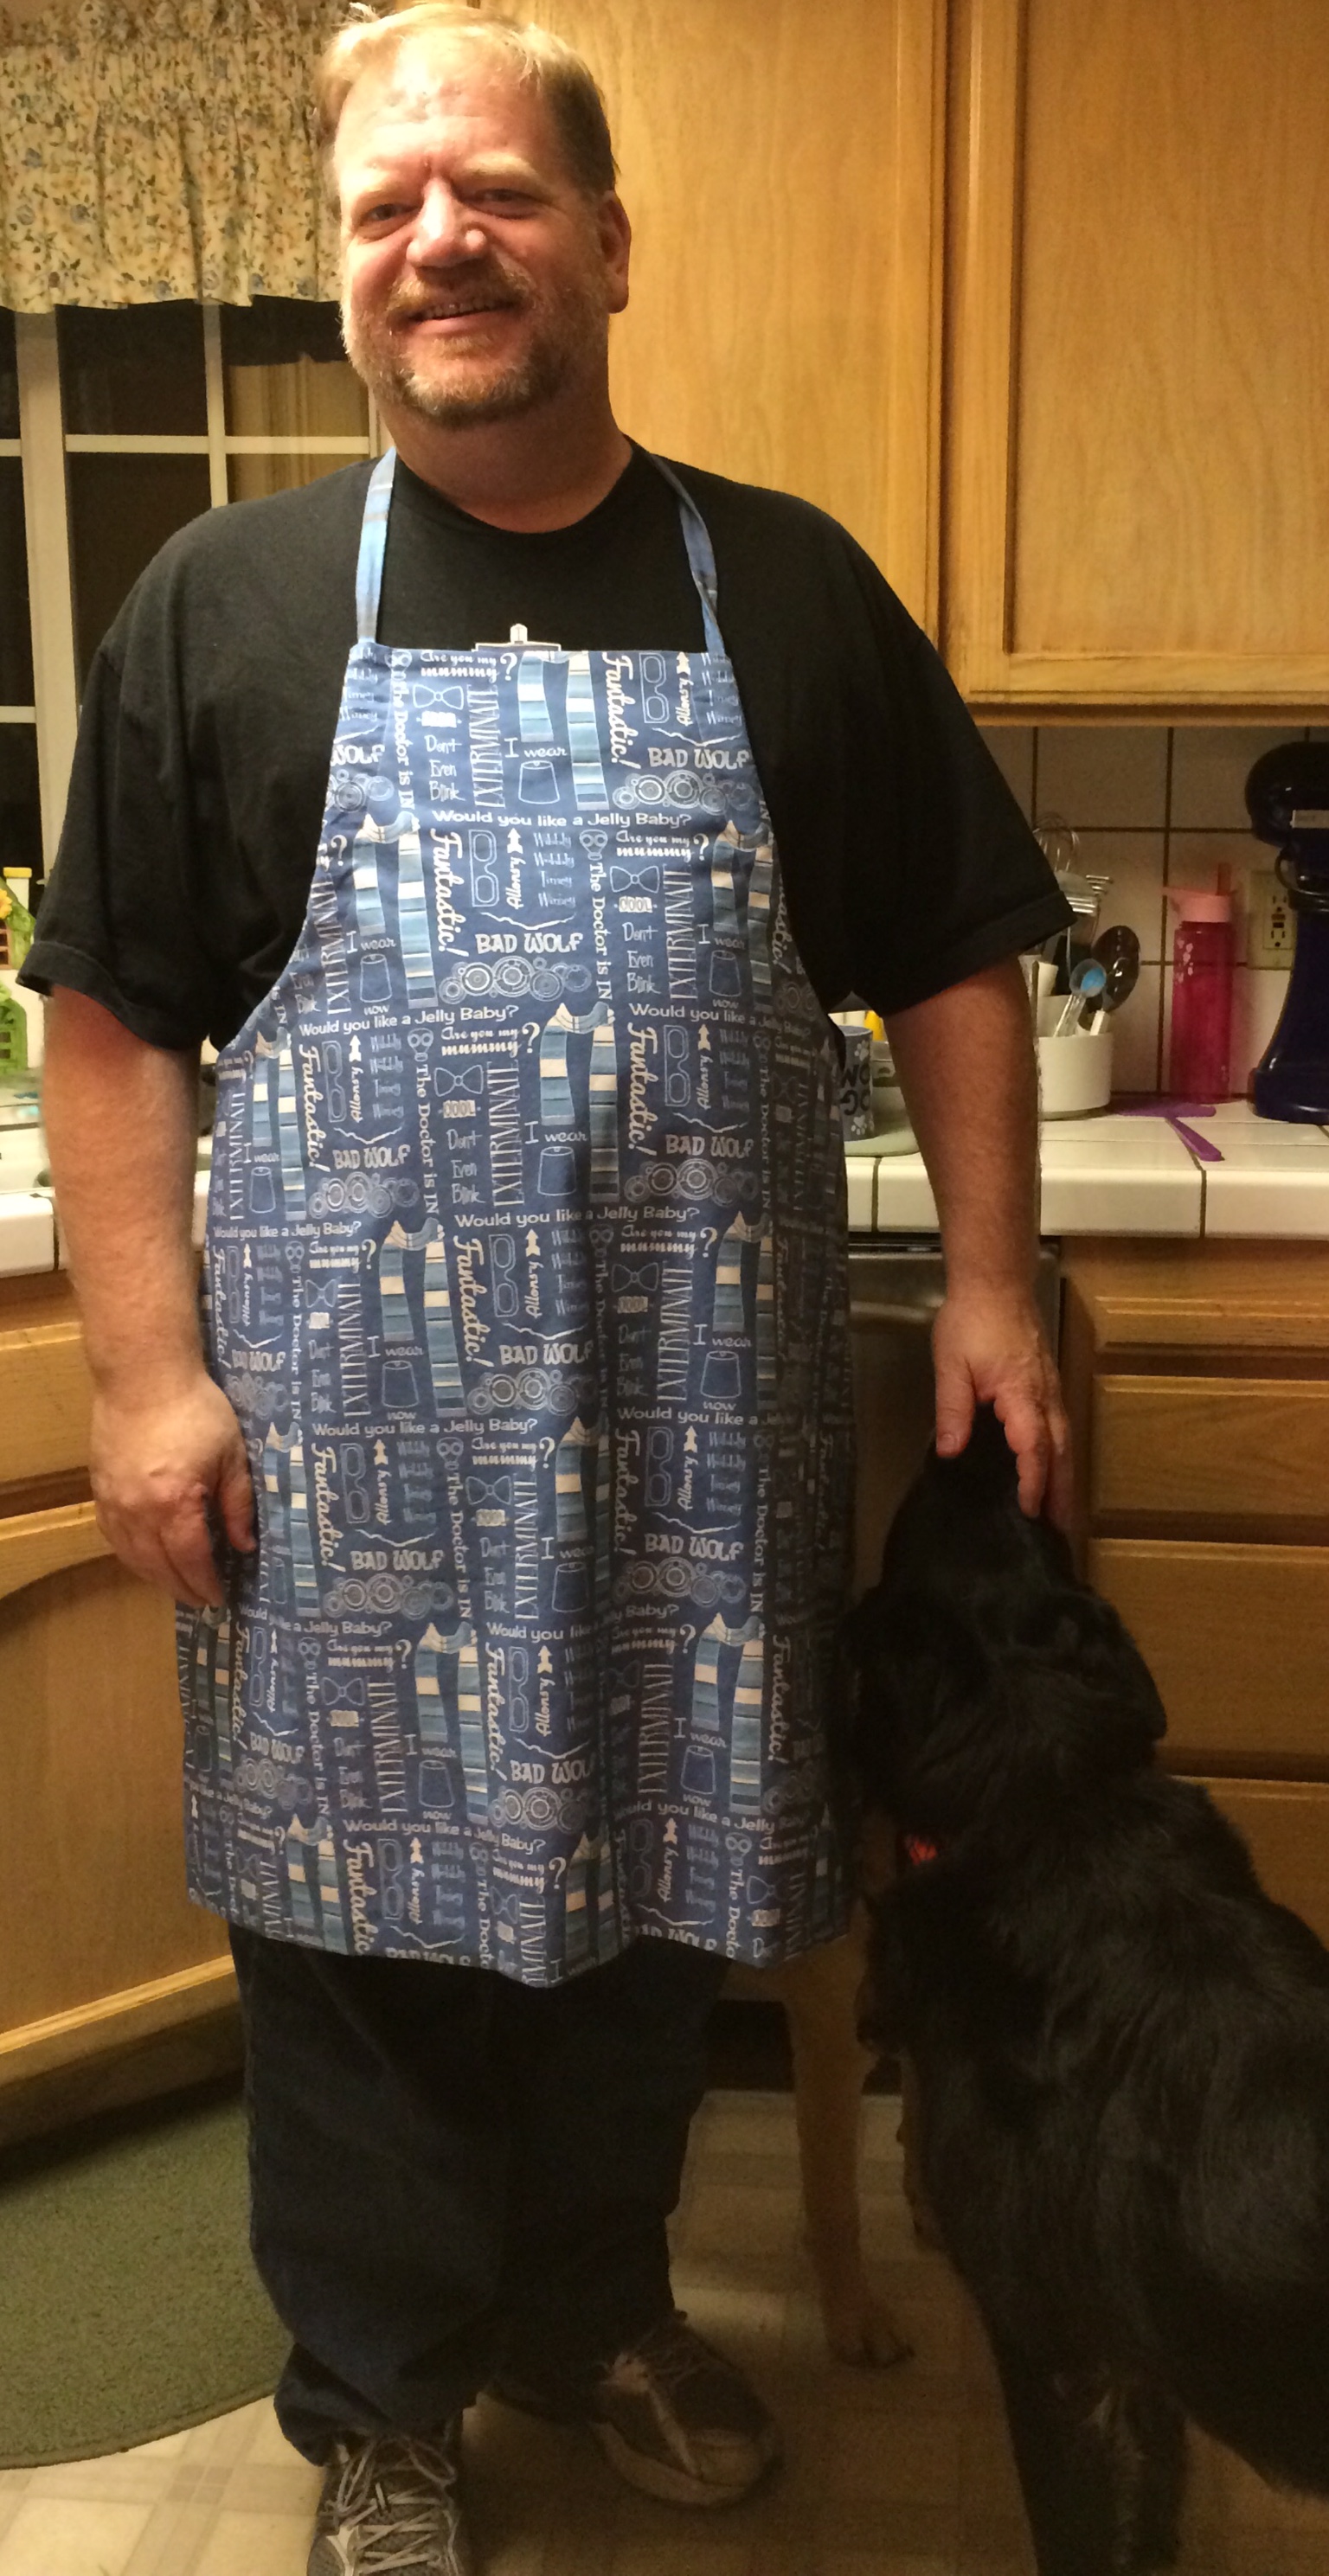 Mike, my hubby, who is a wonderful cook, always wears his apron when preparing a meal. For the past couple of months he’s been cooking dinner for kids on Thursday nights at a teen center where he works and has been wearing the Dr. Who apron I made for him. As I mentioned in that post, I used his old apron to make a pattern and thought I’d share my process.
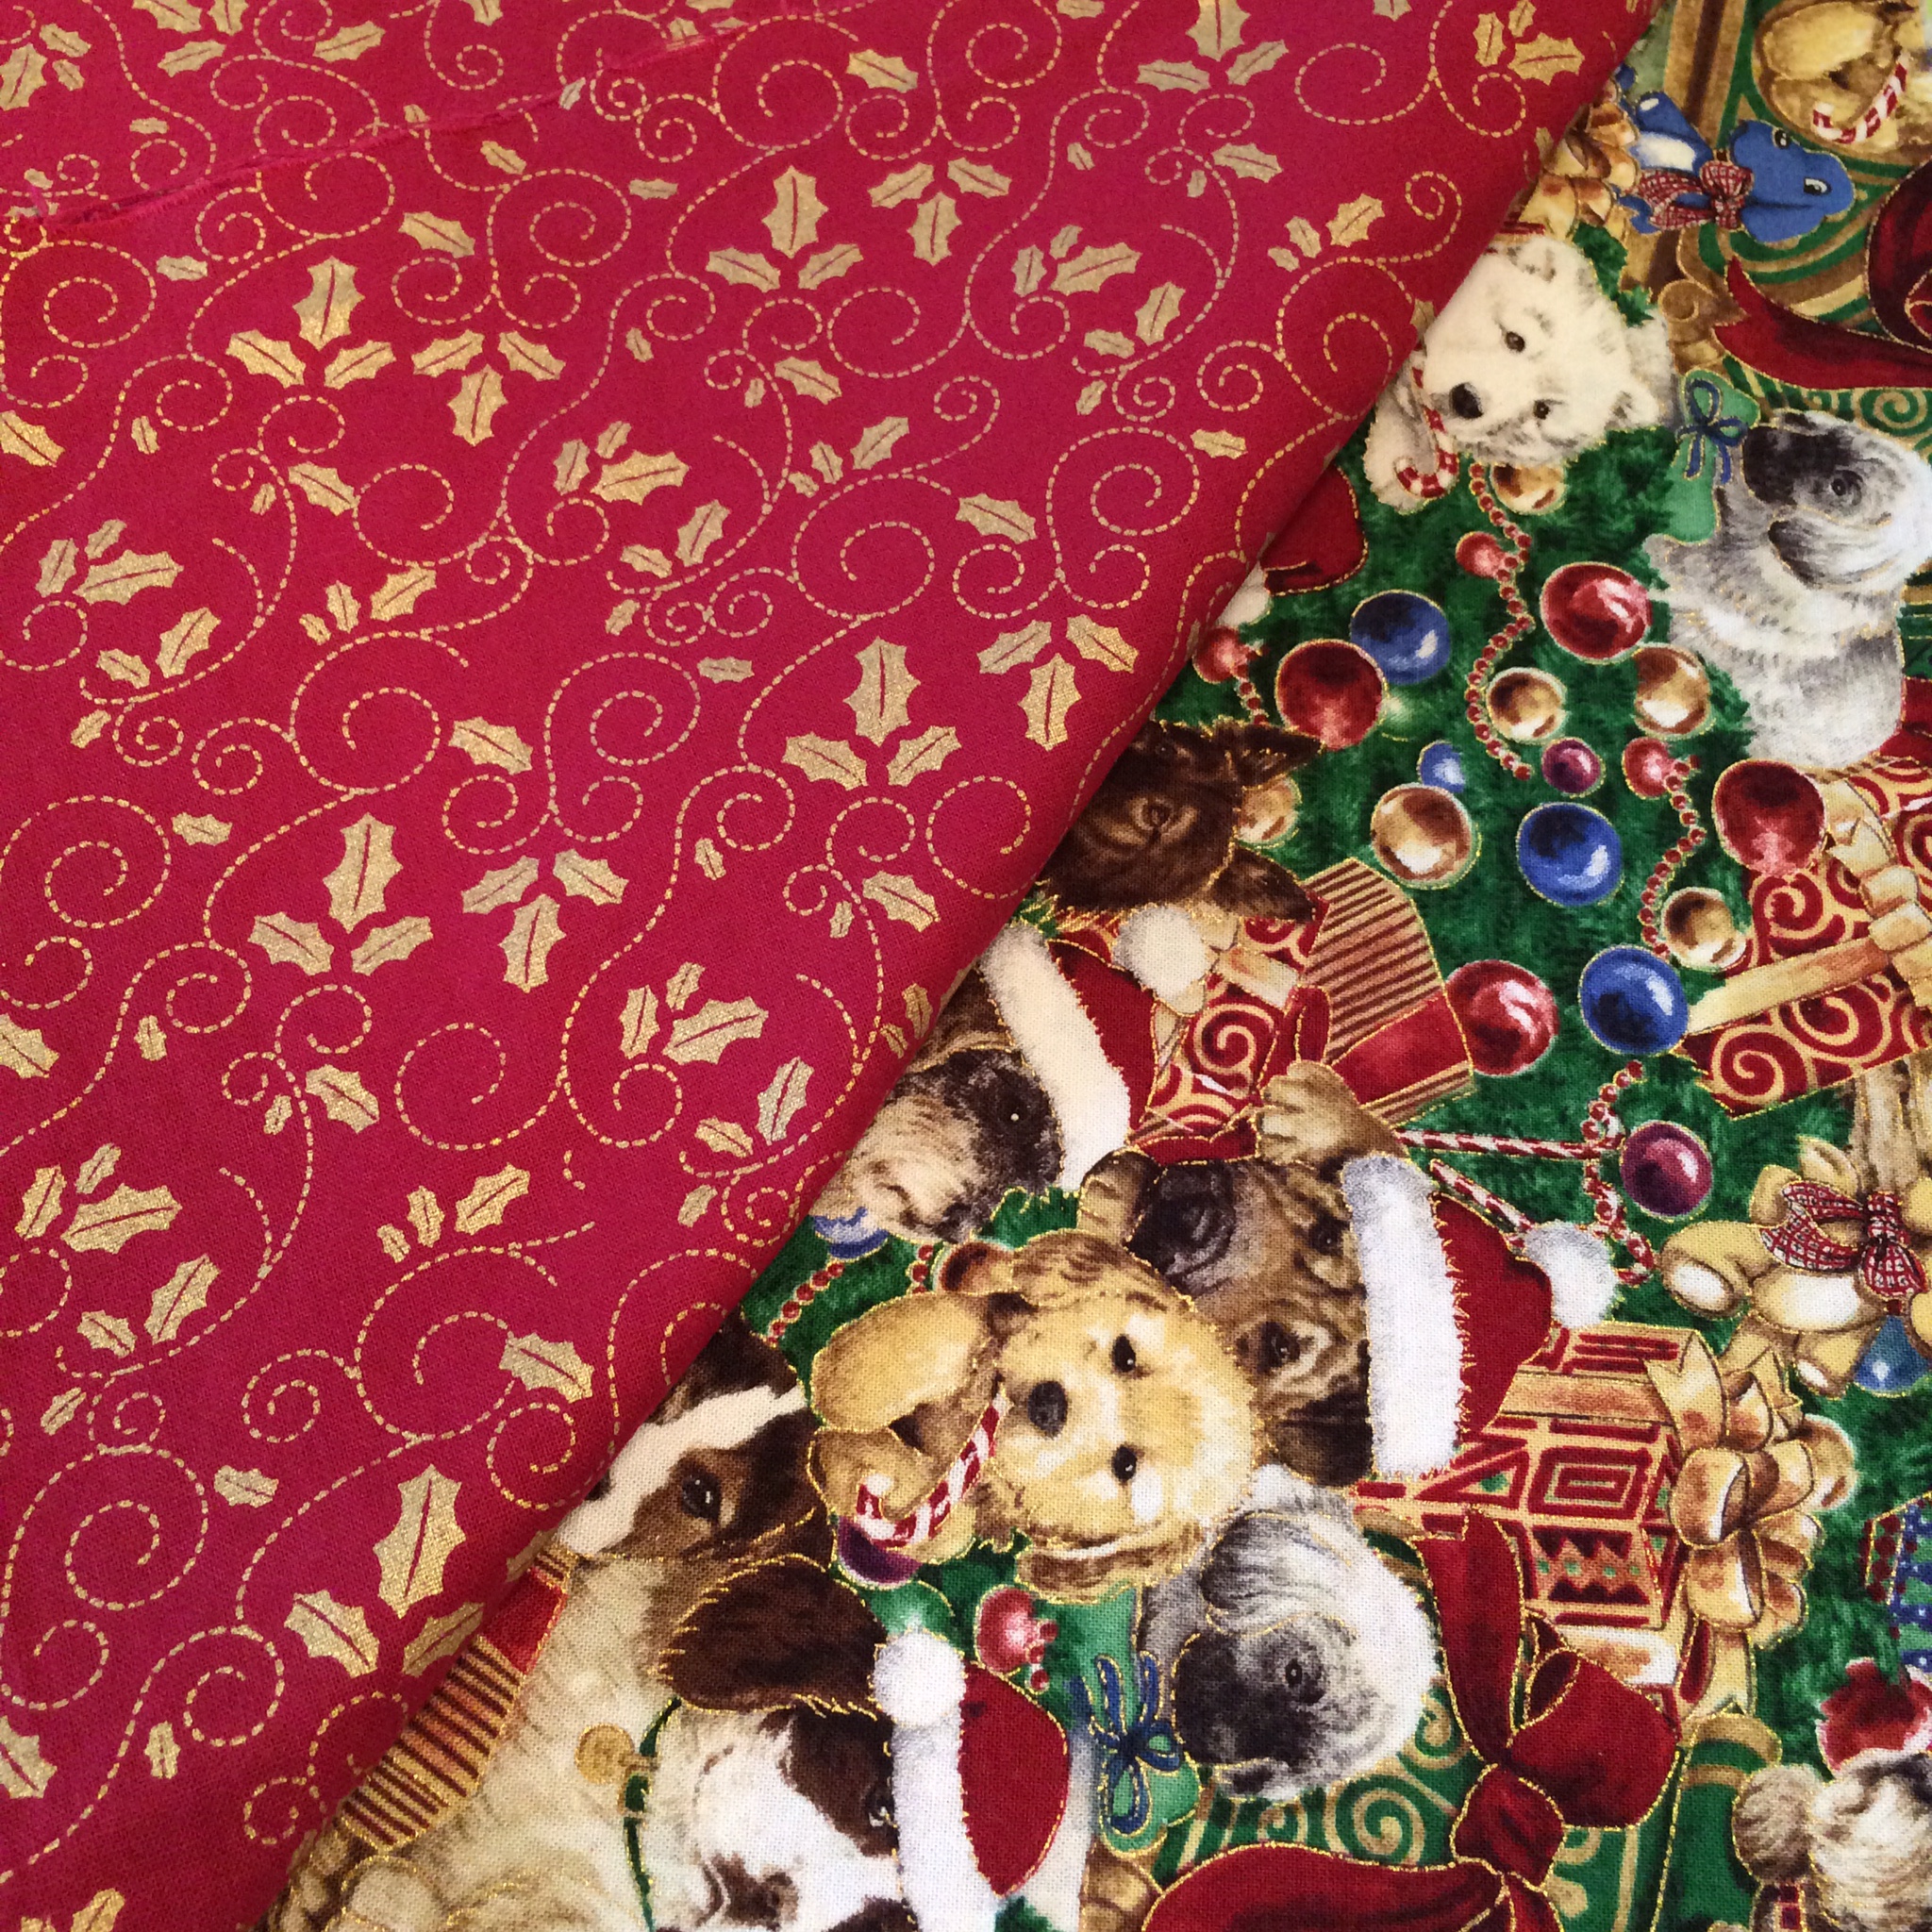
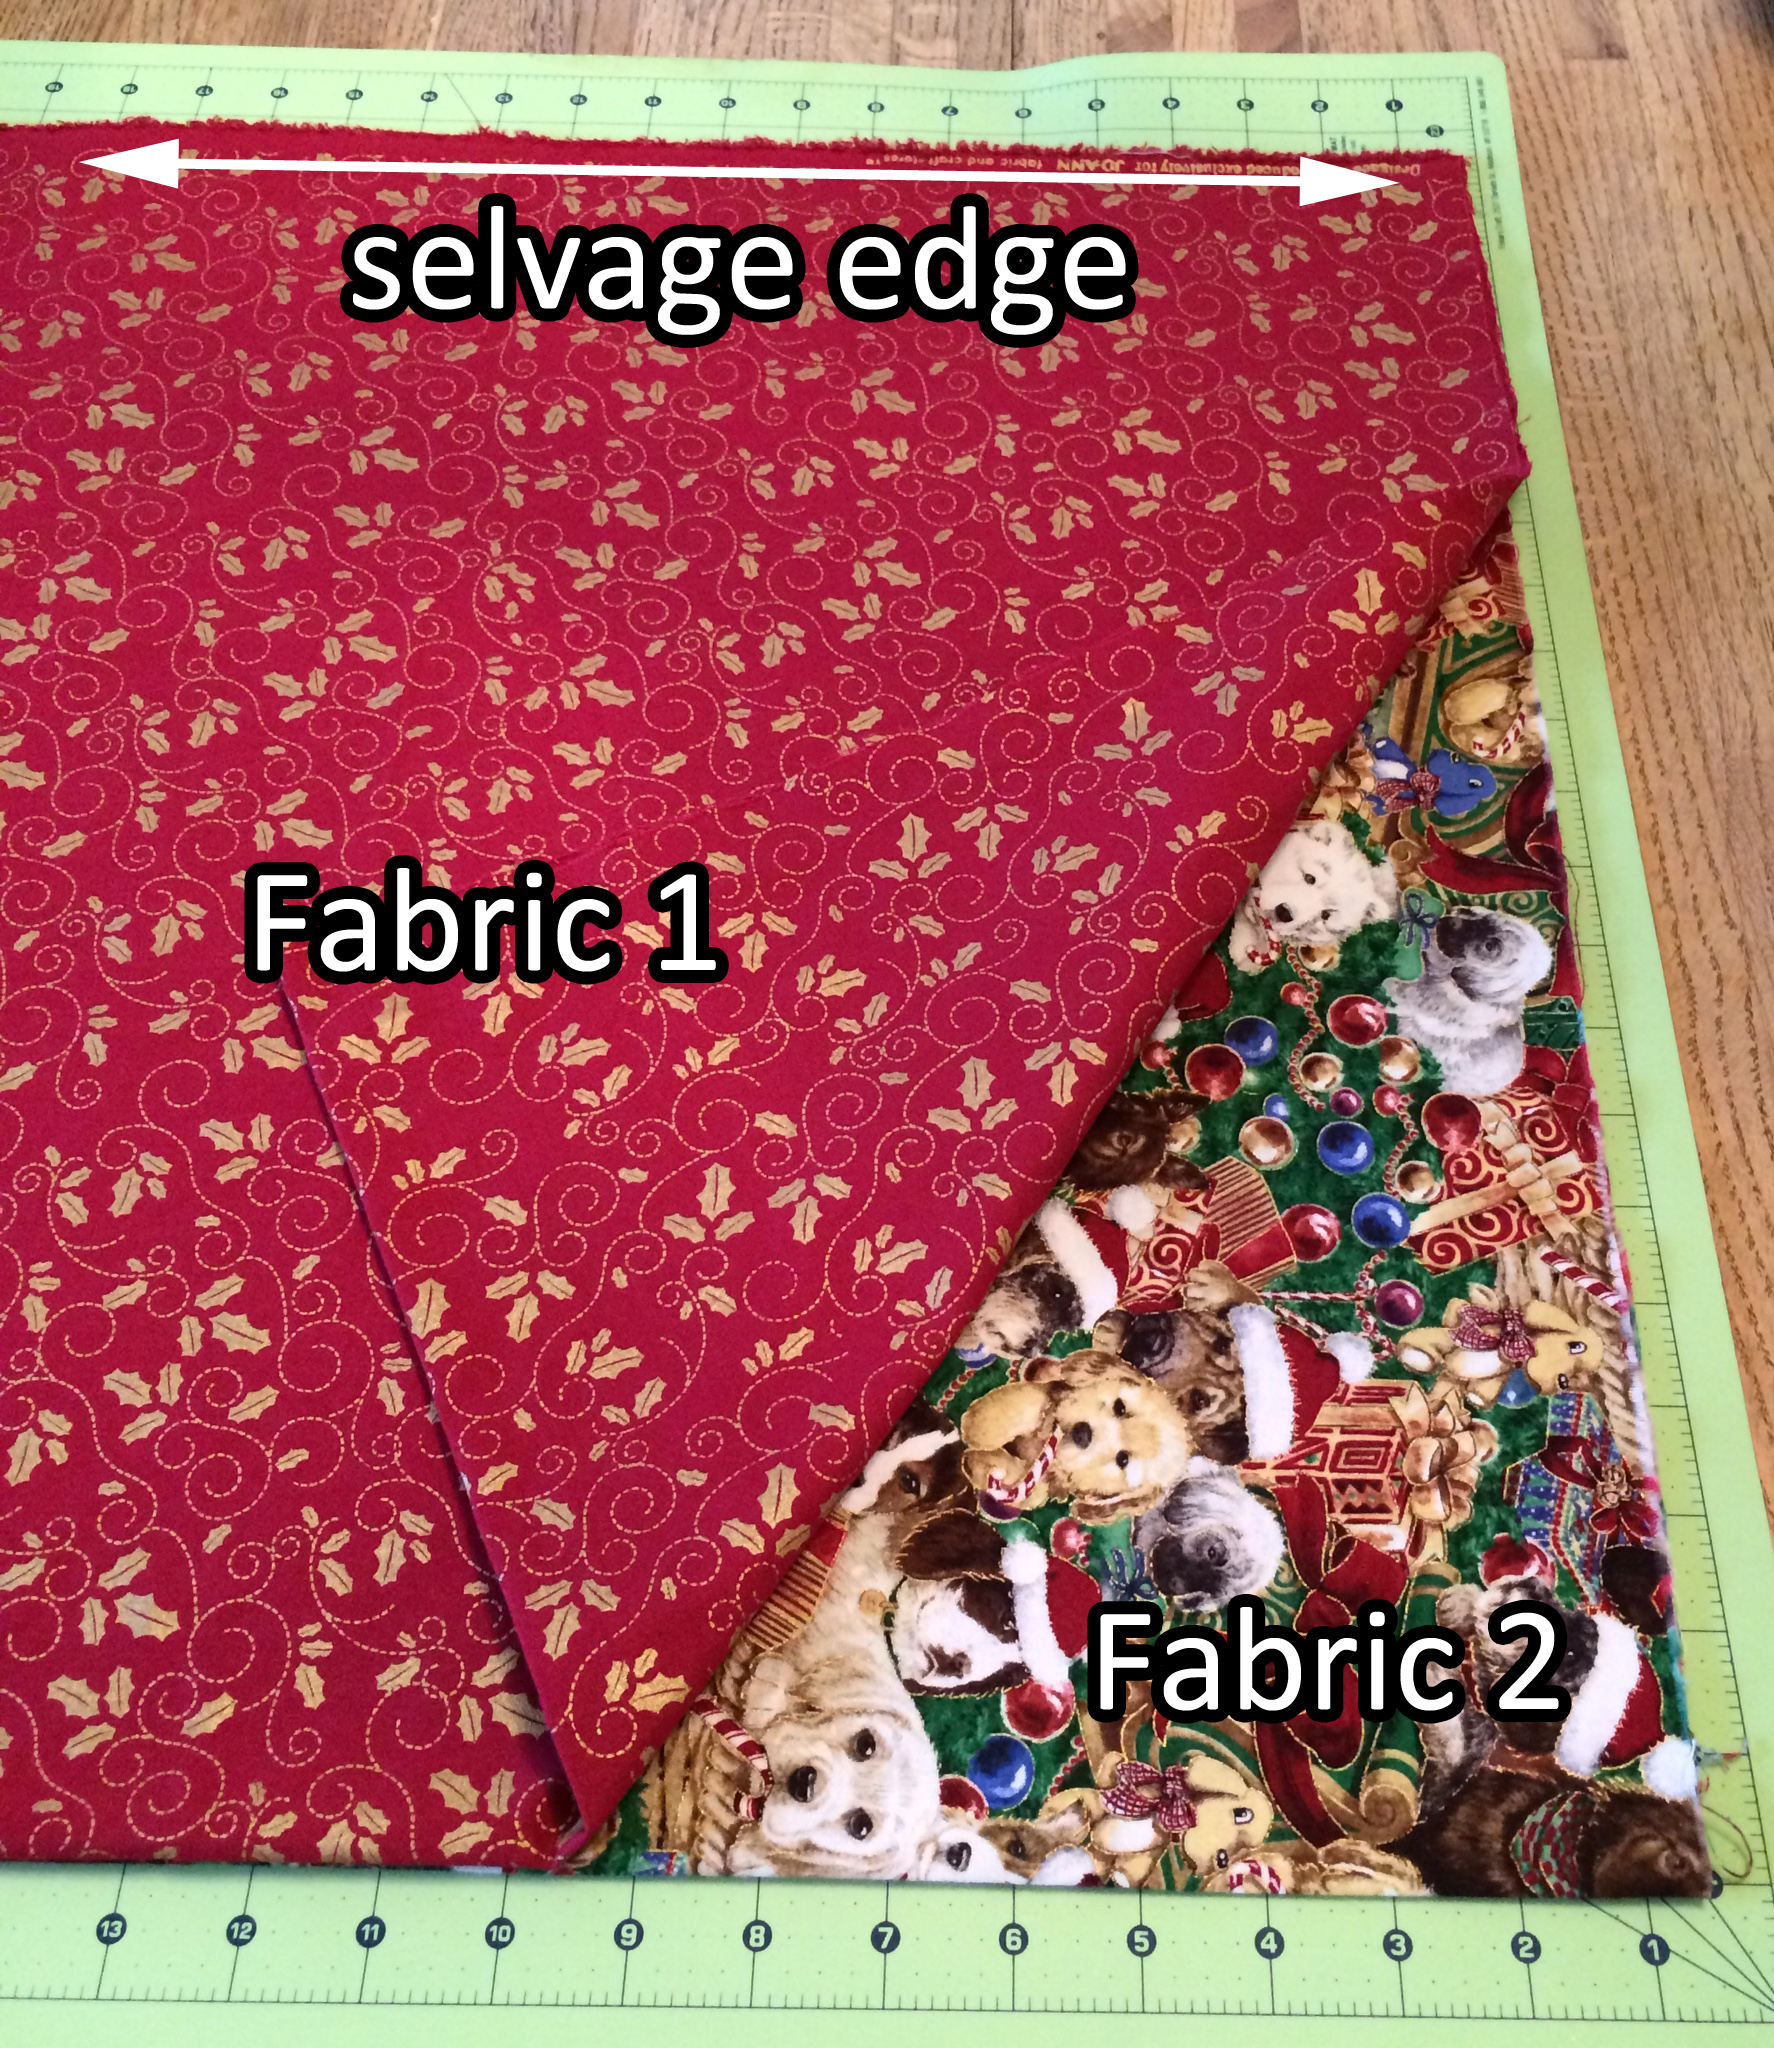
I wanted to make myself a Christmas apron because we’re hosting Christmas for my side of the family at our house this year. Last year I found this doggy Christmas print for a project for a friend and picked up a few yards for myself not knowing what I wanted to do with it. After I finished Mike’s apron, I knew instantly what fabric I would use for my apron.
 Materials:
1 yard of main print
1 yard of contrasting reversible print
coordinating thread
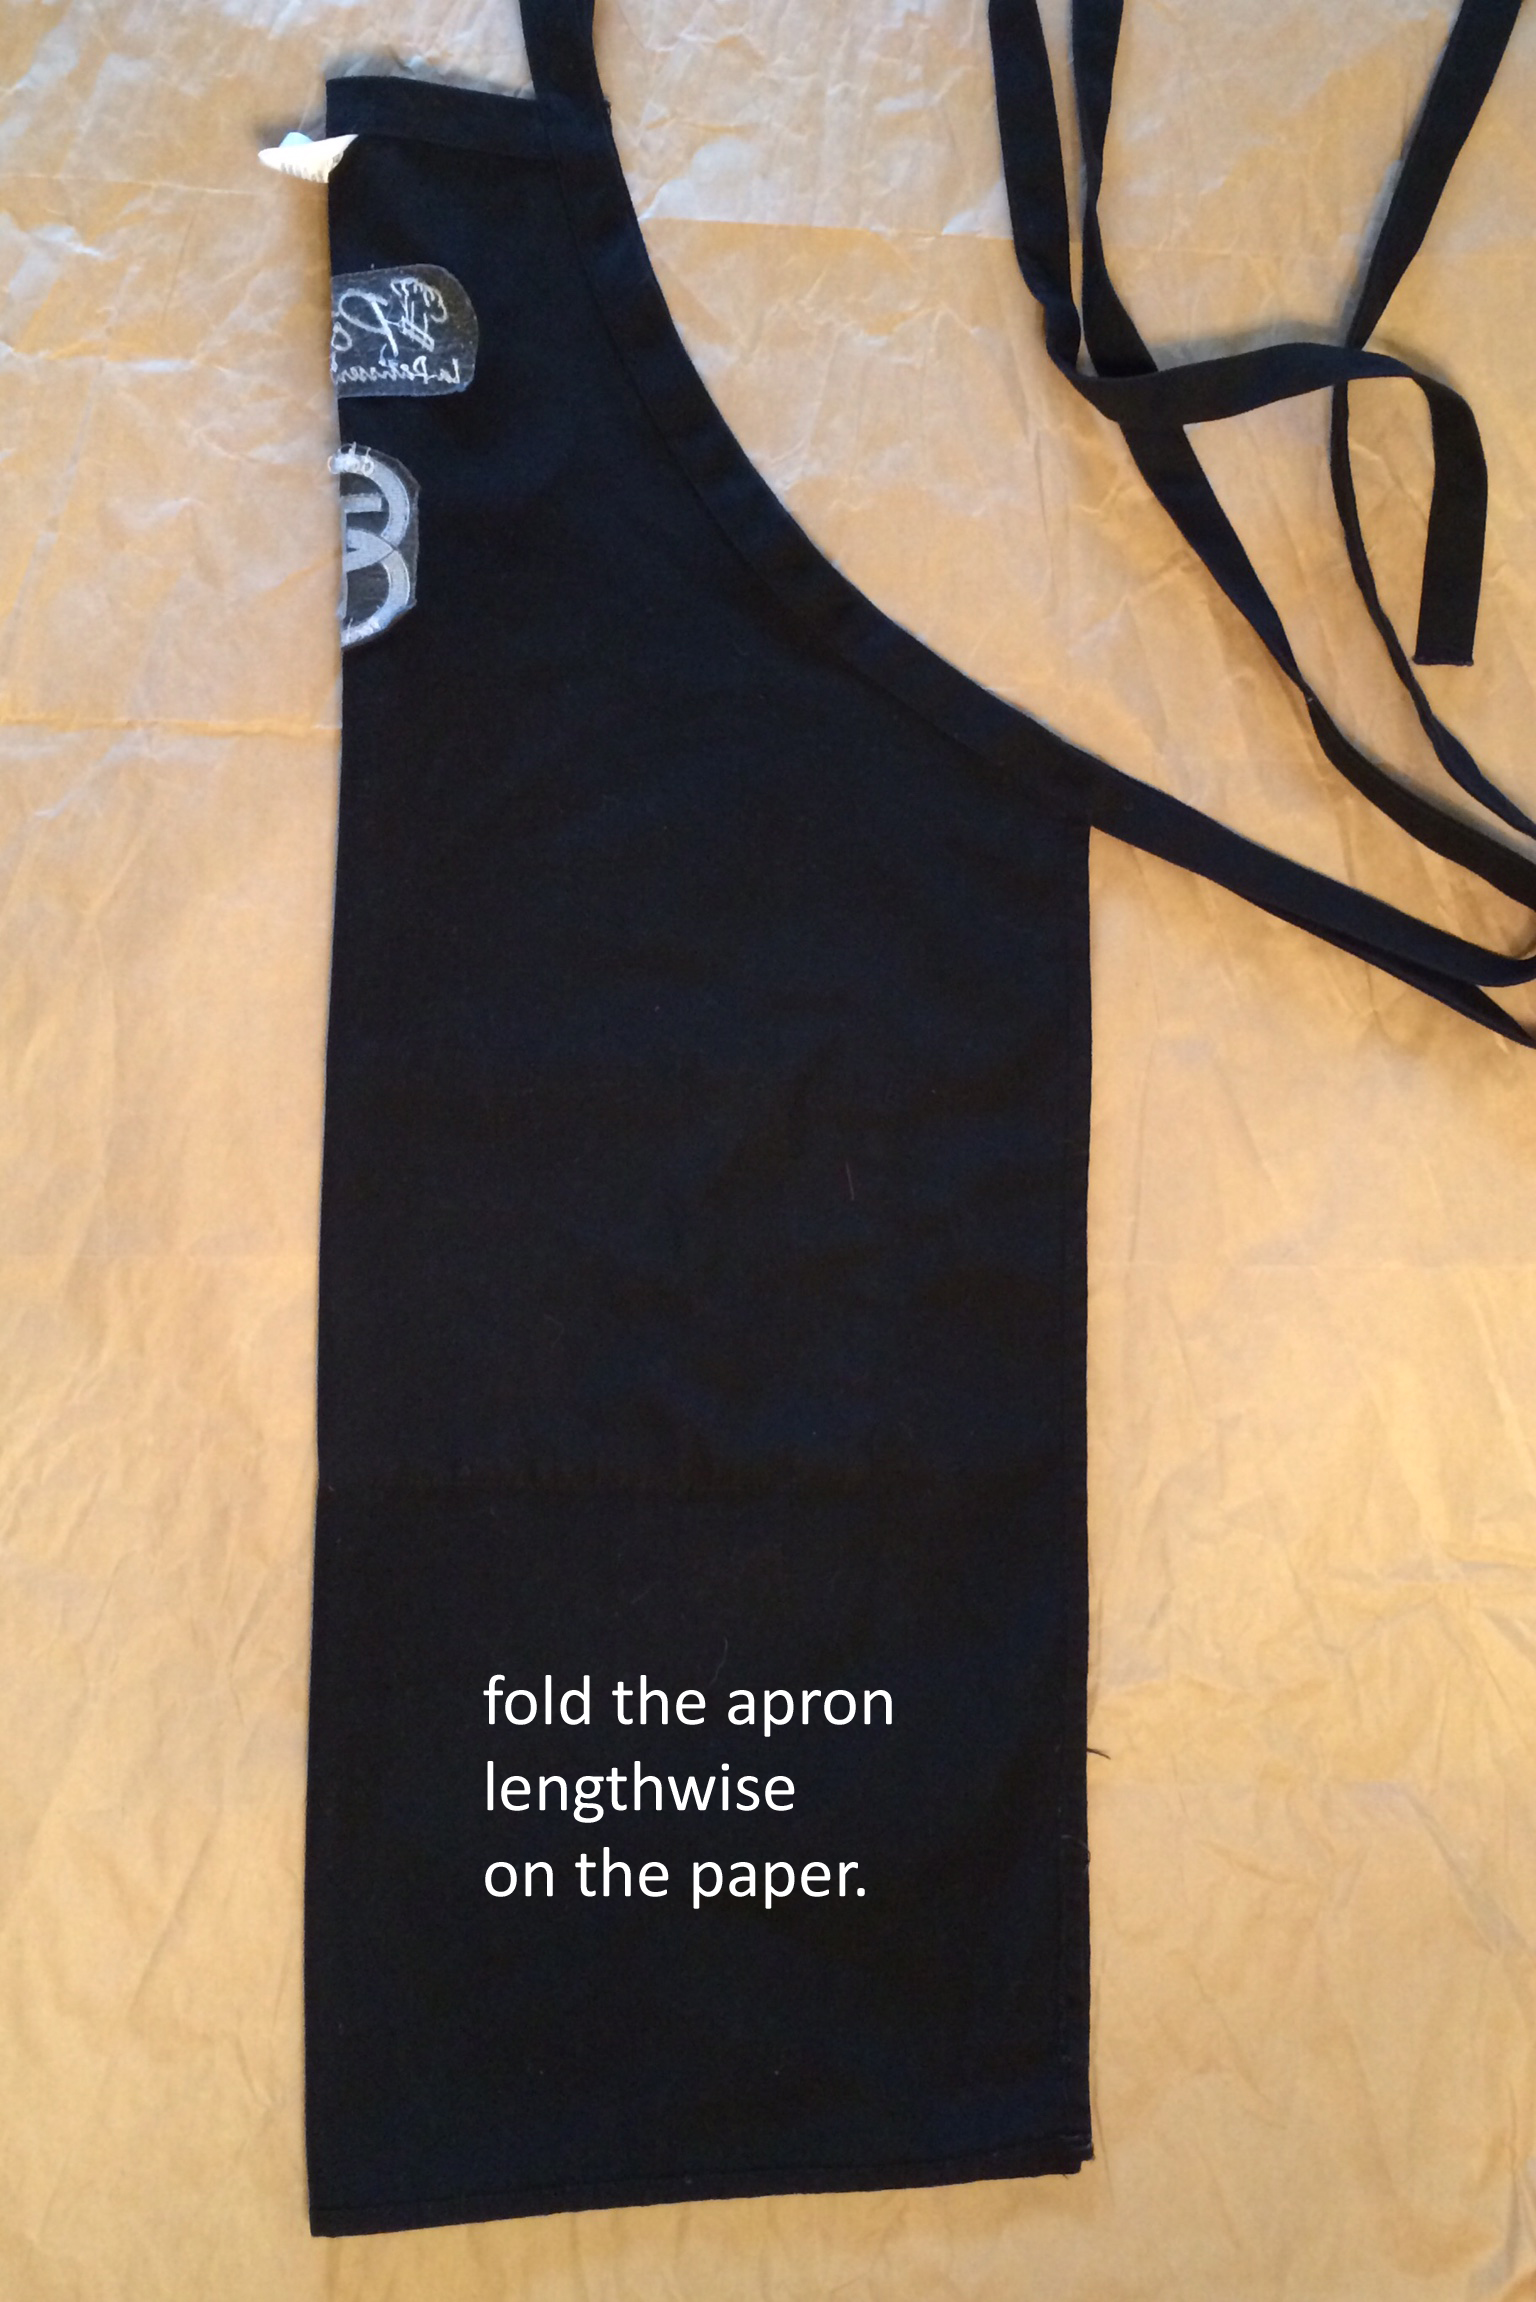
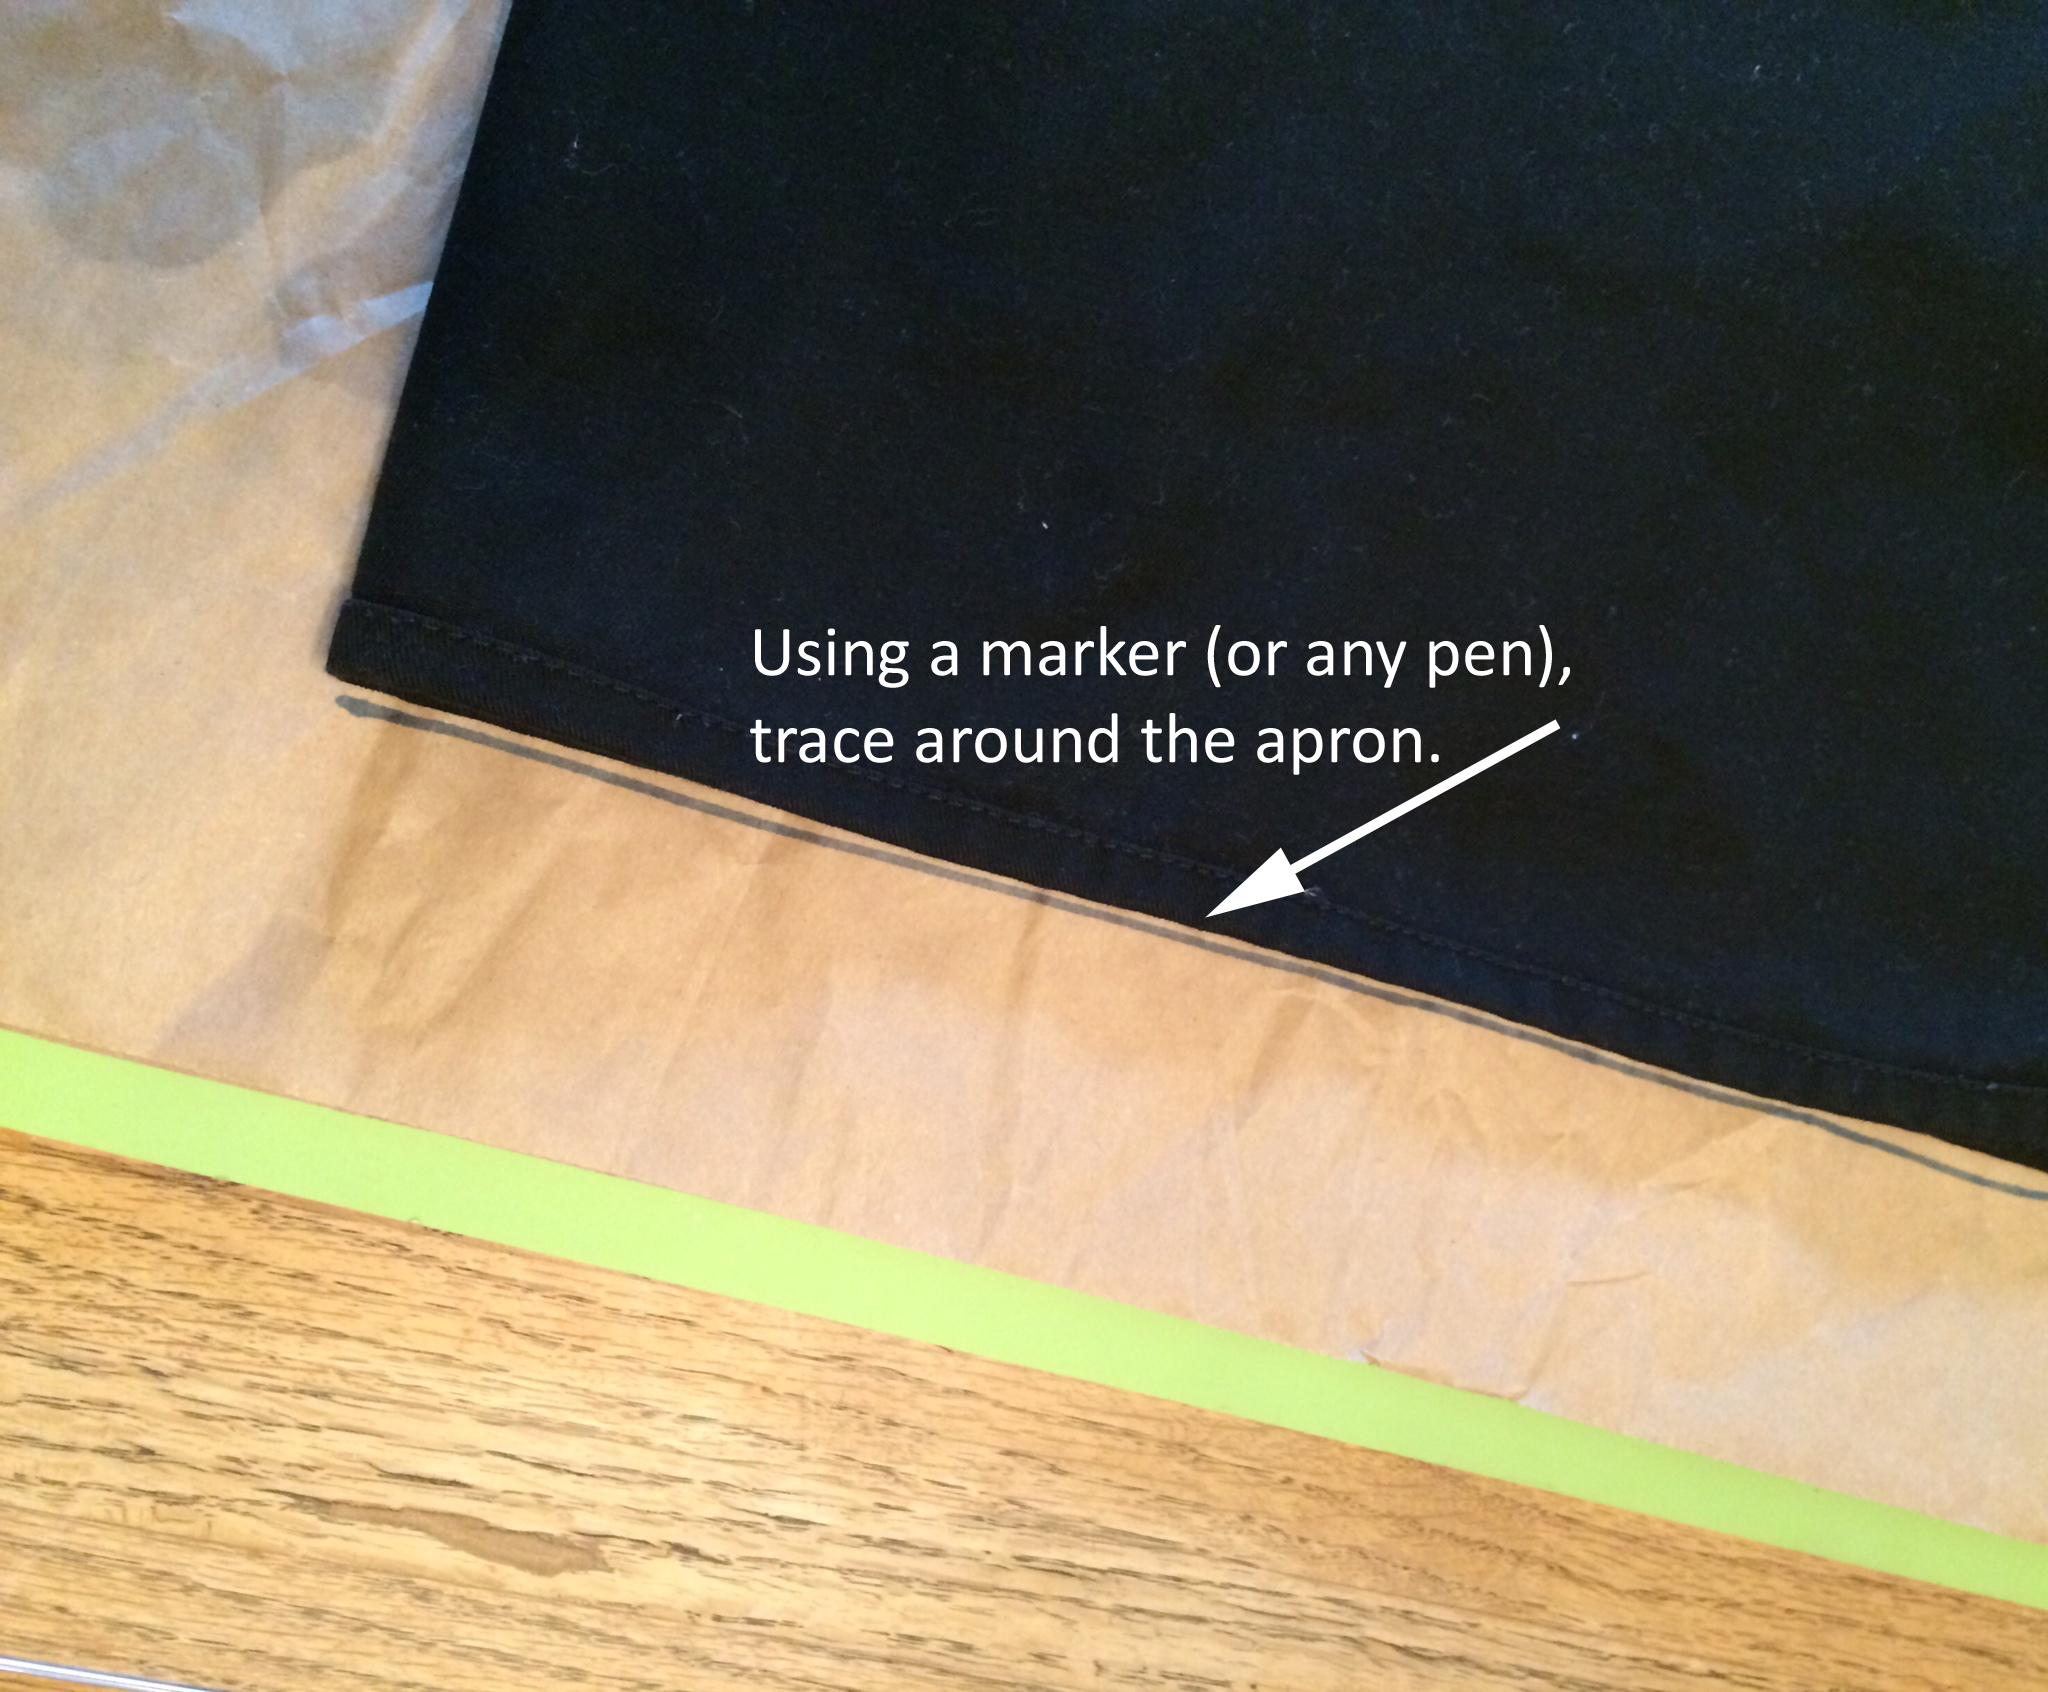
Step 1: Making the pattern.
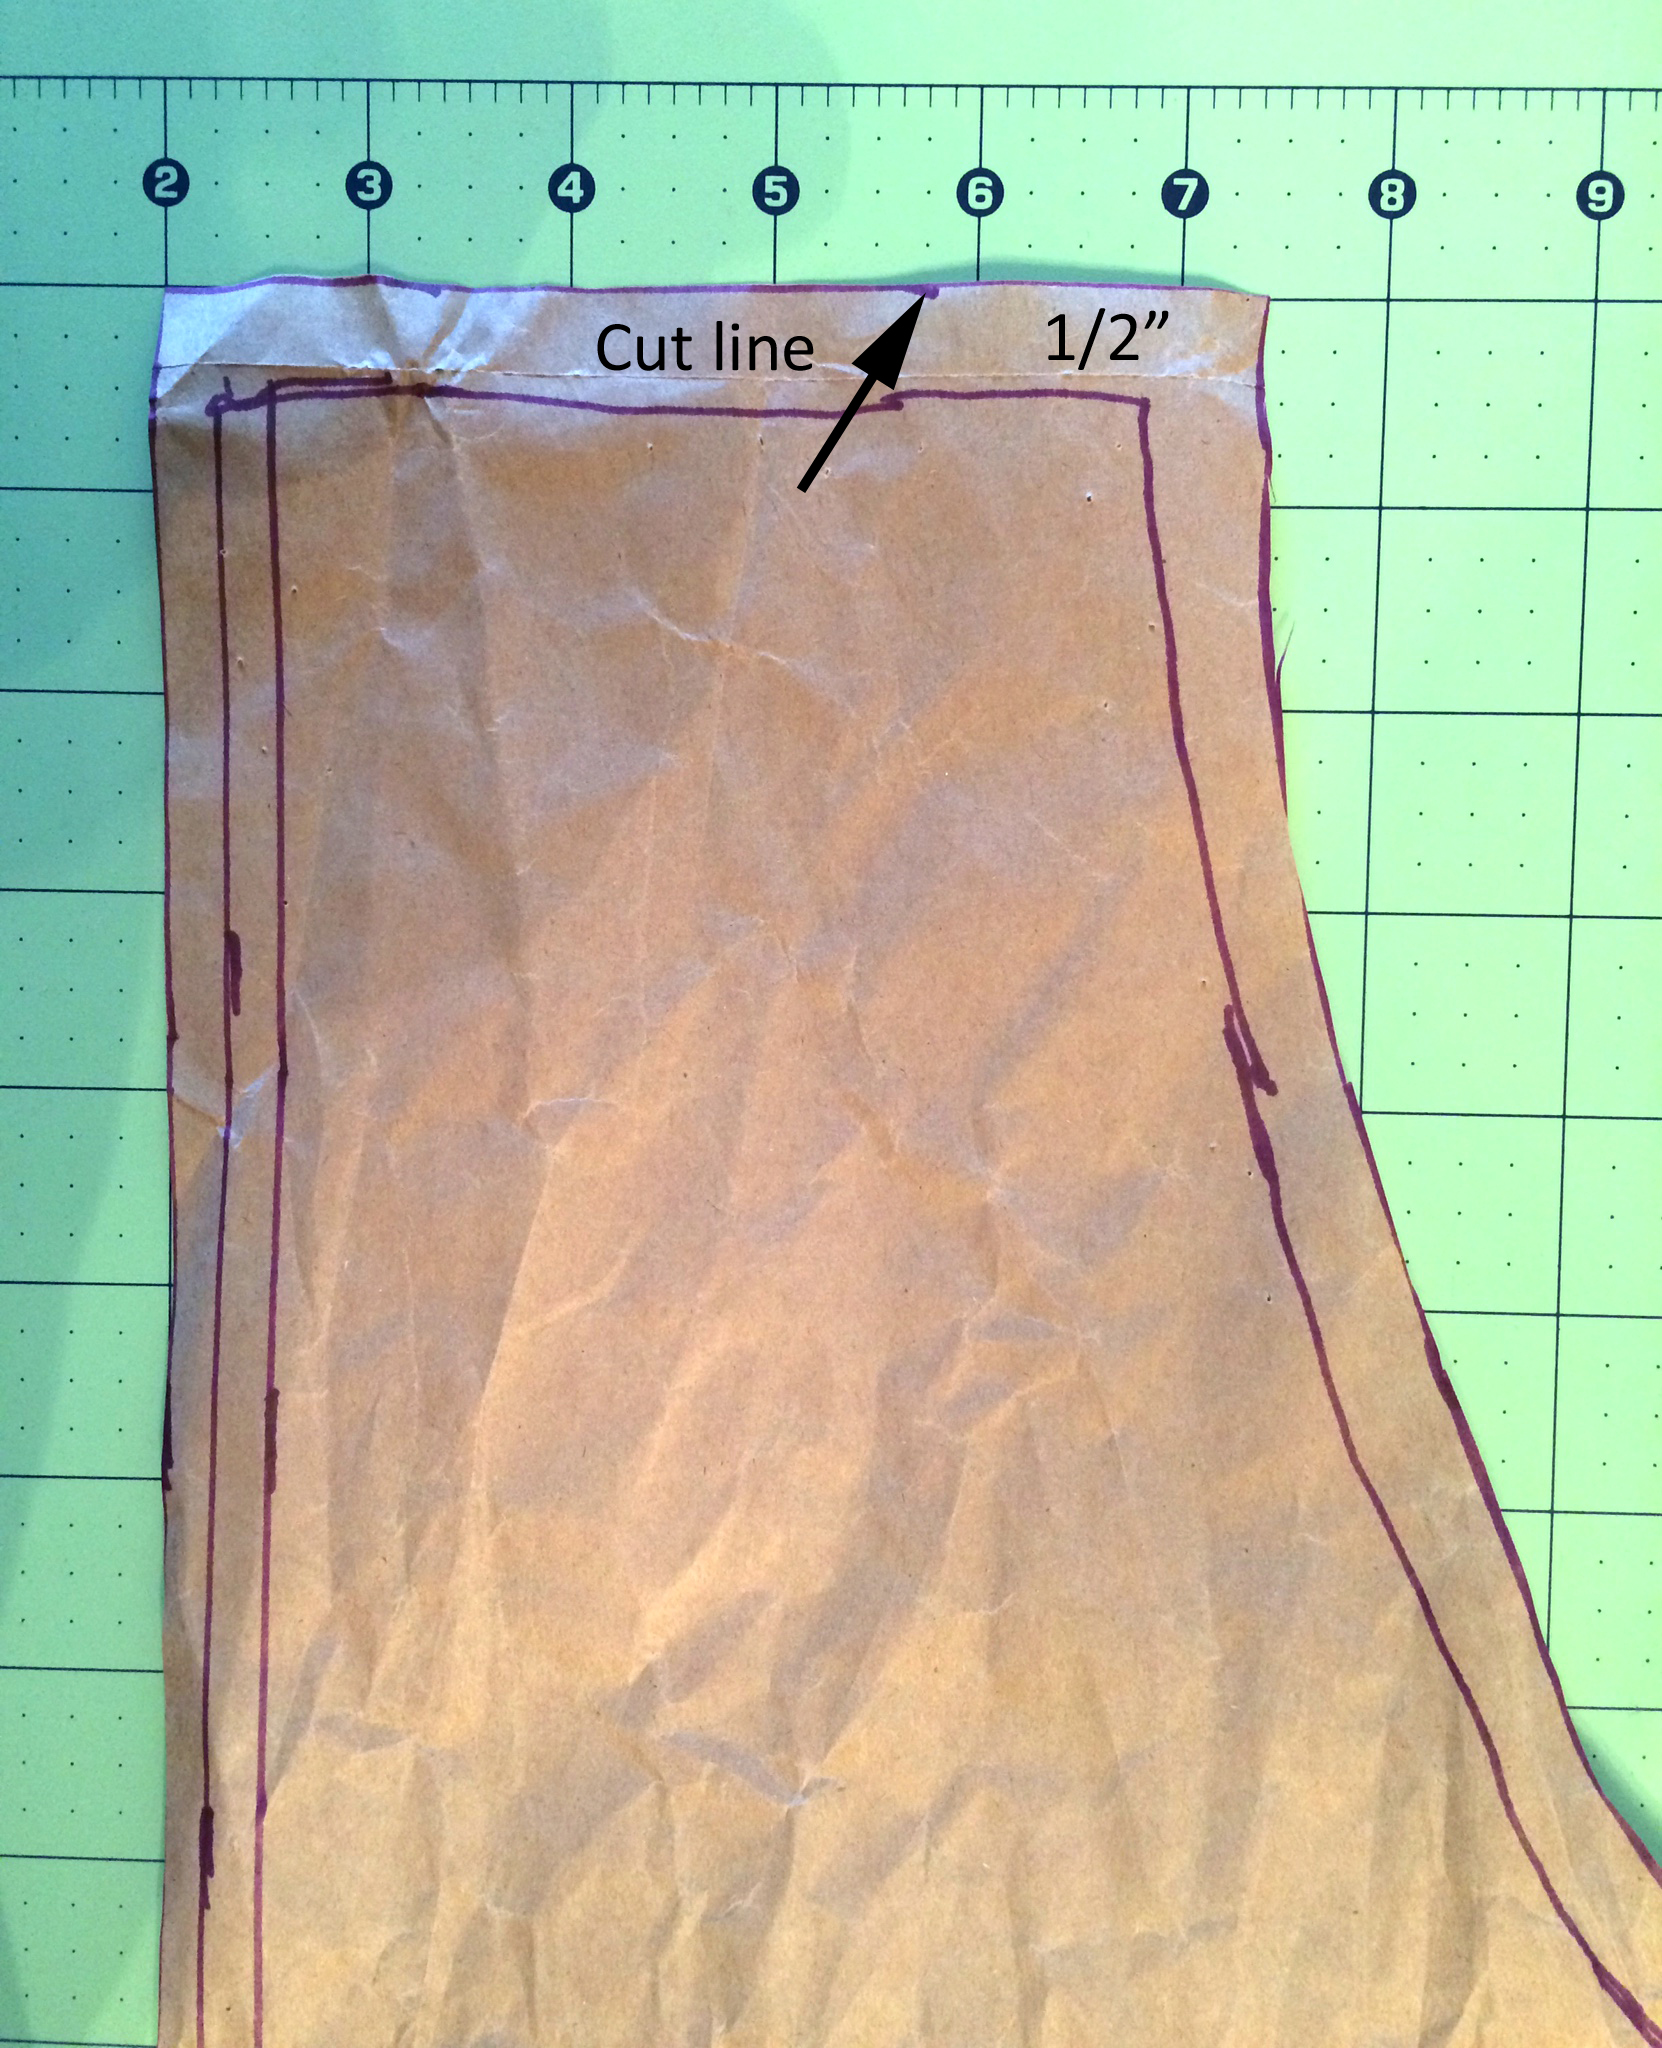
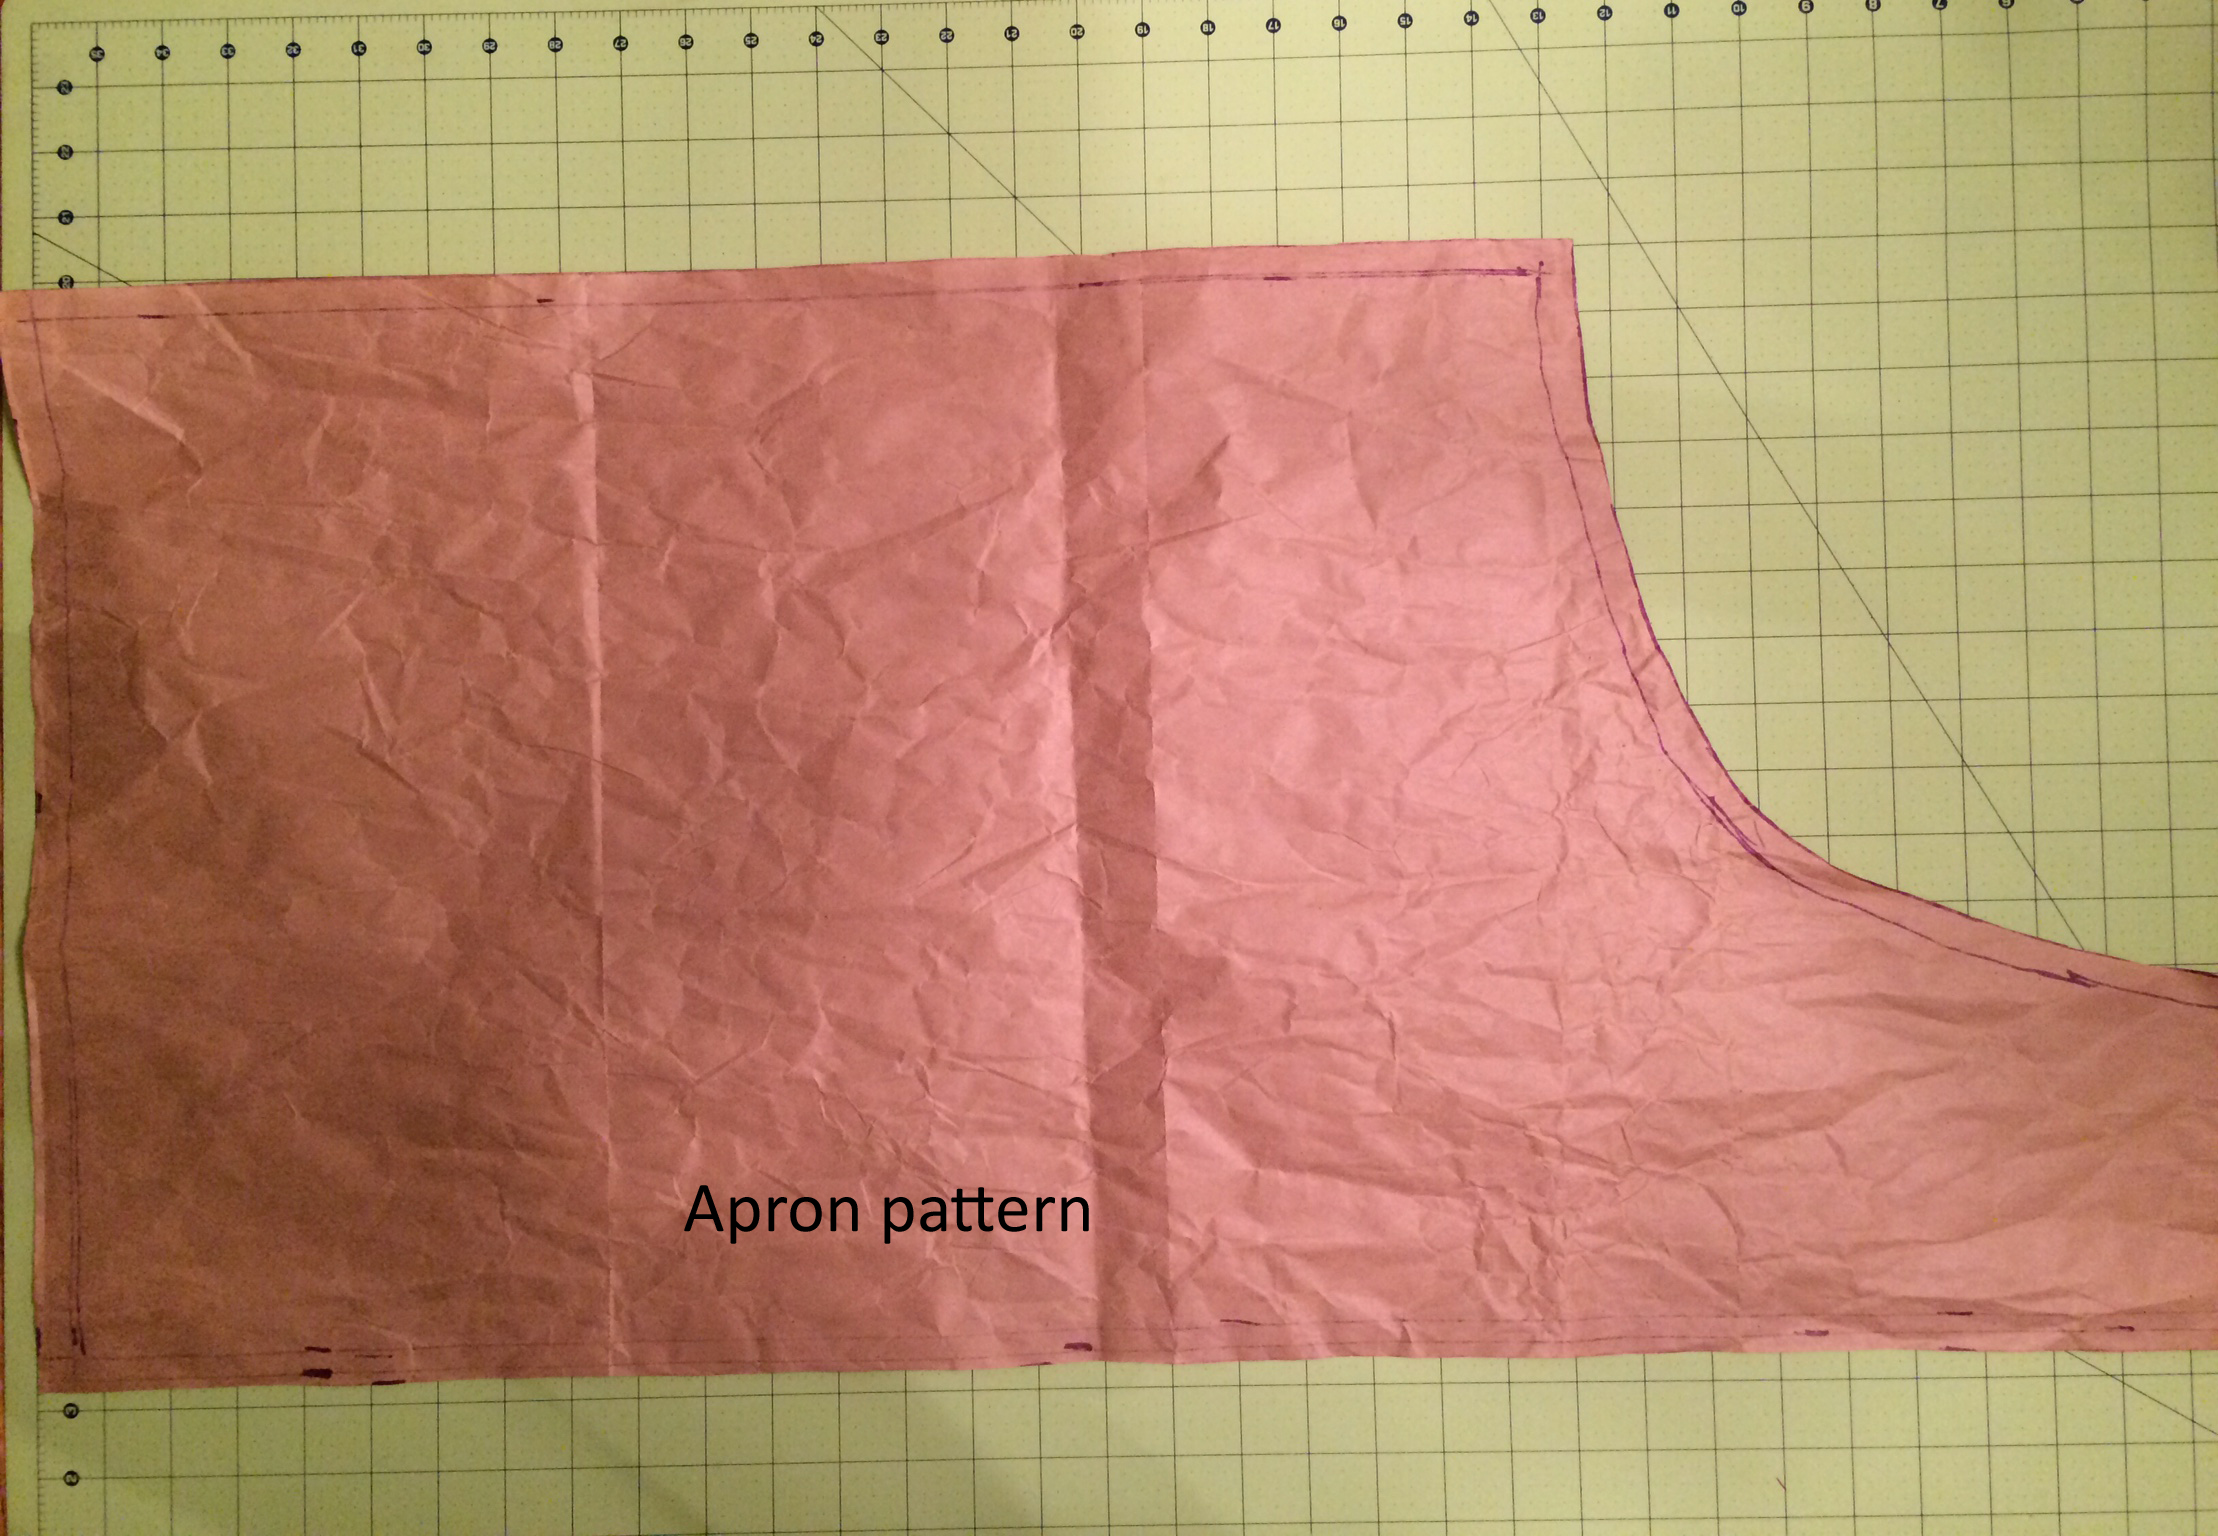
Using kraft paper I saved from mailing packages and an existing apron, fold the apron lengthwise on the paper. Using a marker (or any pen), trace around the apron. You can use a ruler, but if you feel steady enough just trace freehand. You’ll end up with an apron shape and this is a good time to adjust the length. I’m 4’10”, but I wanted the apron longer, so I left it the same length as the one I made for Mike (he’s 5’10”). Now you need to add in your seam allowance. I chose 1/2″ seam allowance (you can choose whatever seam allowance you want), so I measured 1/2″ from my first tracing line and drew a second line around my apron shape. This is the cut line. I know it seems like we’ve only cut out half an apron, but it will make sense in the next step.
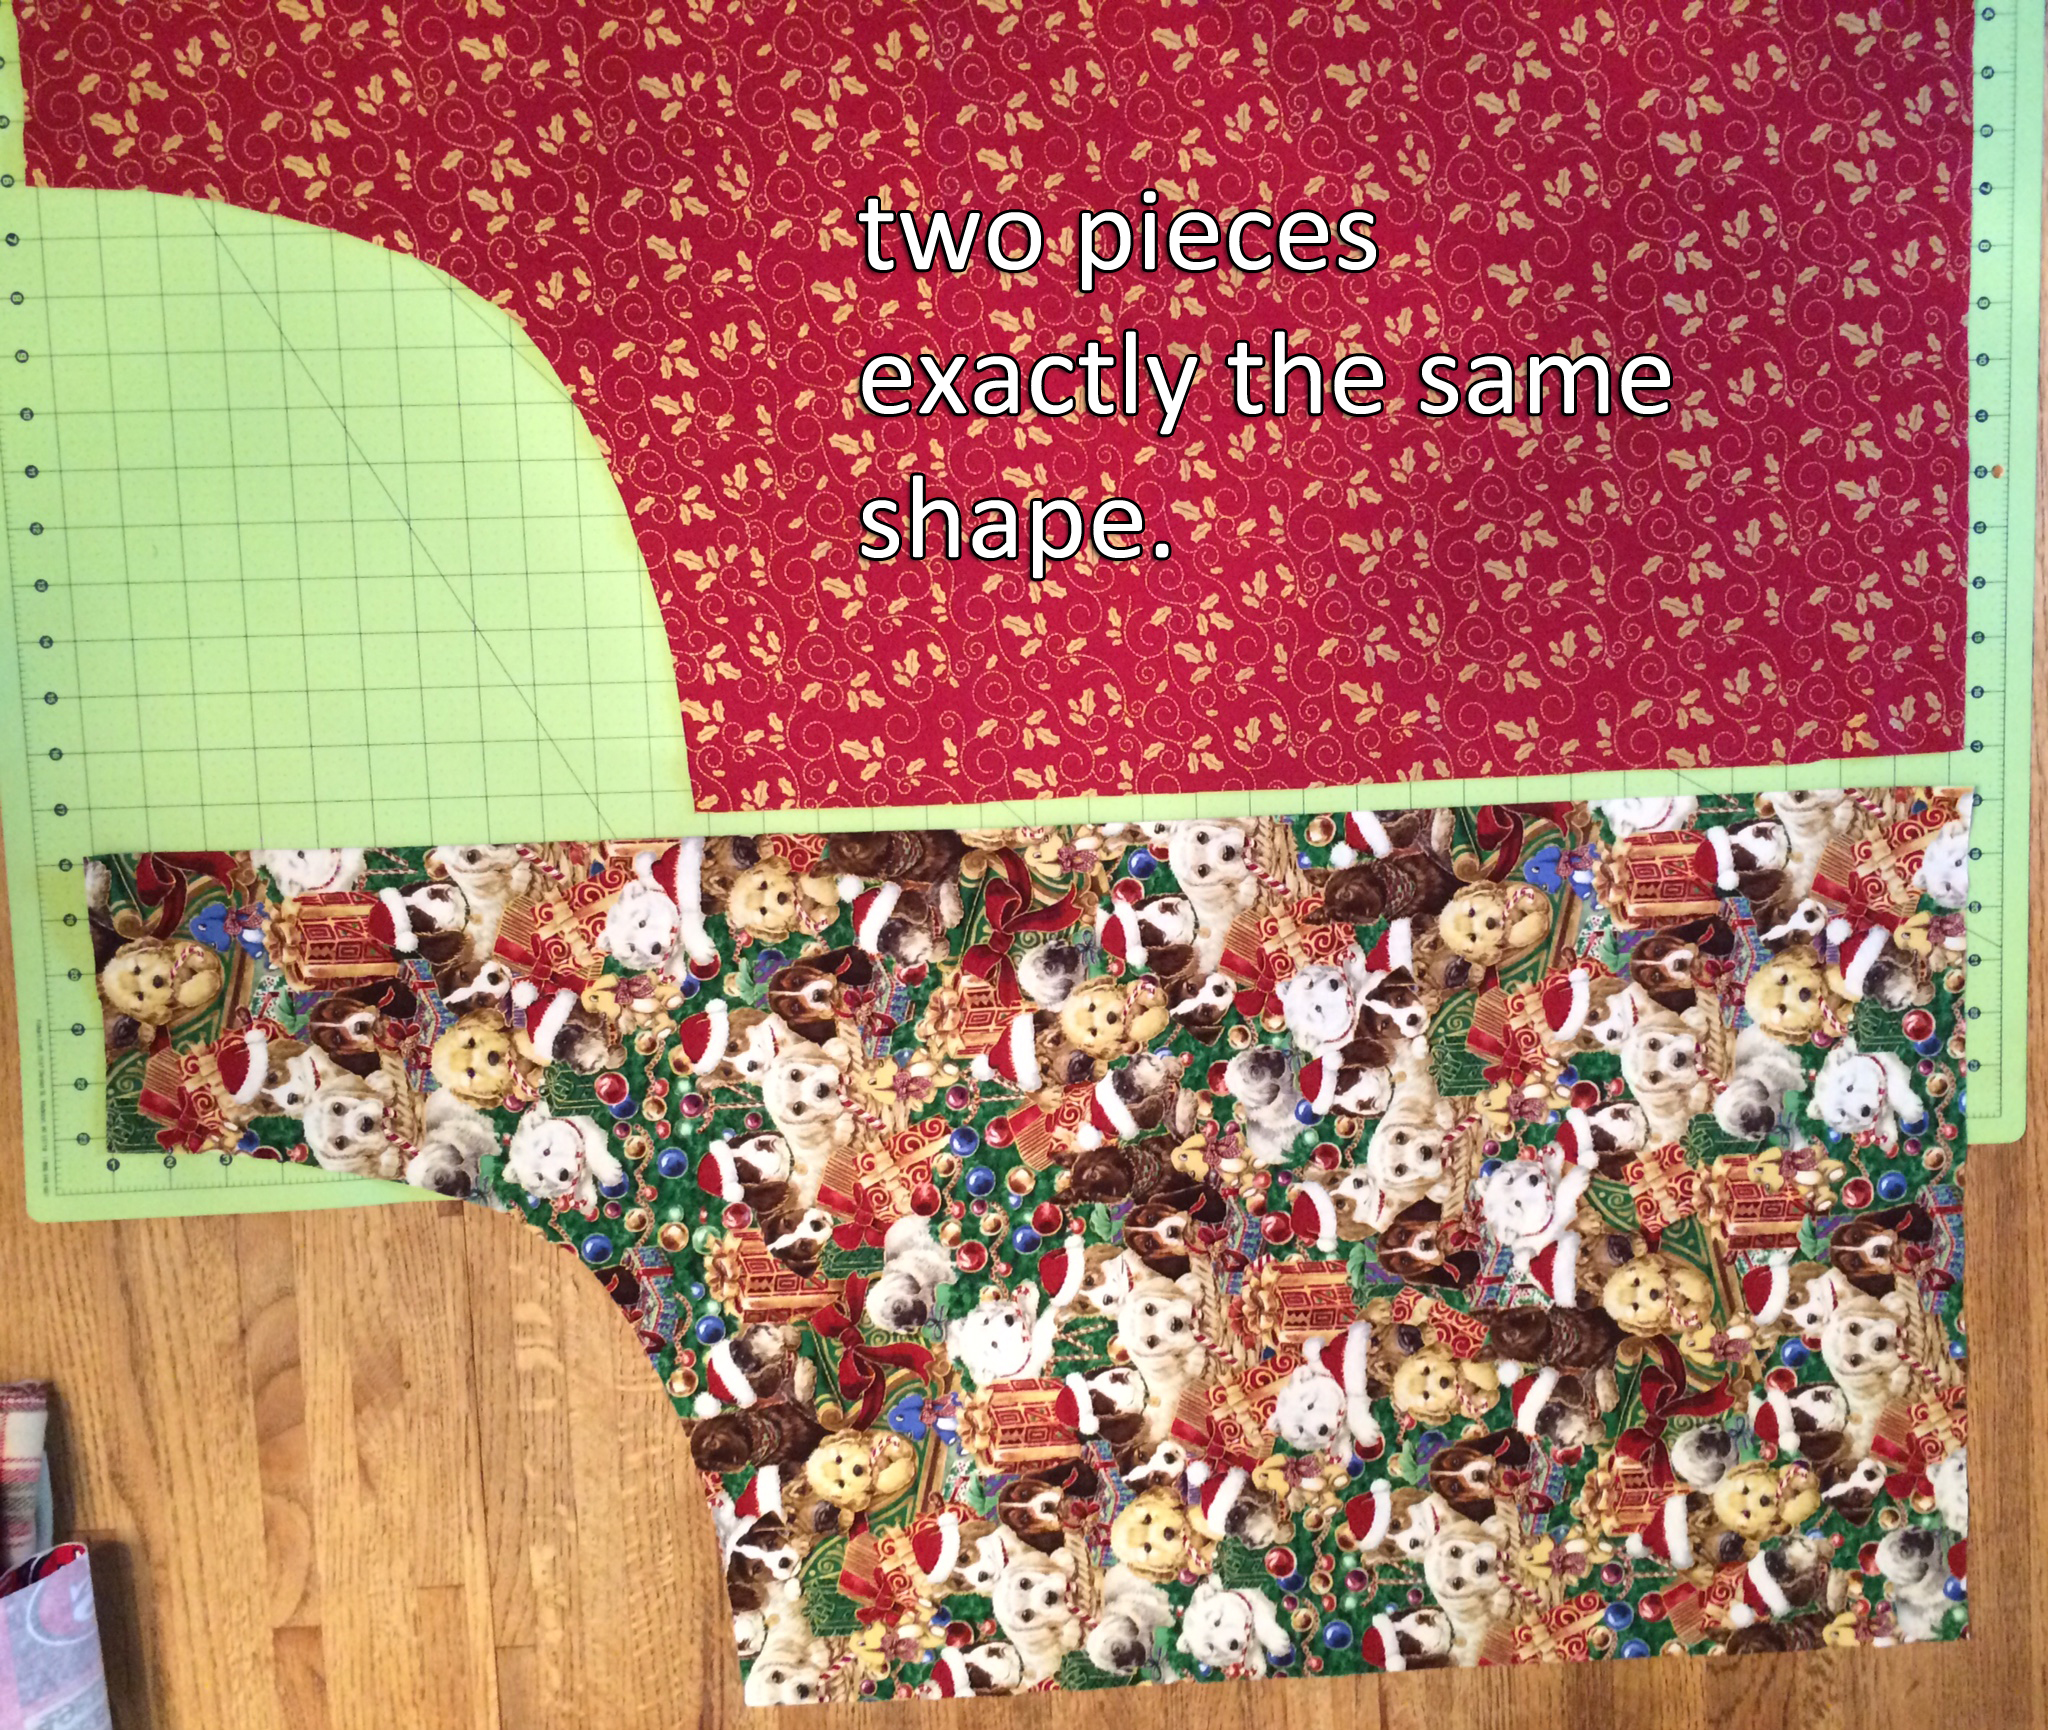
Step 2: Cutting out the fabric from the pattern.
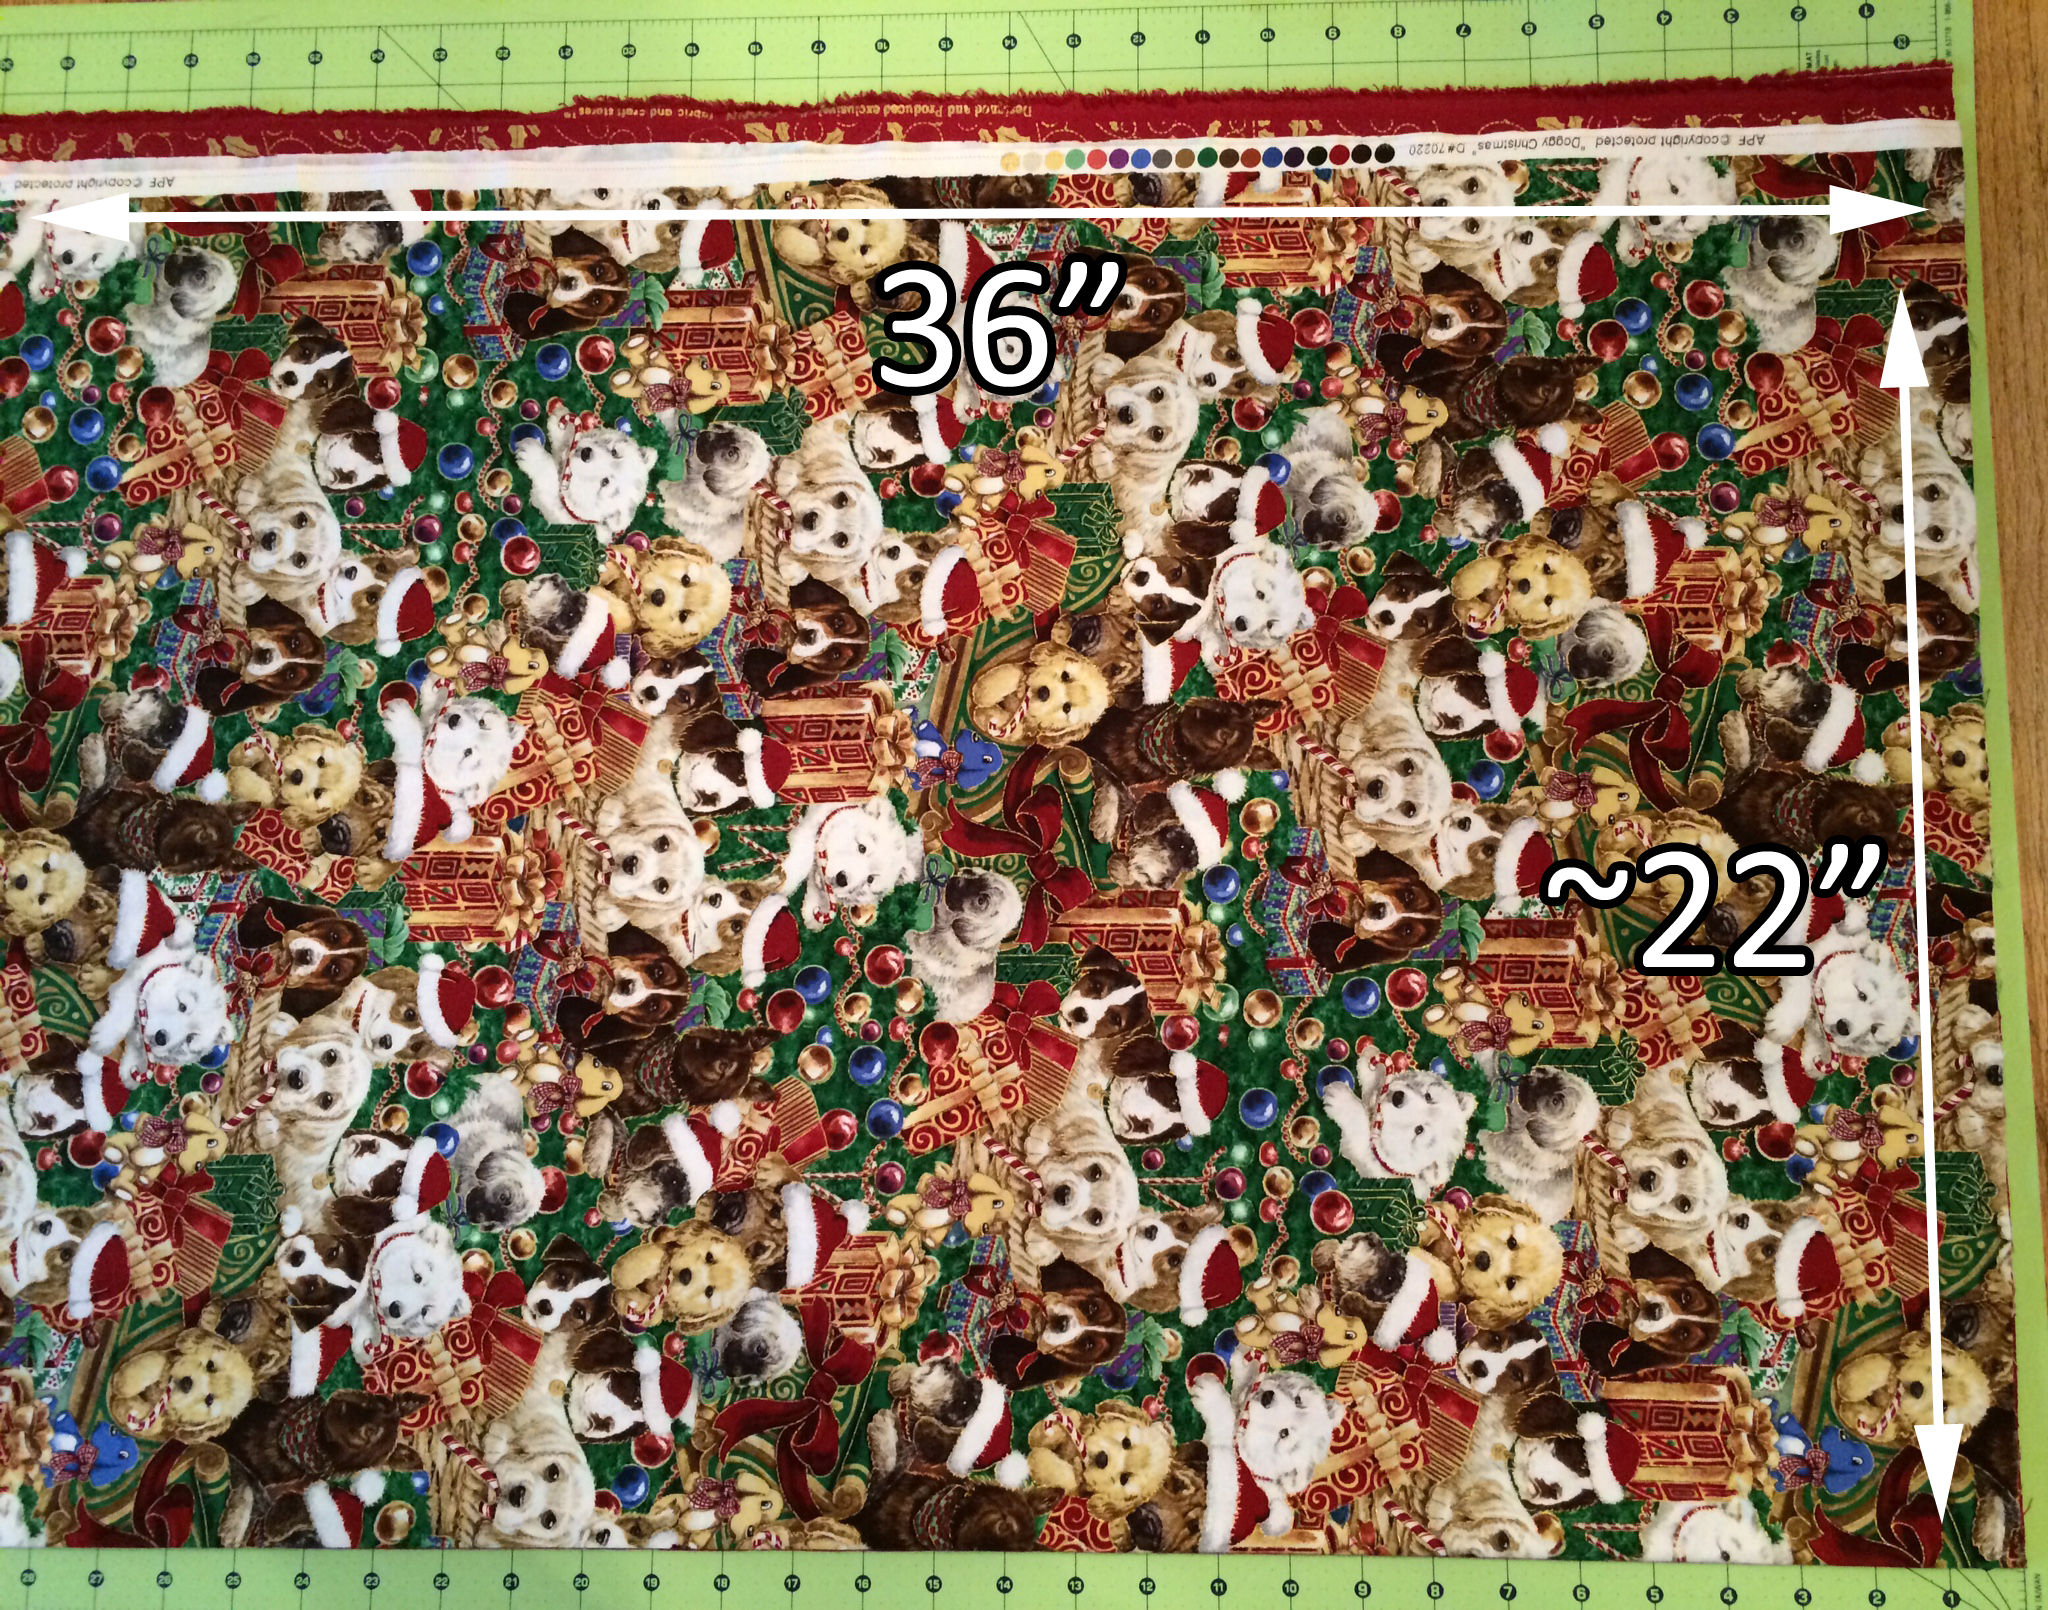
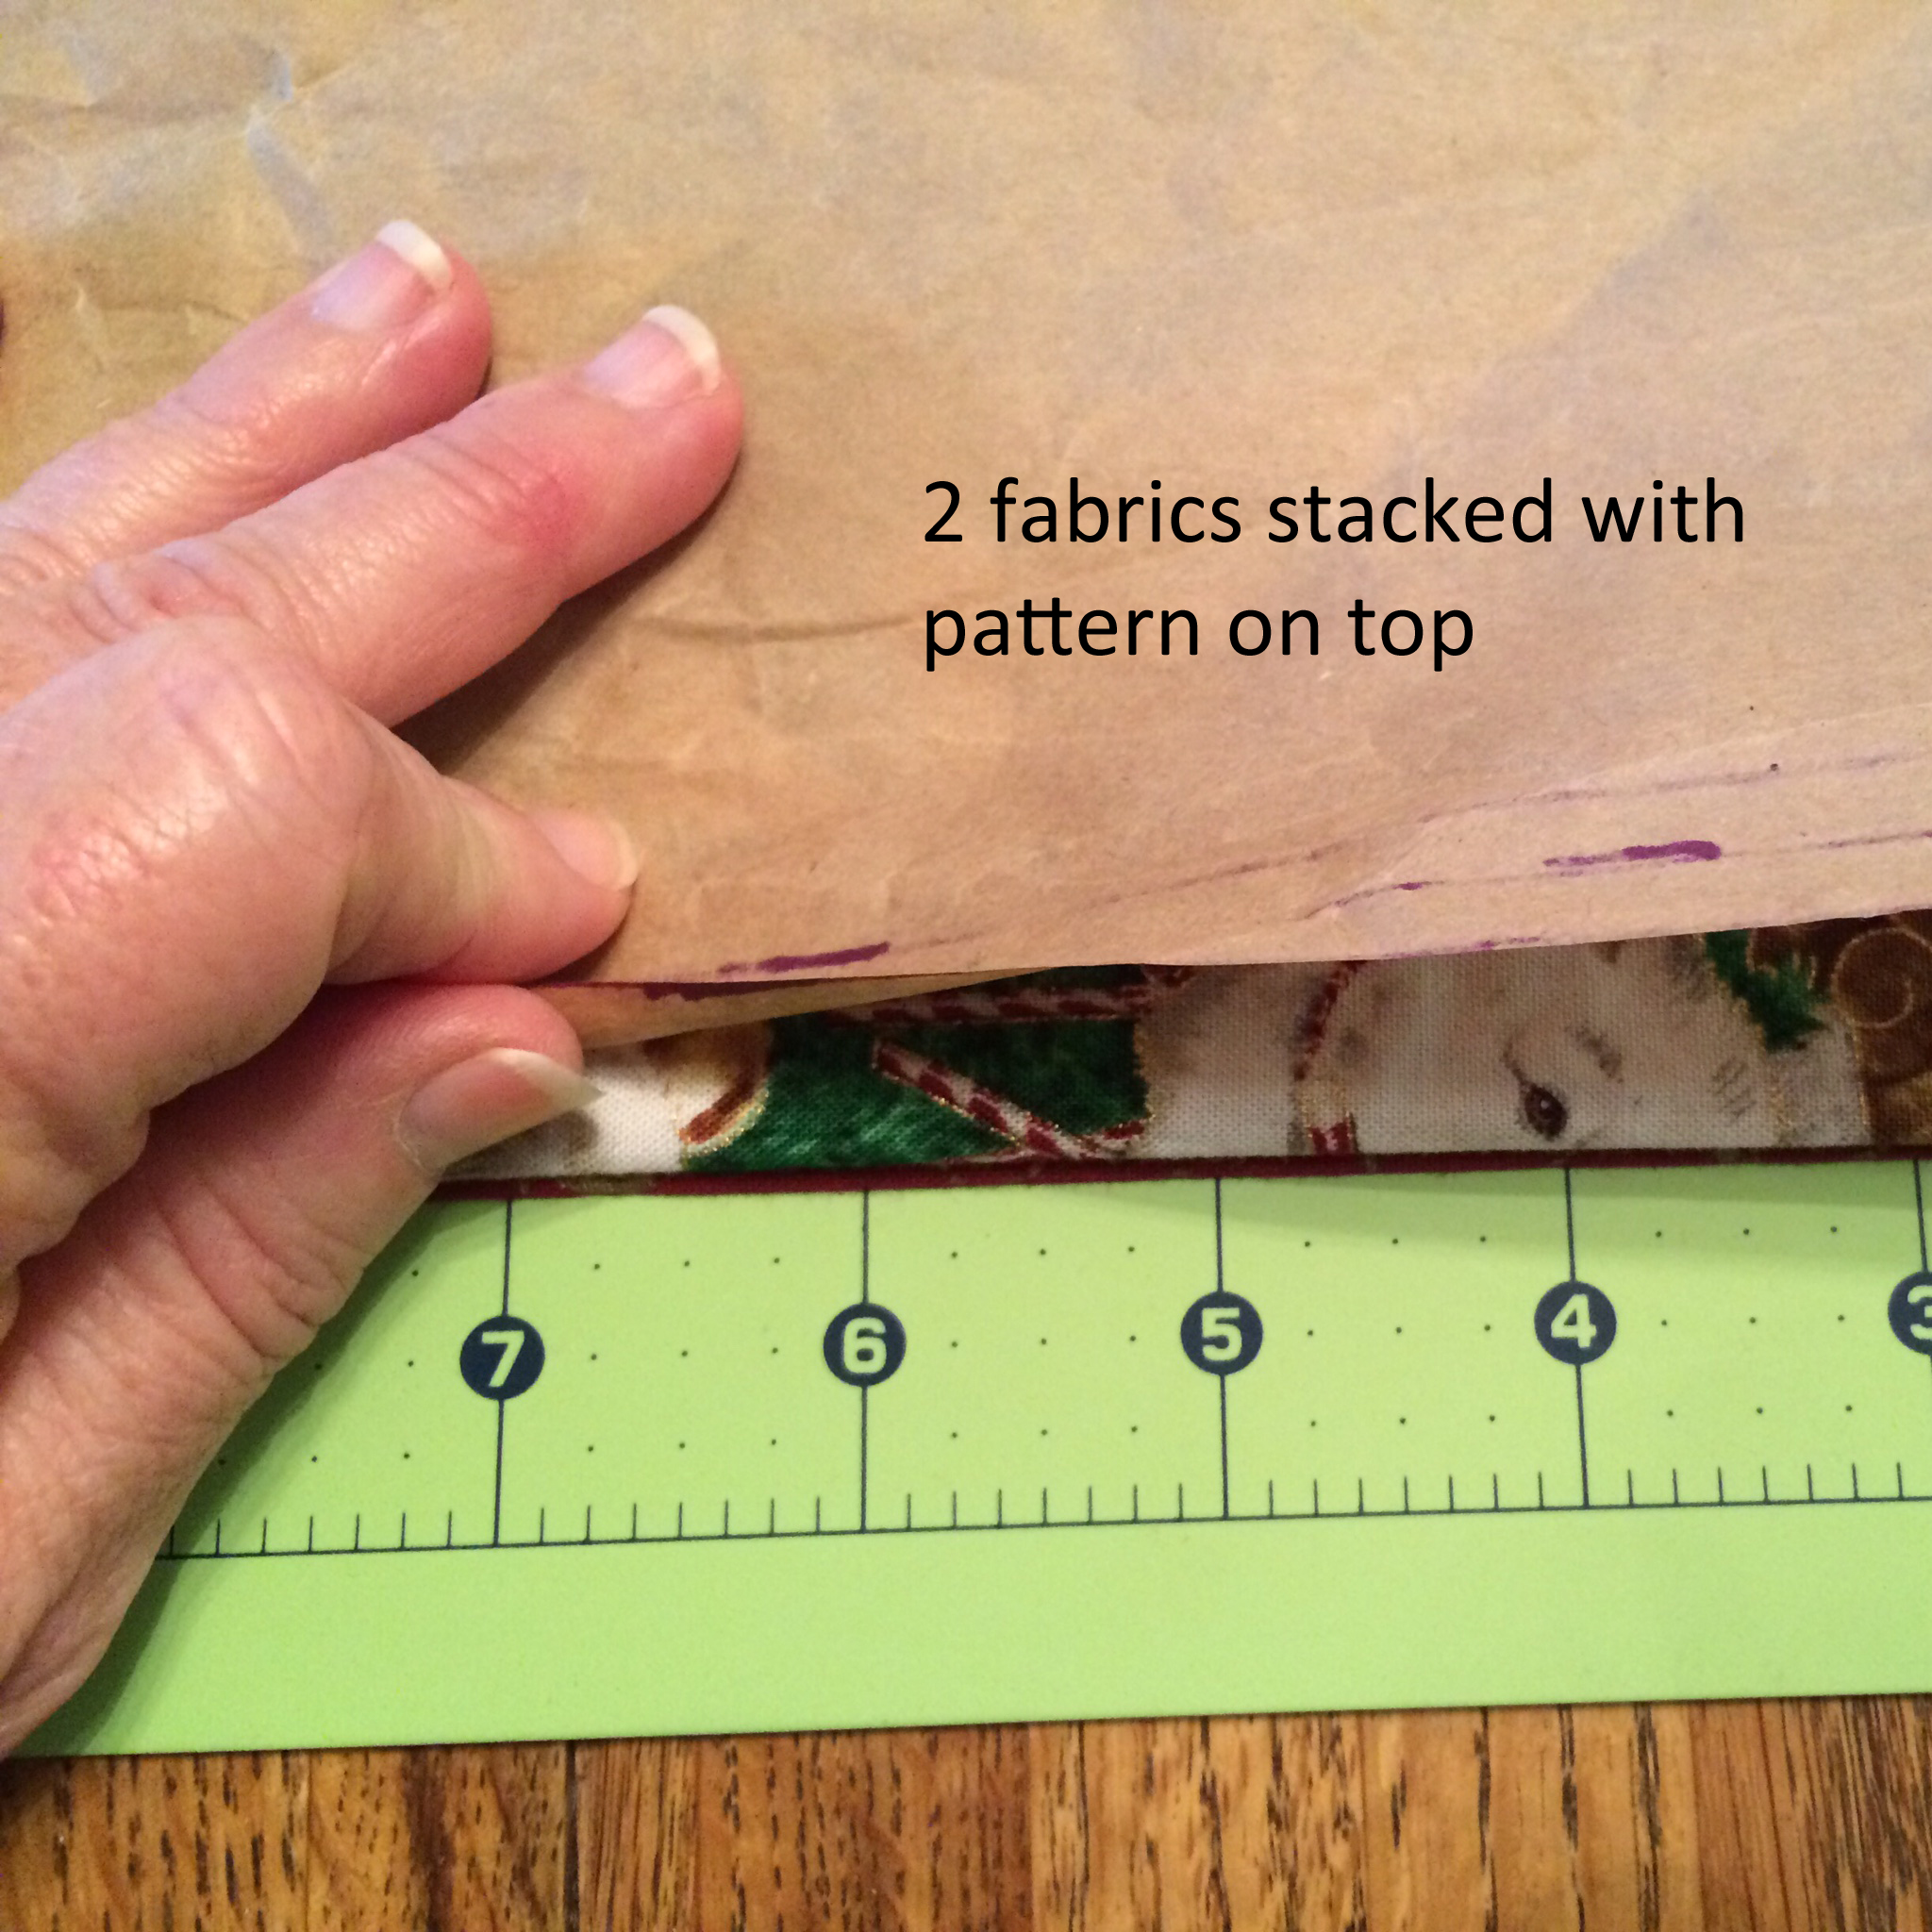
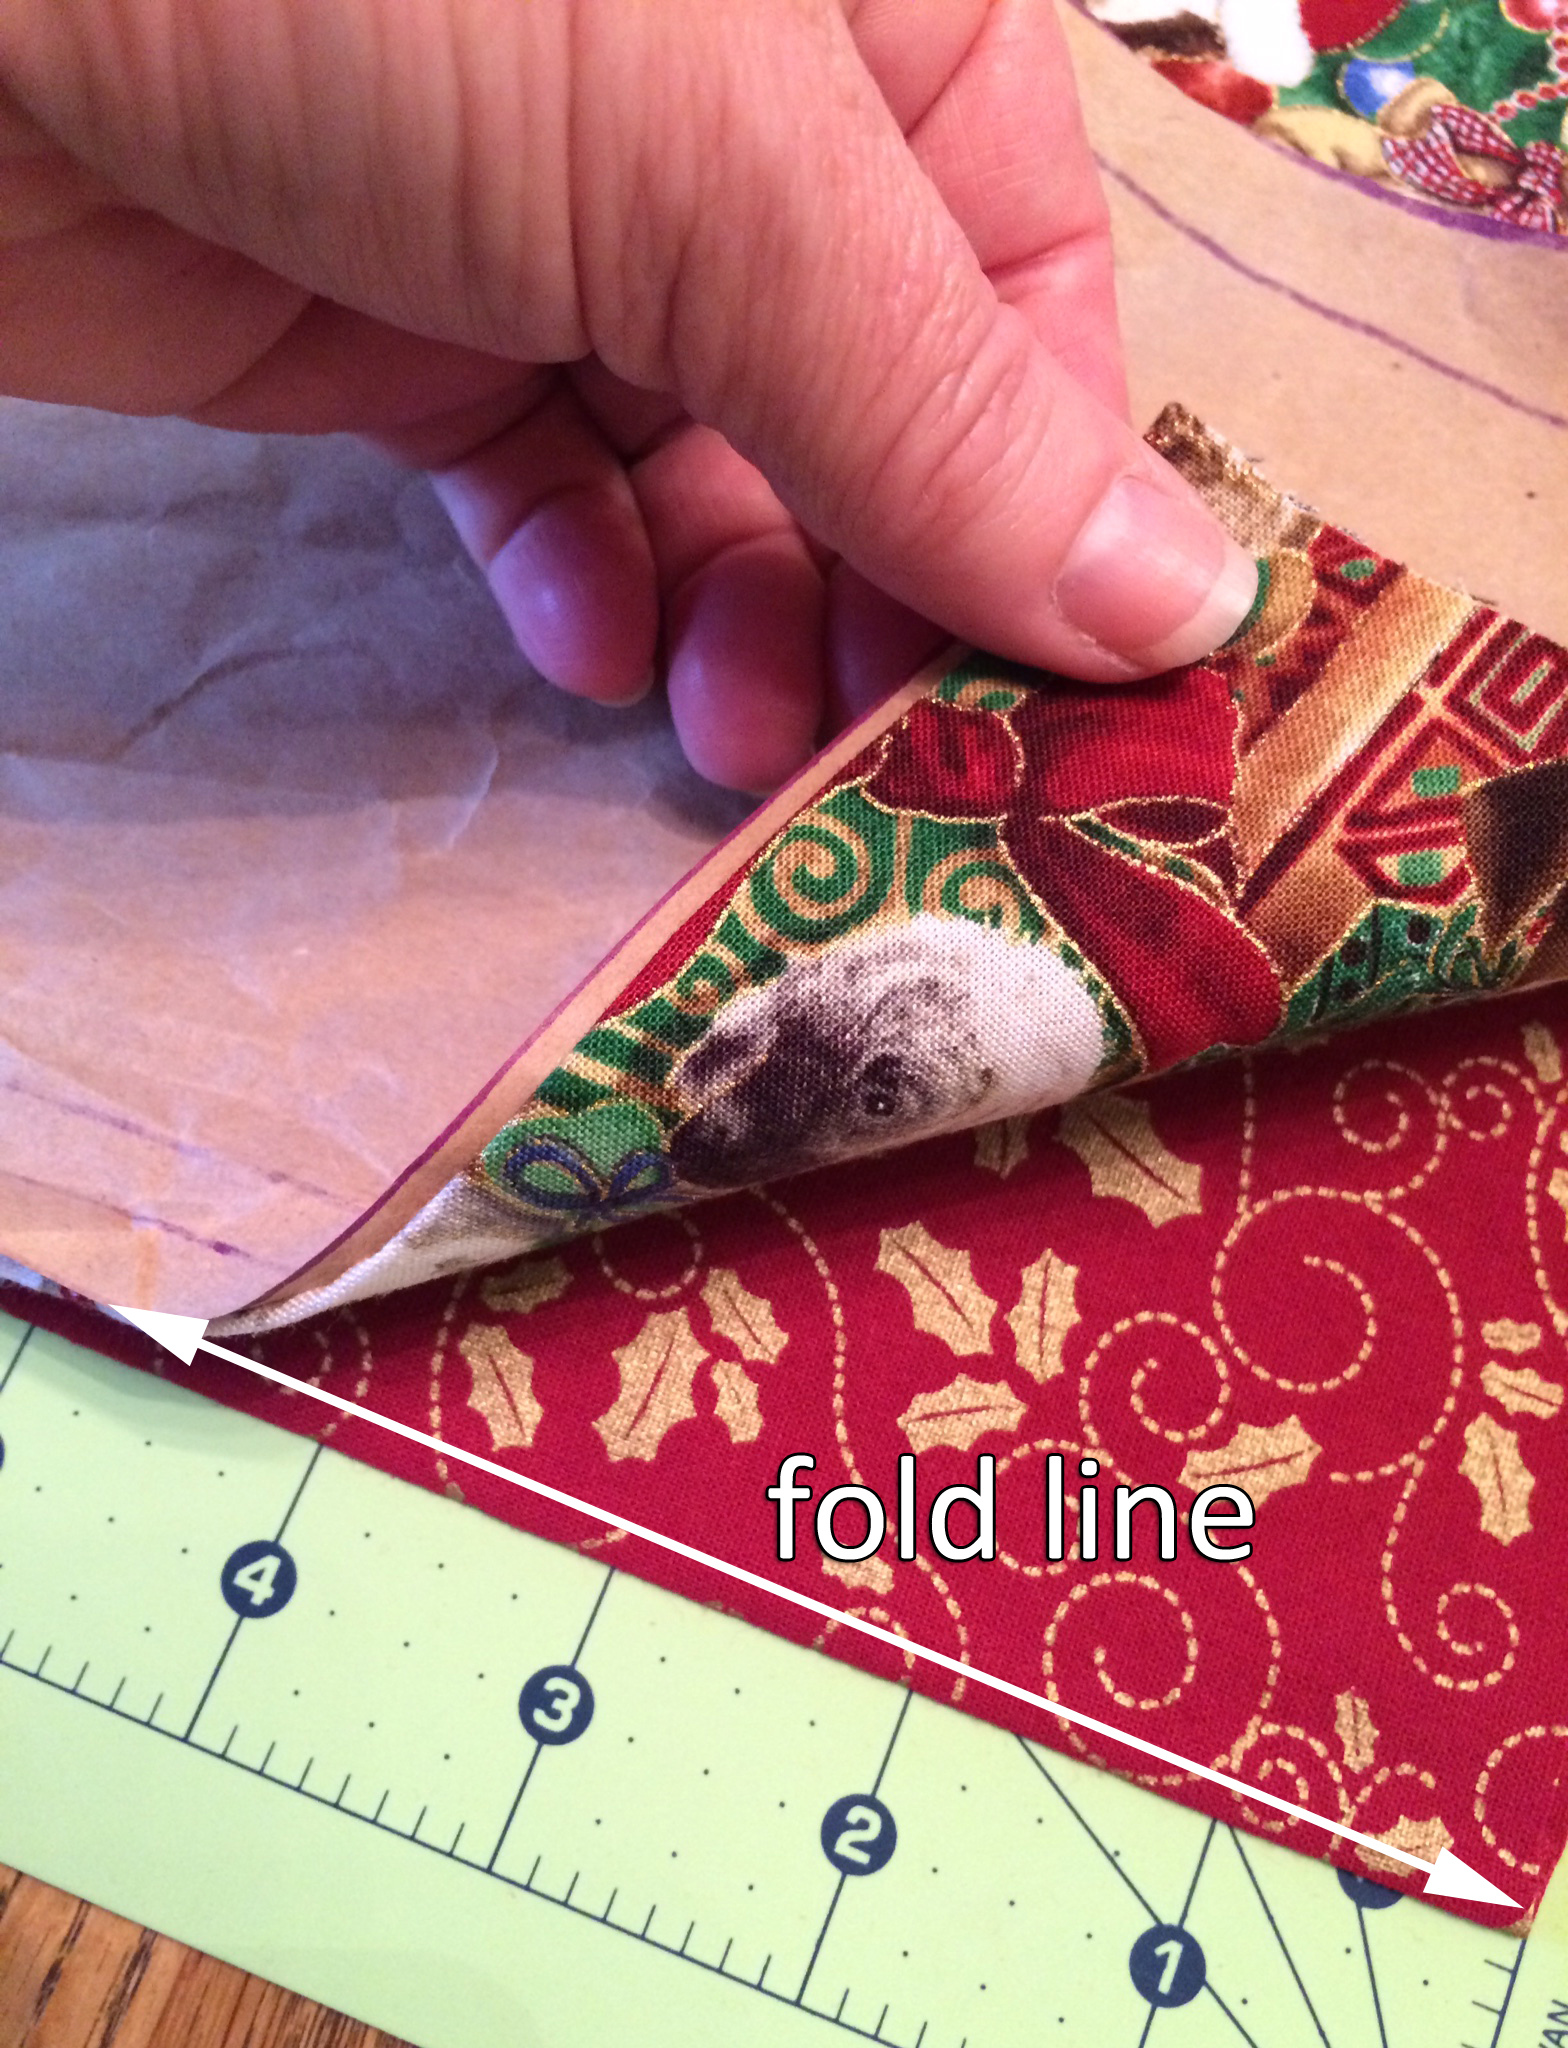
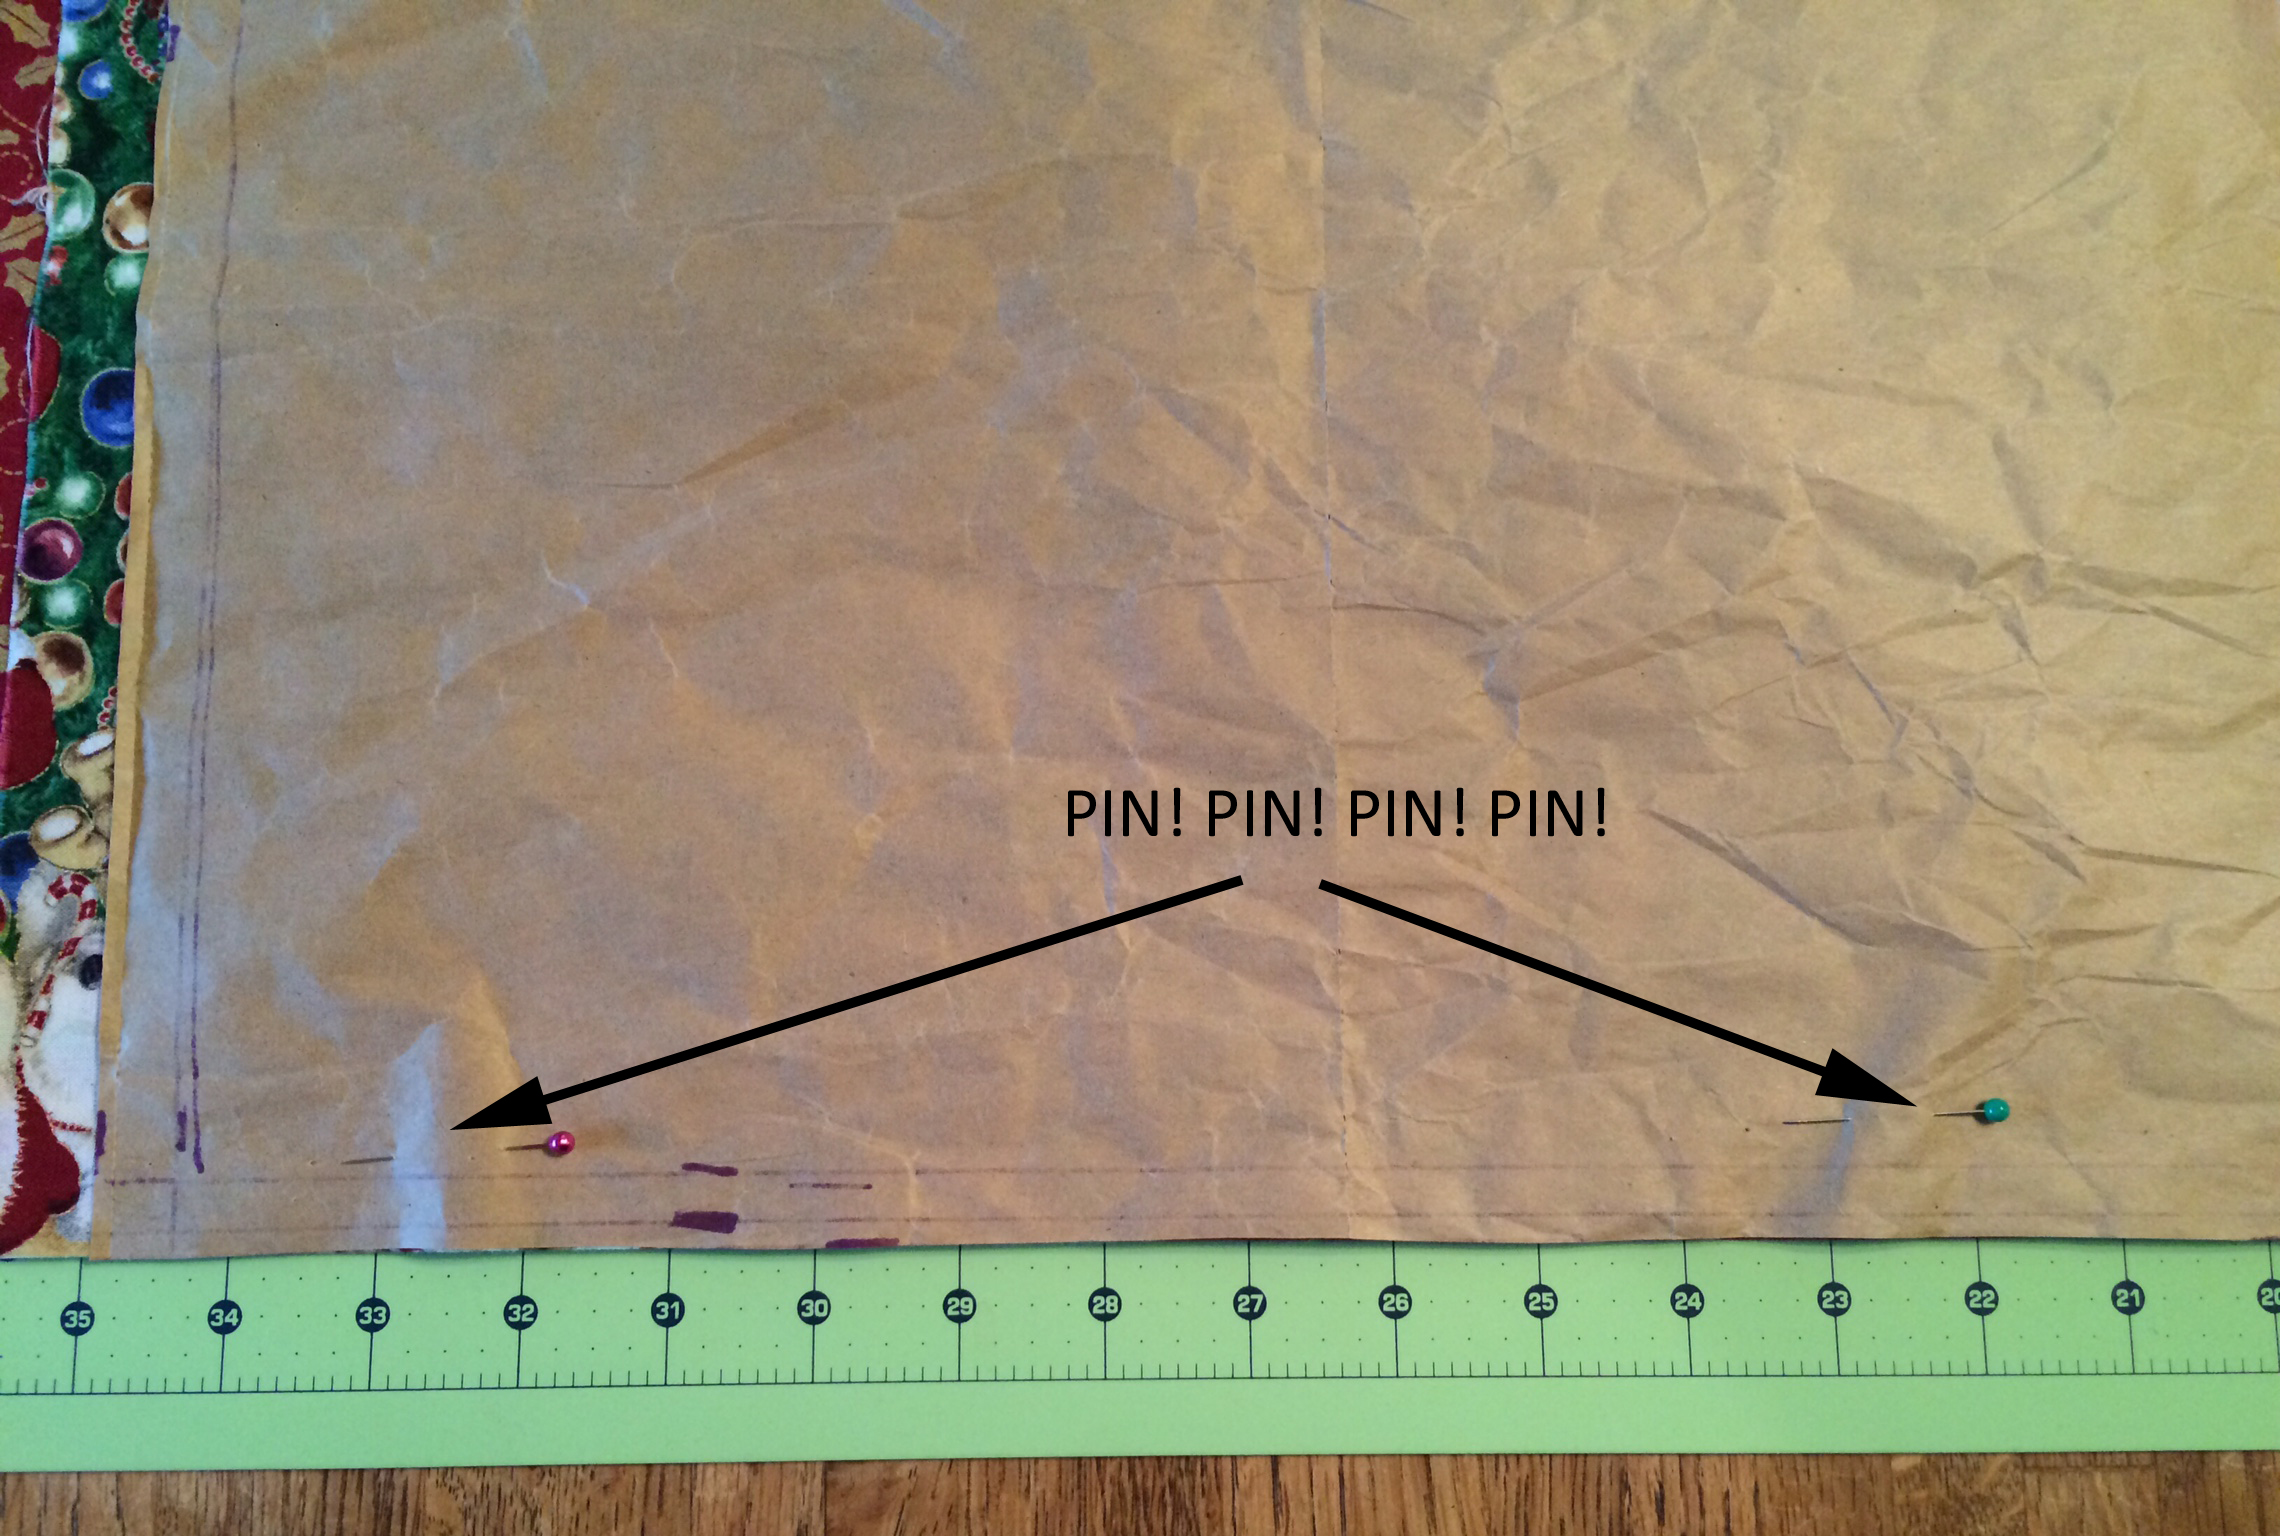
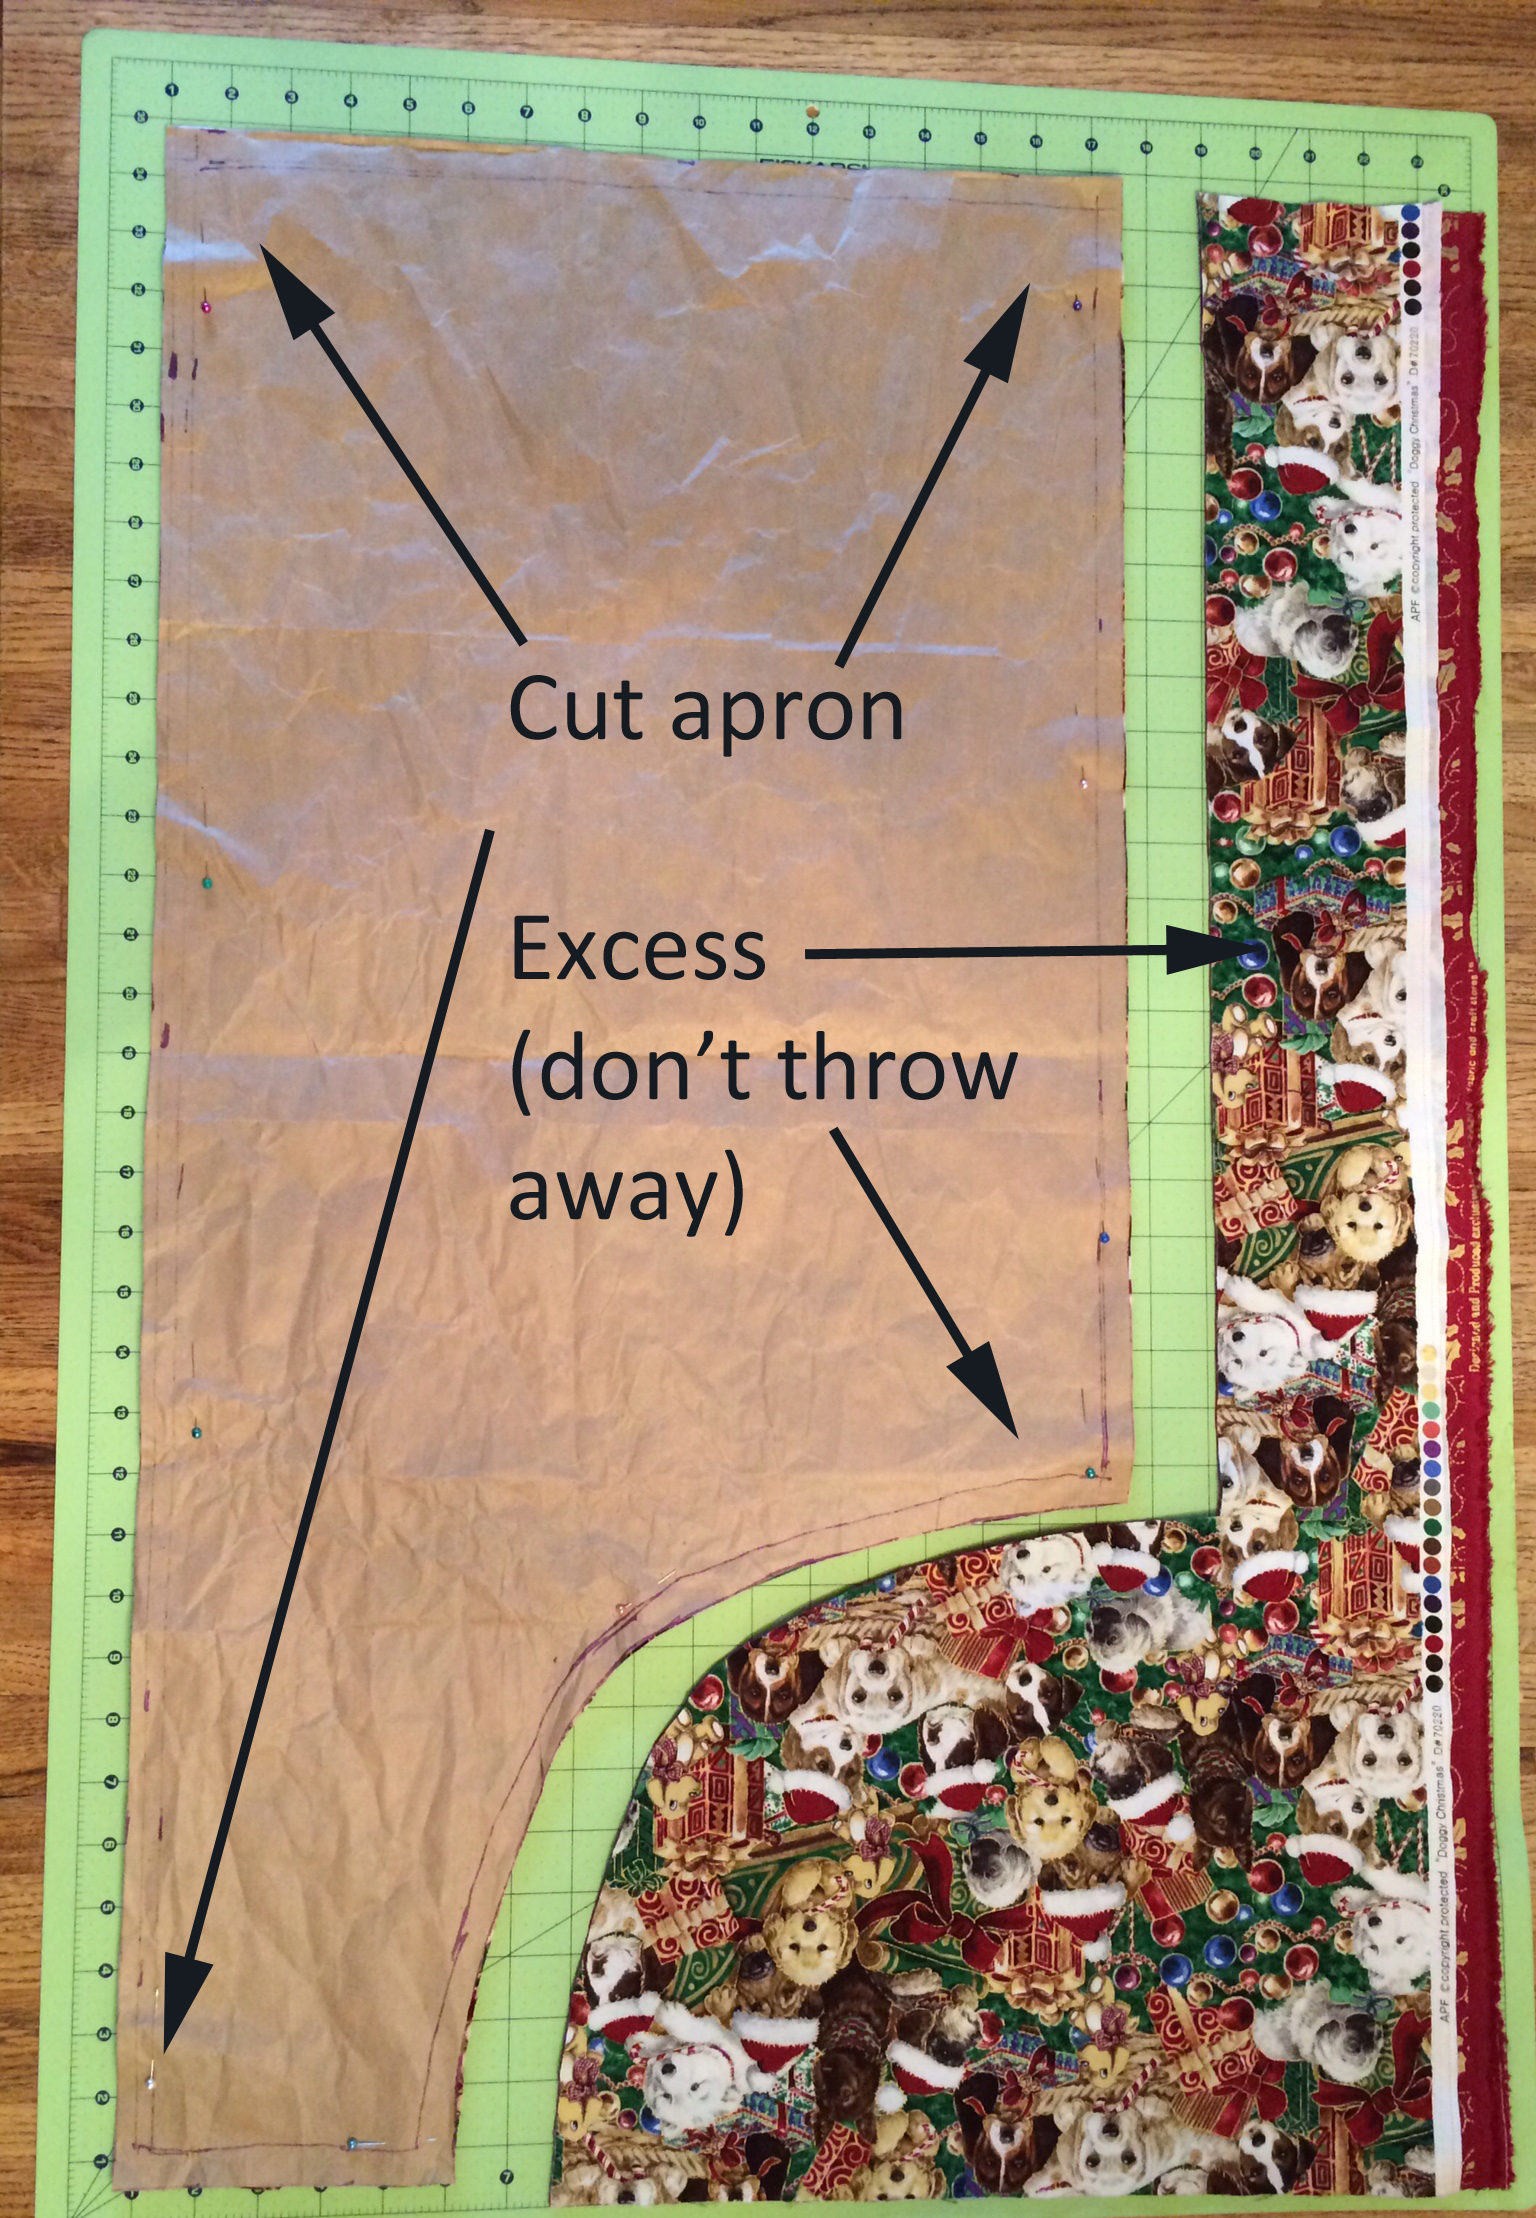
Fold each piece of your pre-washed, ironed fabric in half so that the selvage edge (the finished edge) comes together. The approximate dimensions of your fabric piece should be (36″X22″). Now stack one piece on top of the other. This means that you’ll only have to cut out the pattern once and both pieces will match exactly. Make sure the fold edge on one fabric matches the fold edge on the other piece. Then lay the pattern on top of the fabric stack with the longest side along the folded edge. Pin the pattern in place around all the edges. I know there’s a temptation to not pin, but don’t do it. I speak from experience: the pattern will shift and you’ll want to kick yourself for not pinning it. Save yourself the aggravation and just pin! Once pinned, but along the edges of the pattern. You’ll have excess pieces of fabric. Don’t throw these away – you need them for your apron strings.
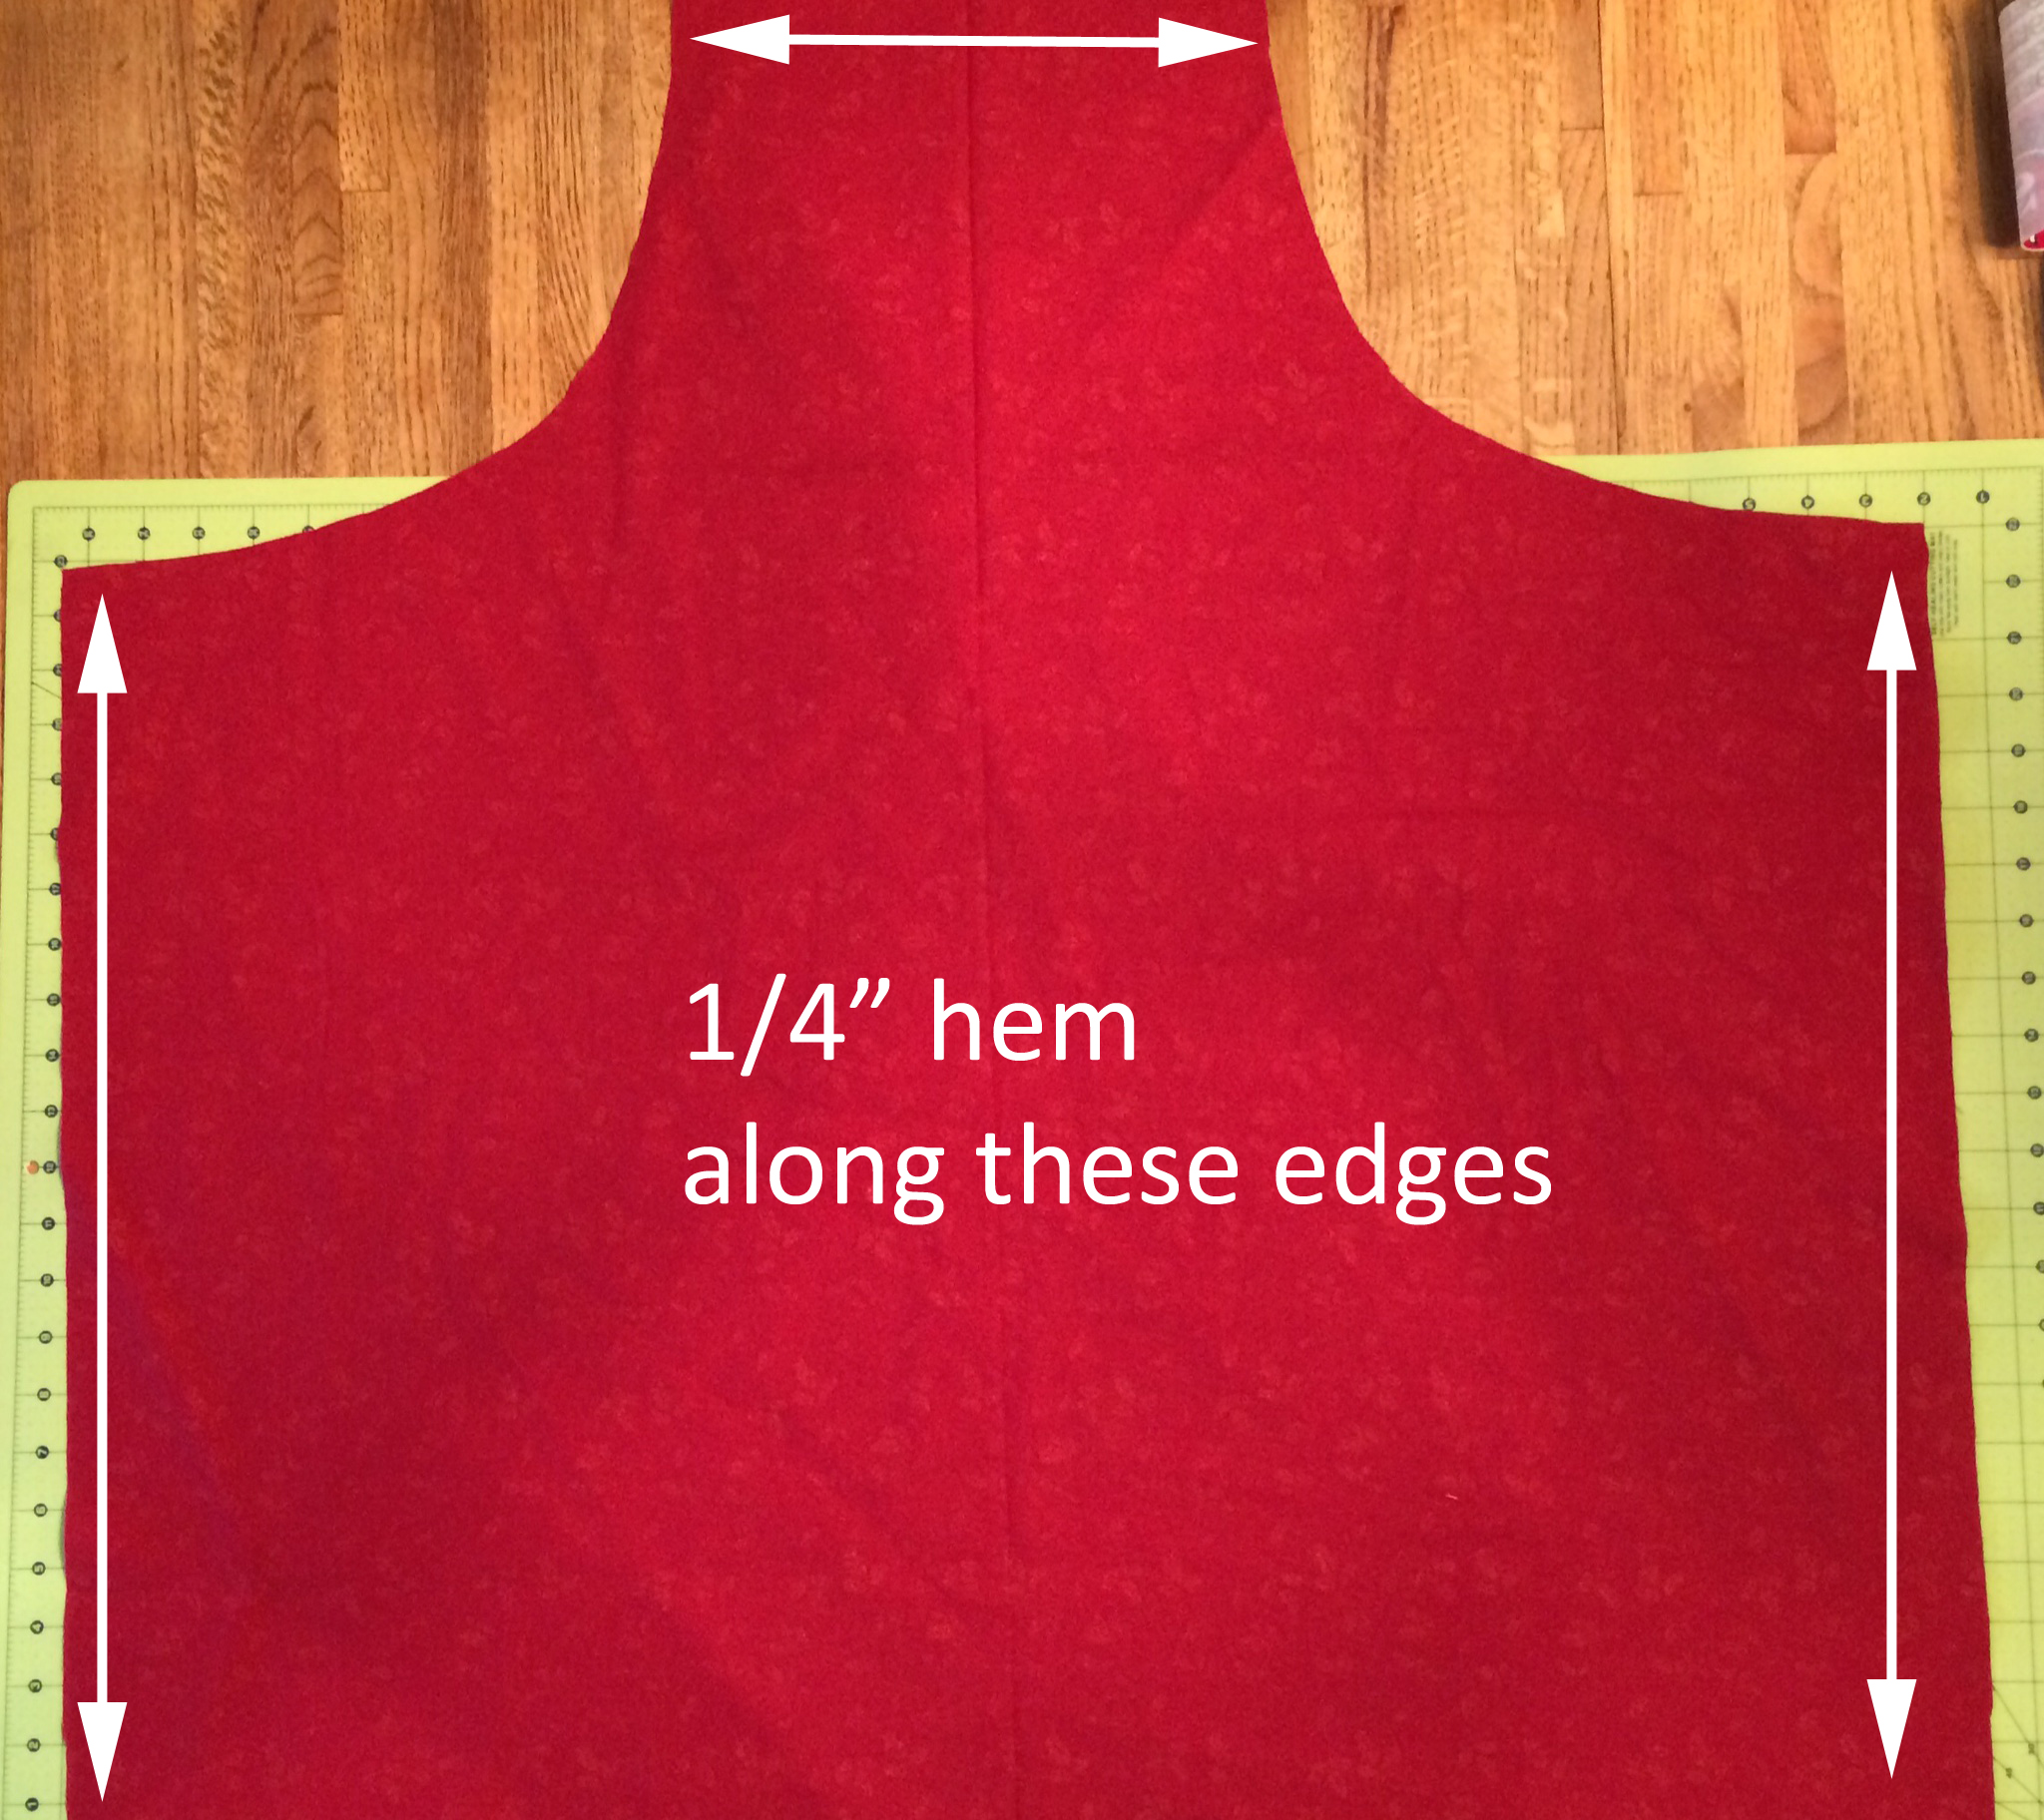
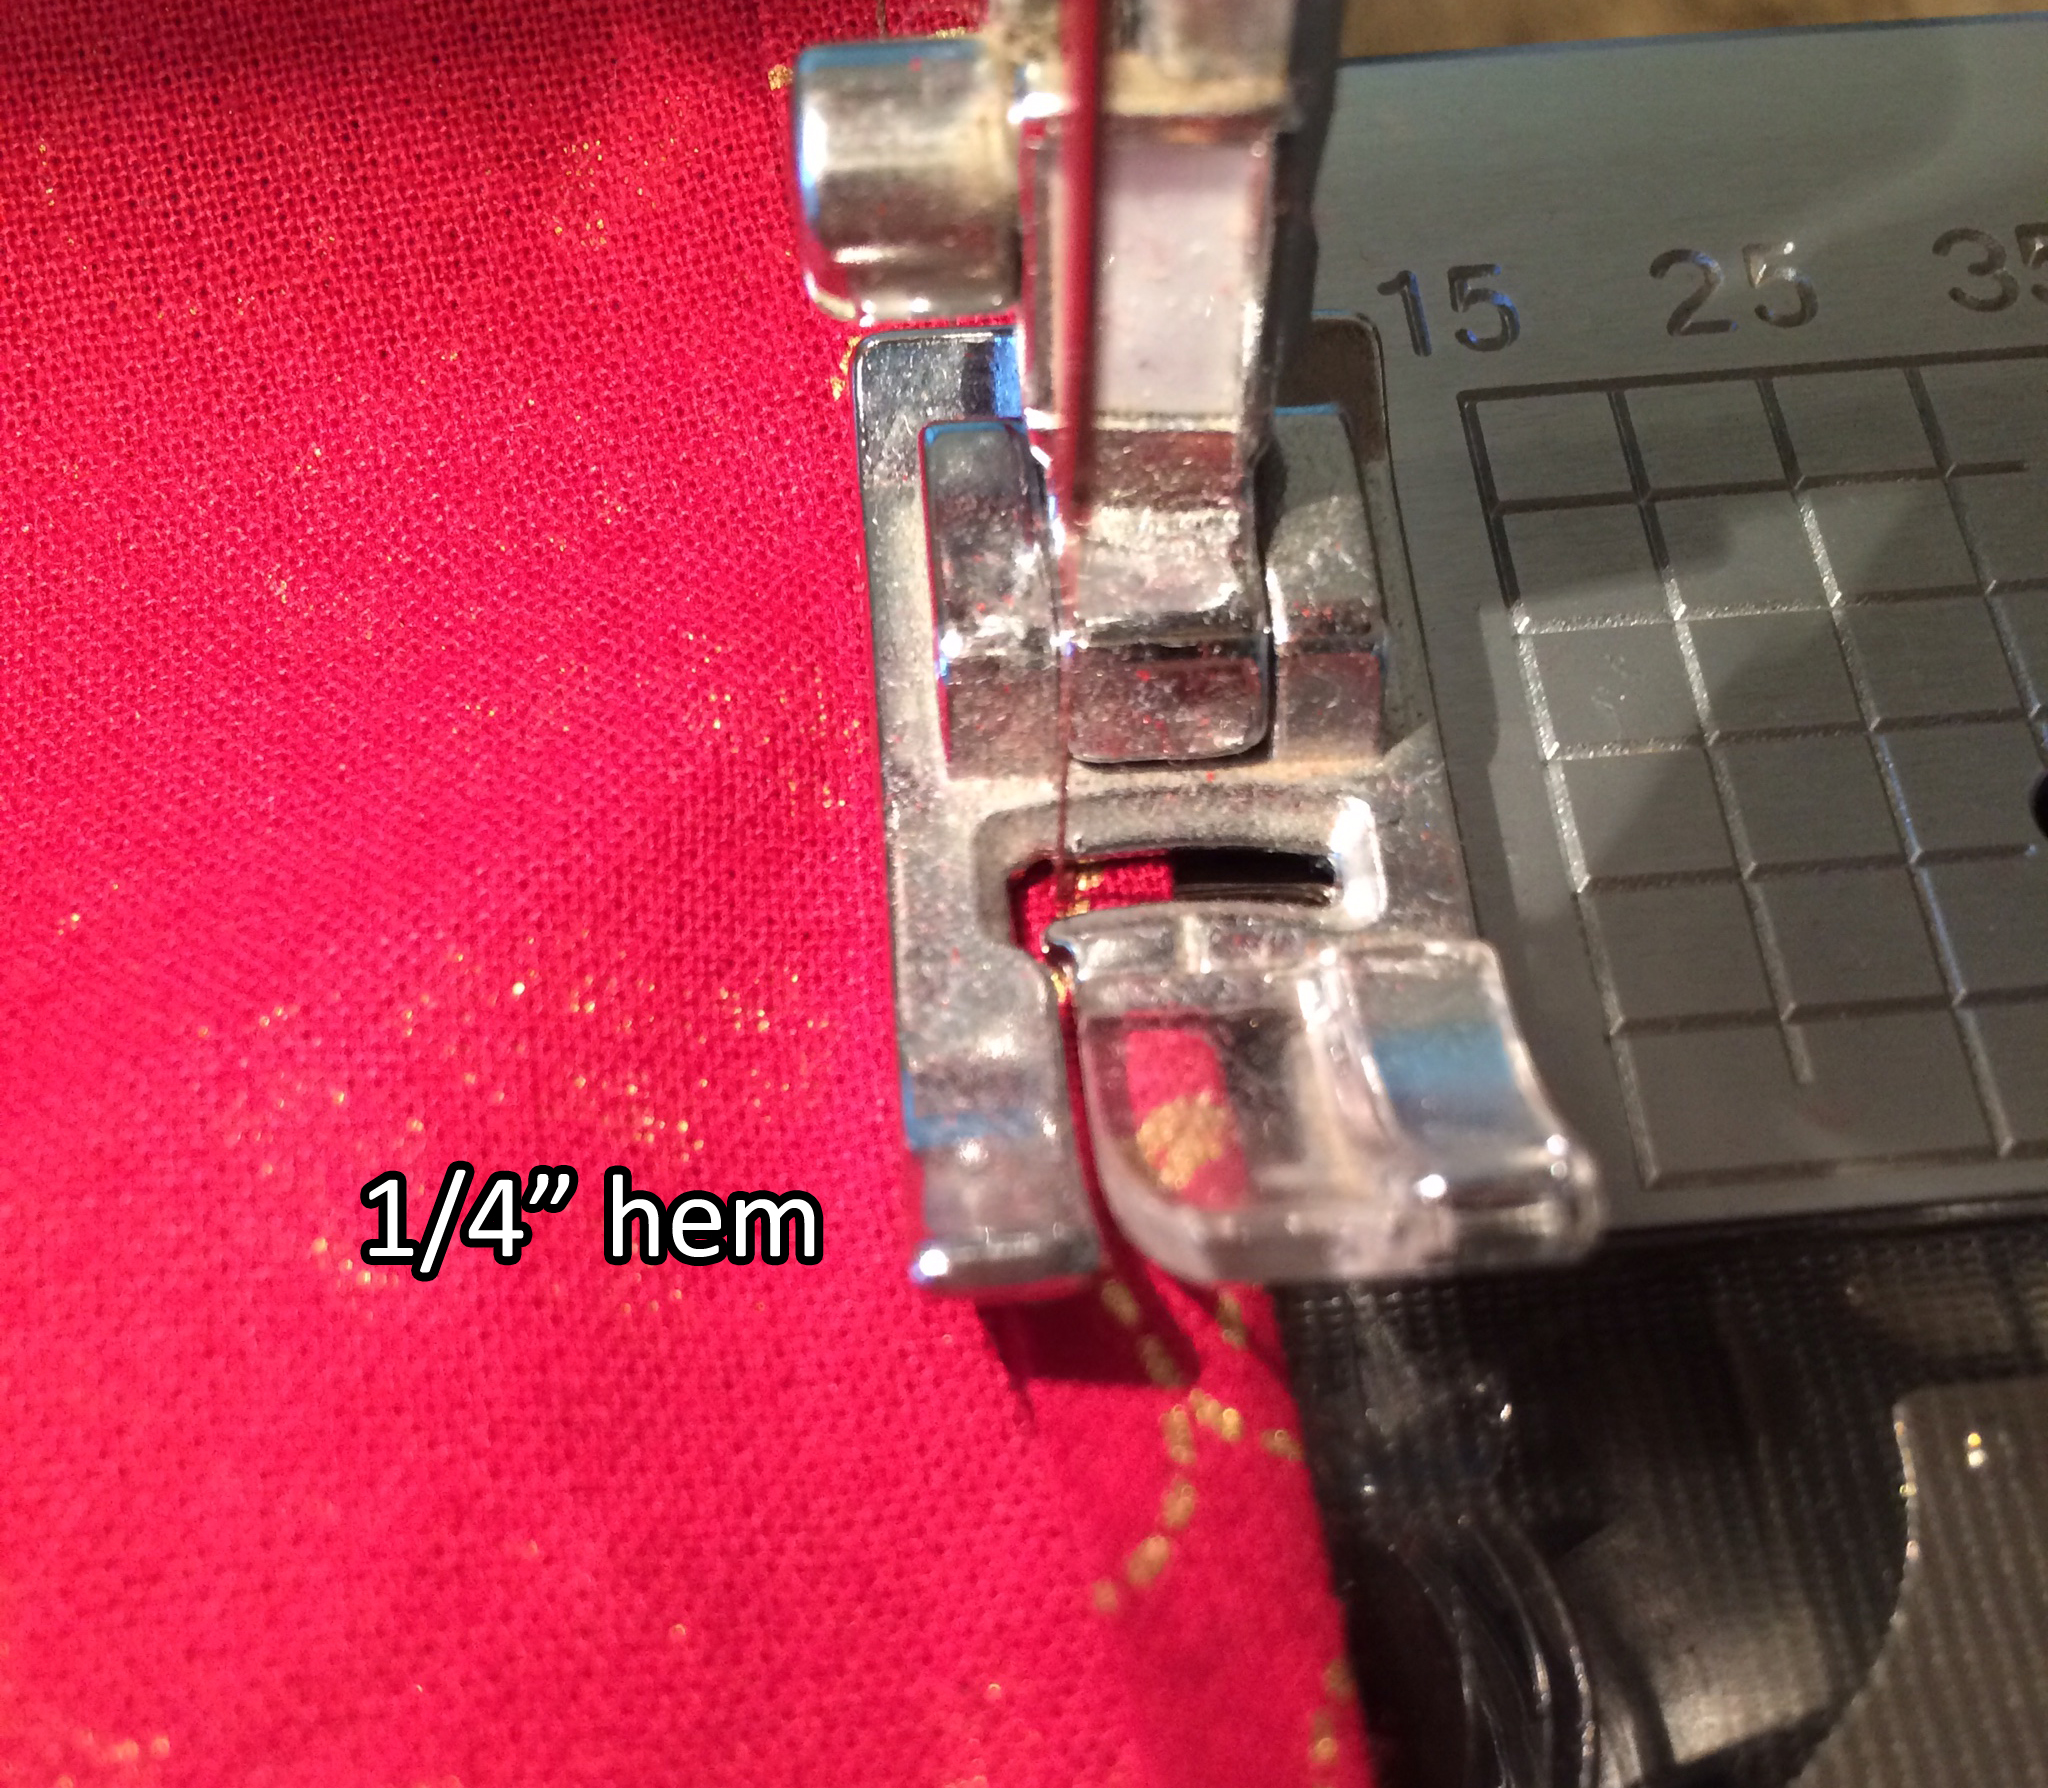
Step 3: Sewing a 1/4″ hem.
Because this apron is adjustable, we will be sewing a tube from the waist to the apron top along the armhole. This requires a neat finish to all the edges before we sew the two pieces together. Fold over and sew a 1/4″ hem along both sides and the top of the apron. Do this for both pieces of fabric.
Step 4: Sewing the two pieces of fabric together.
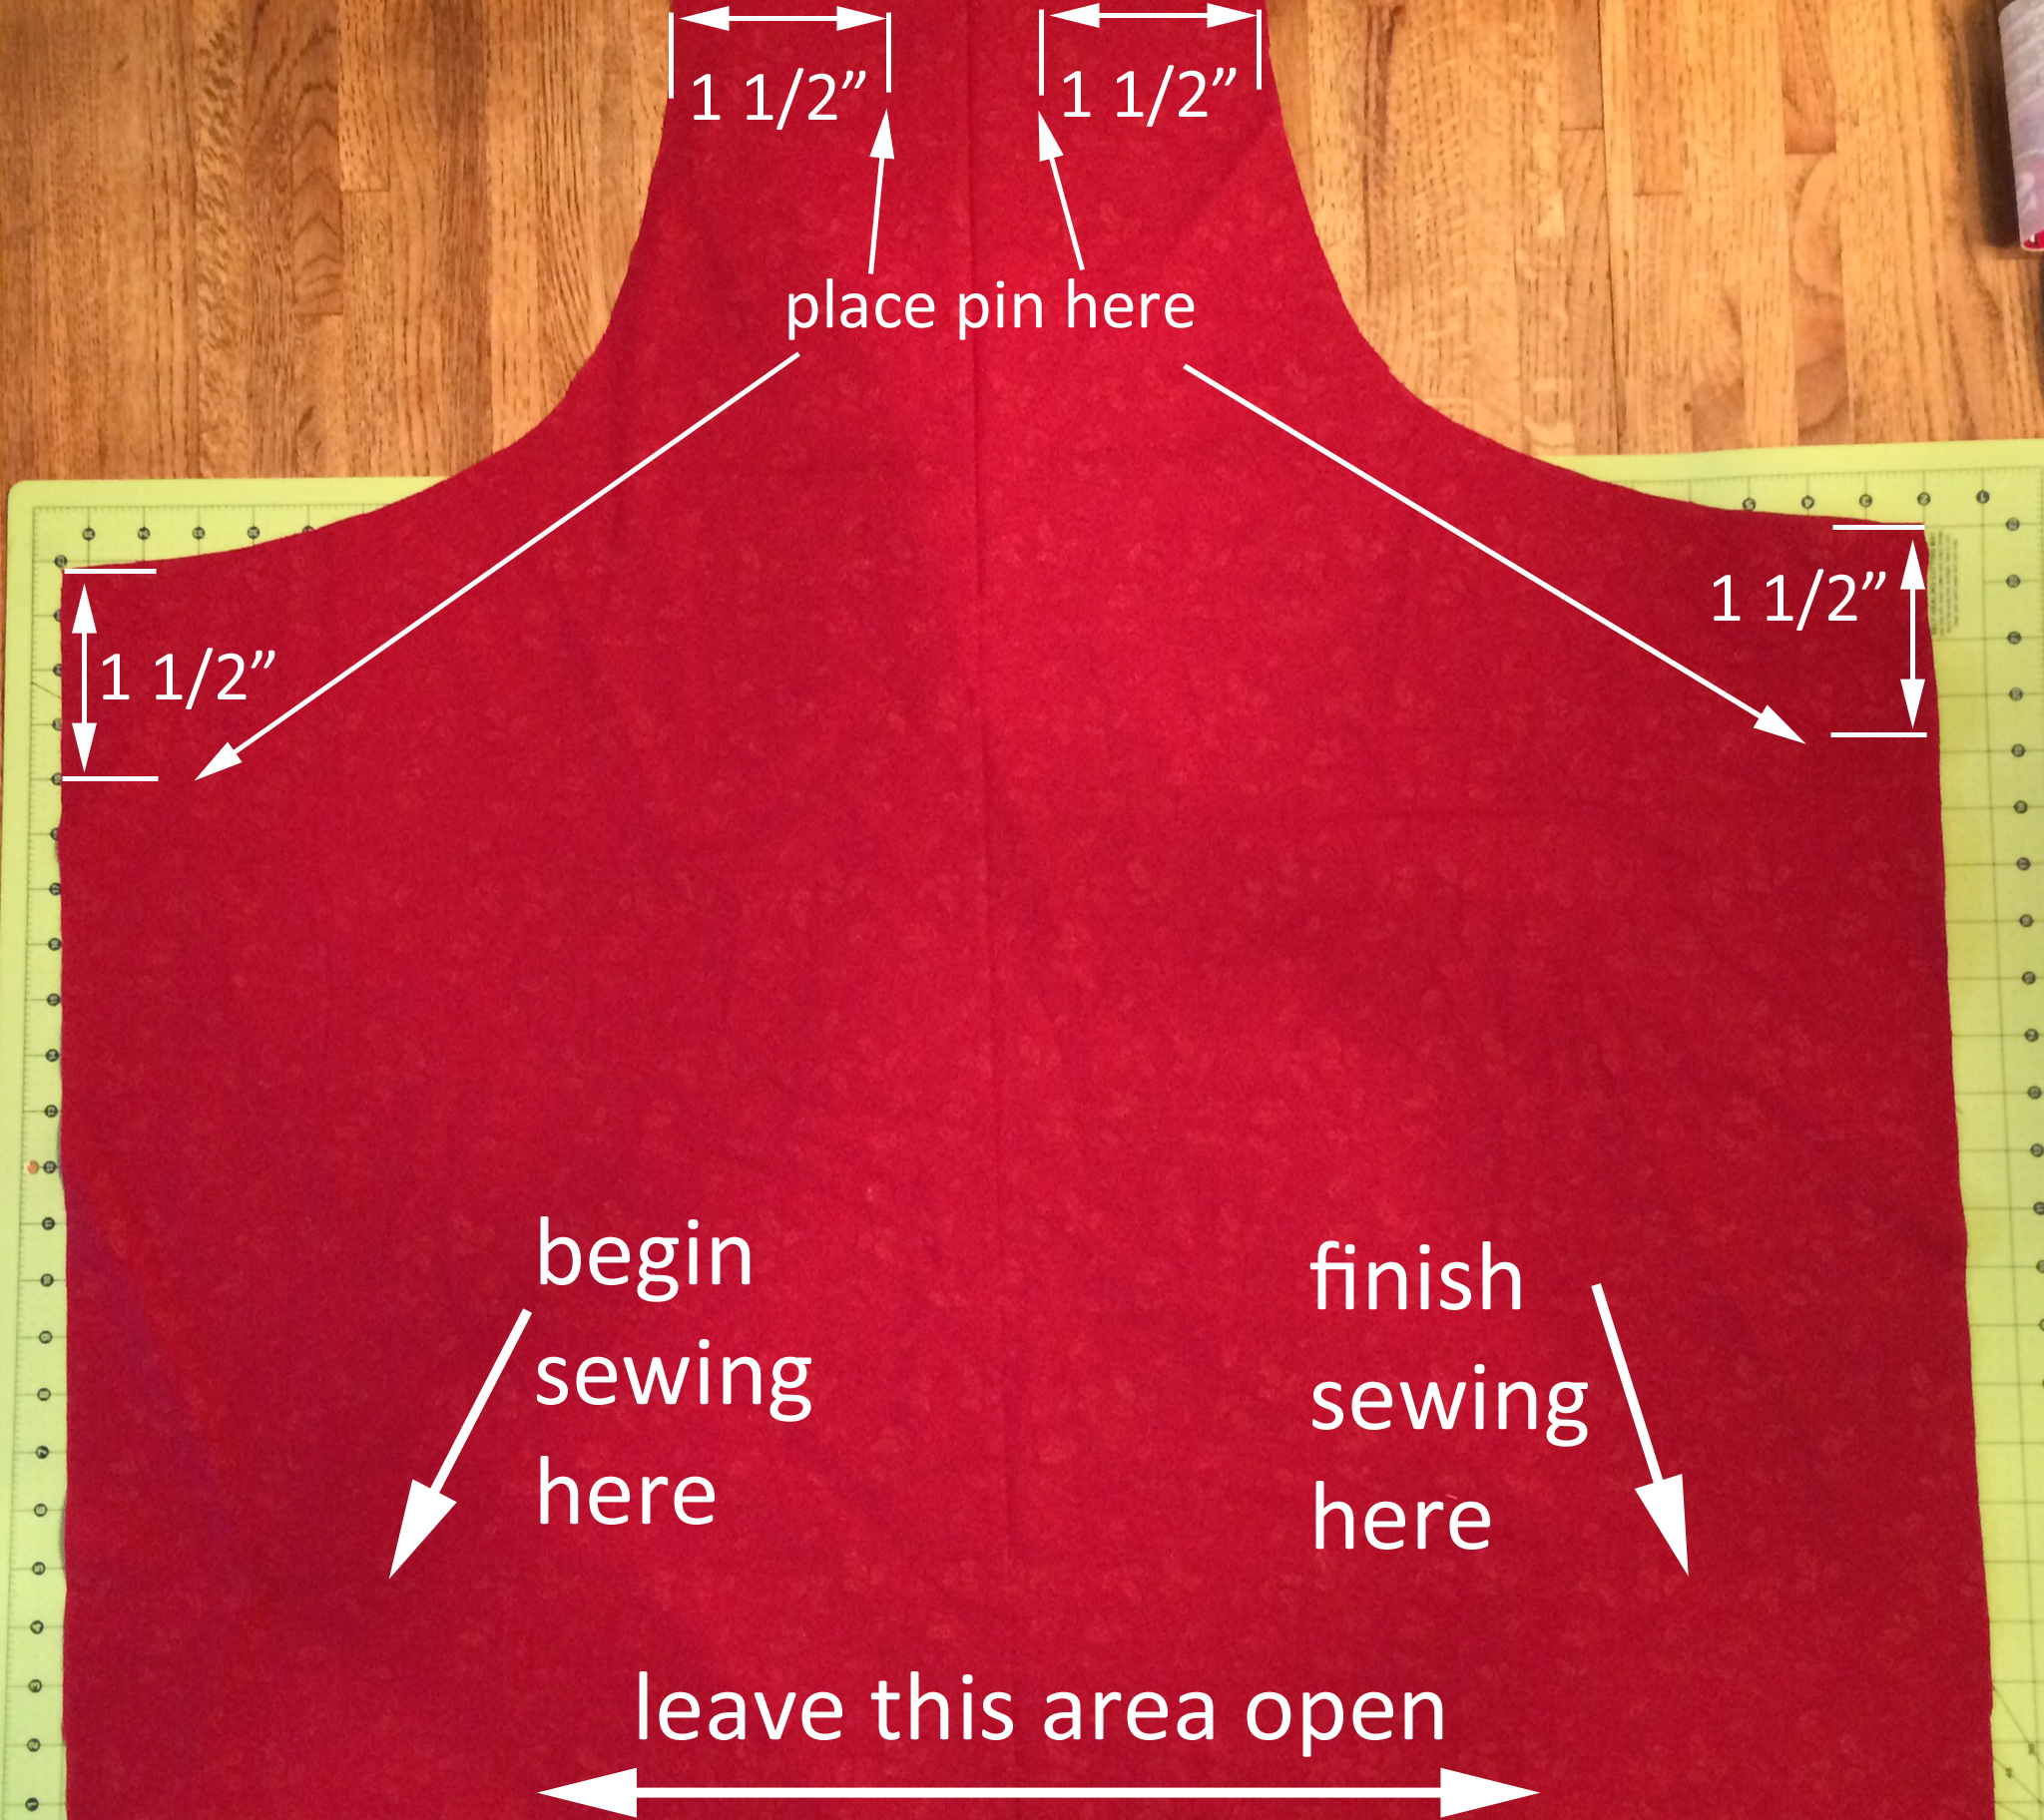
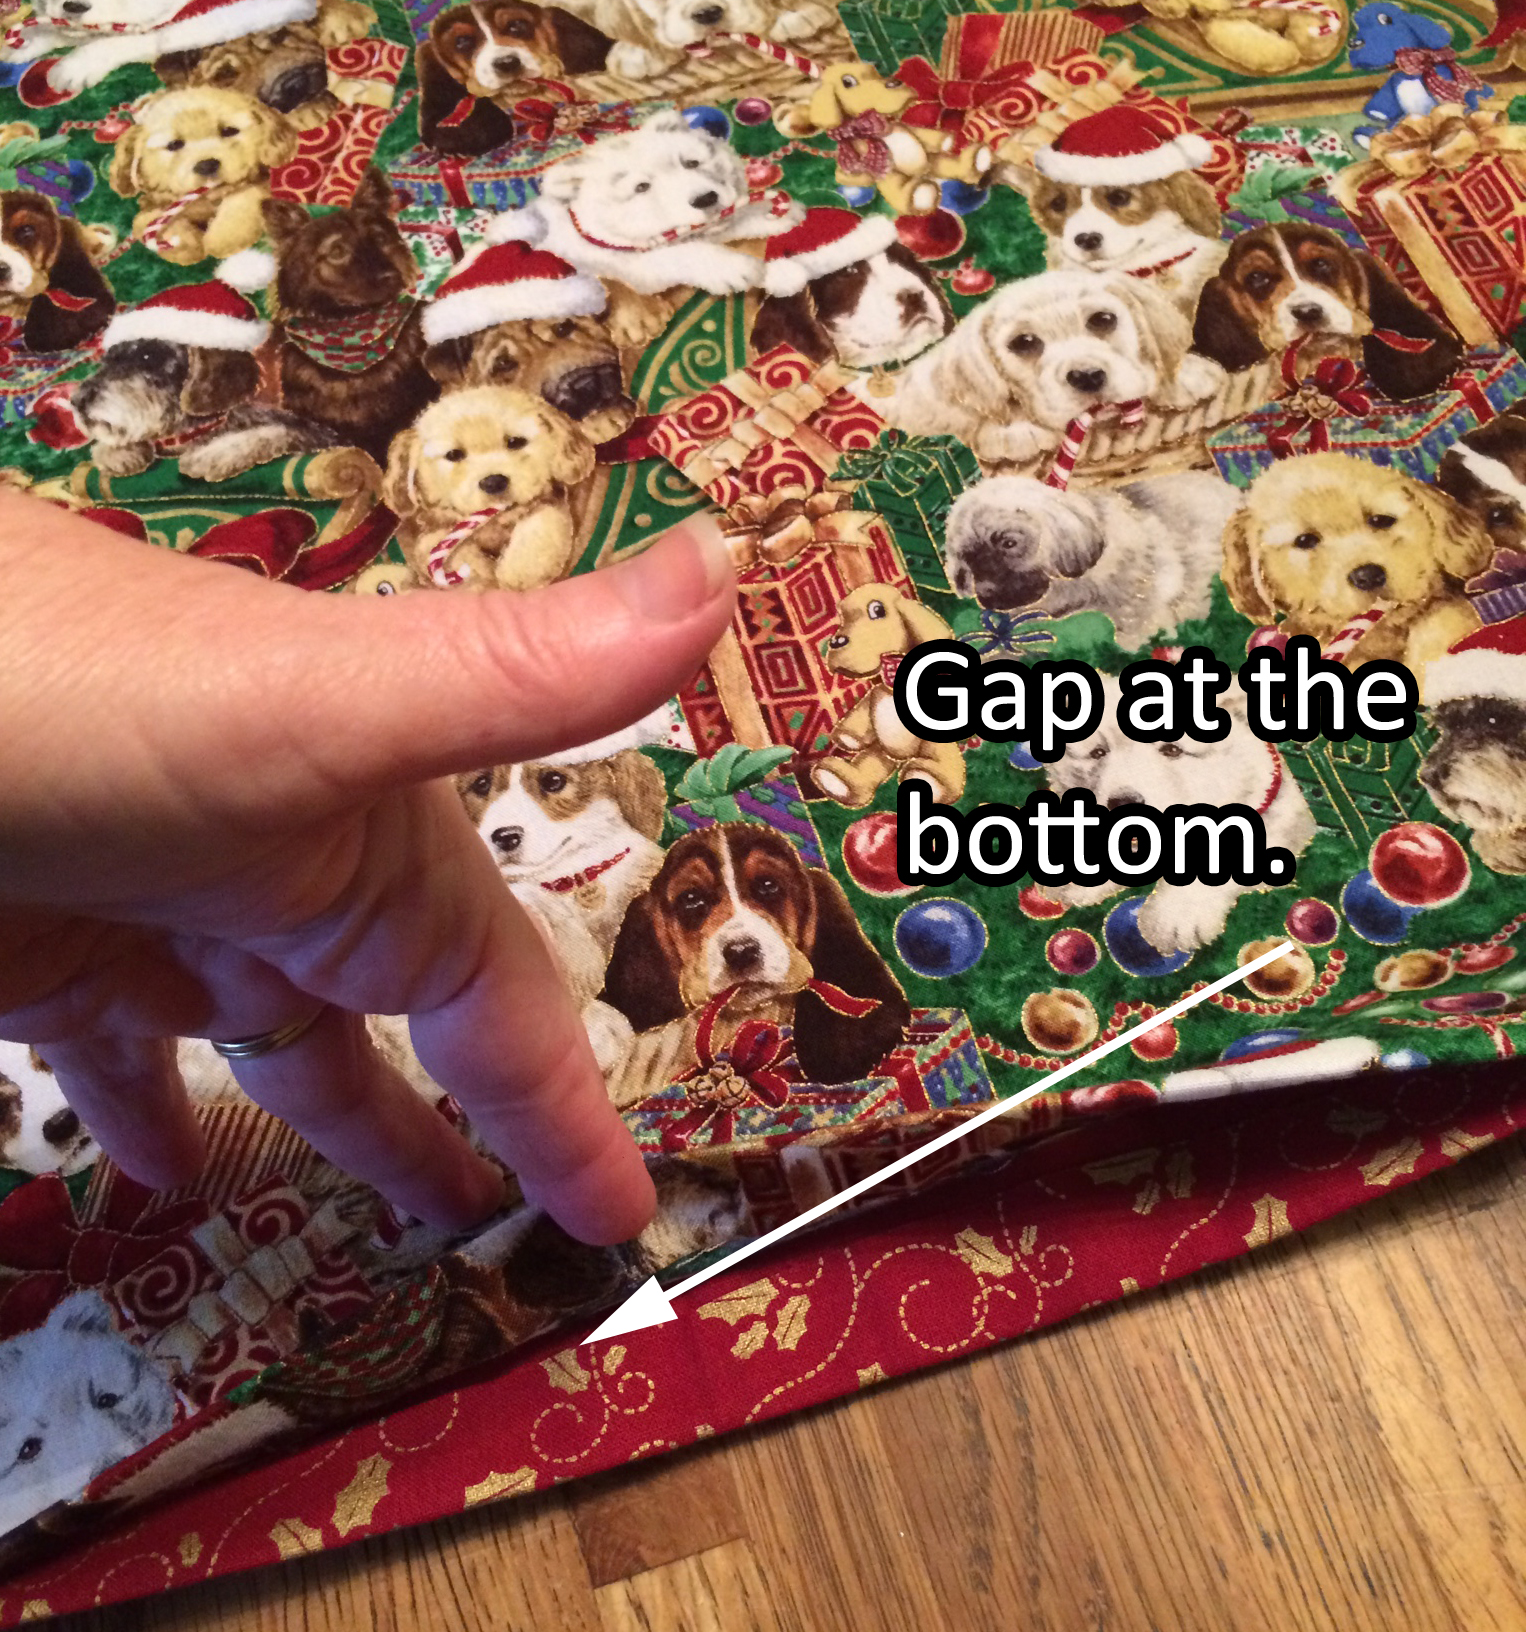
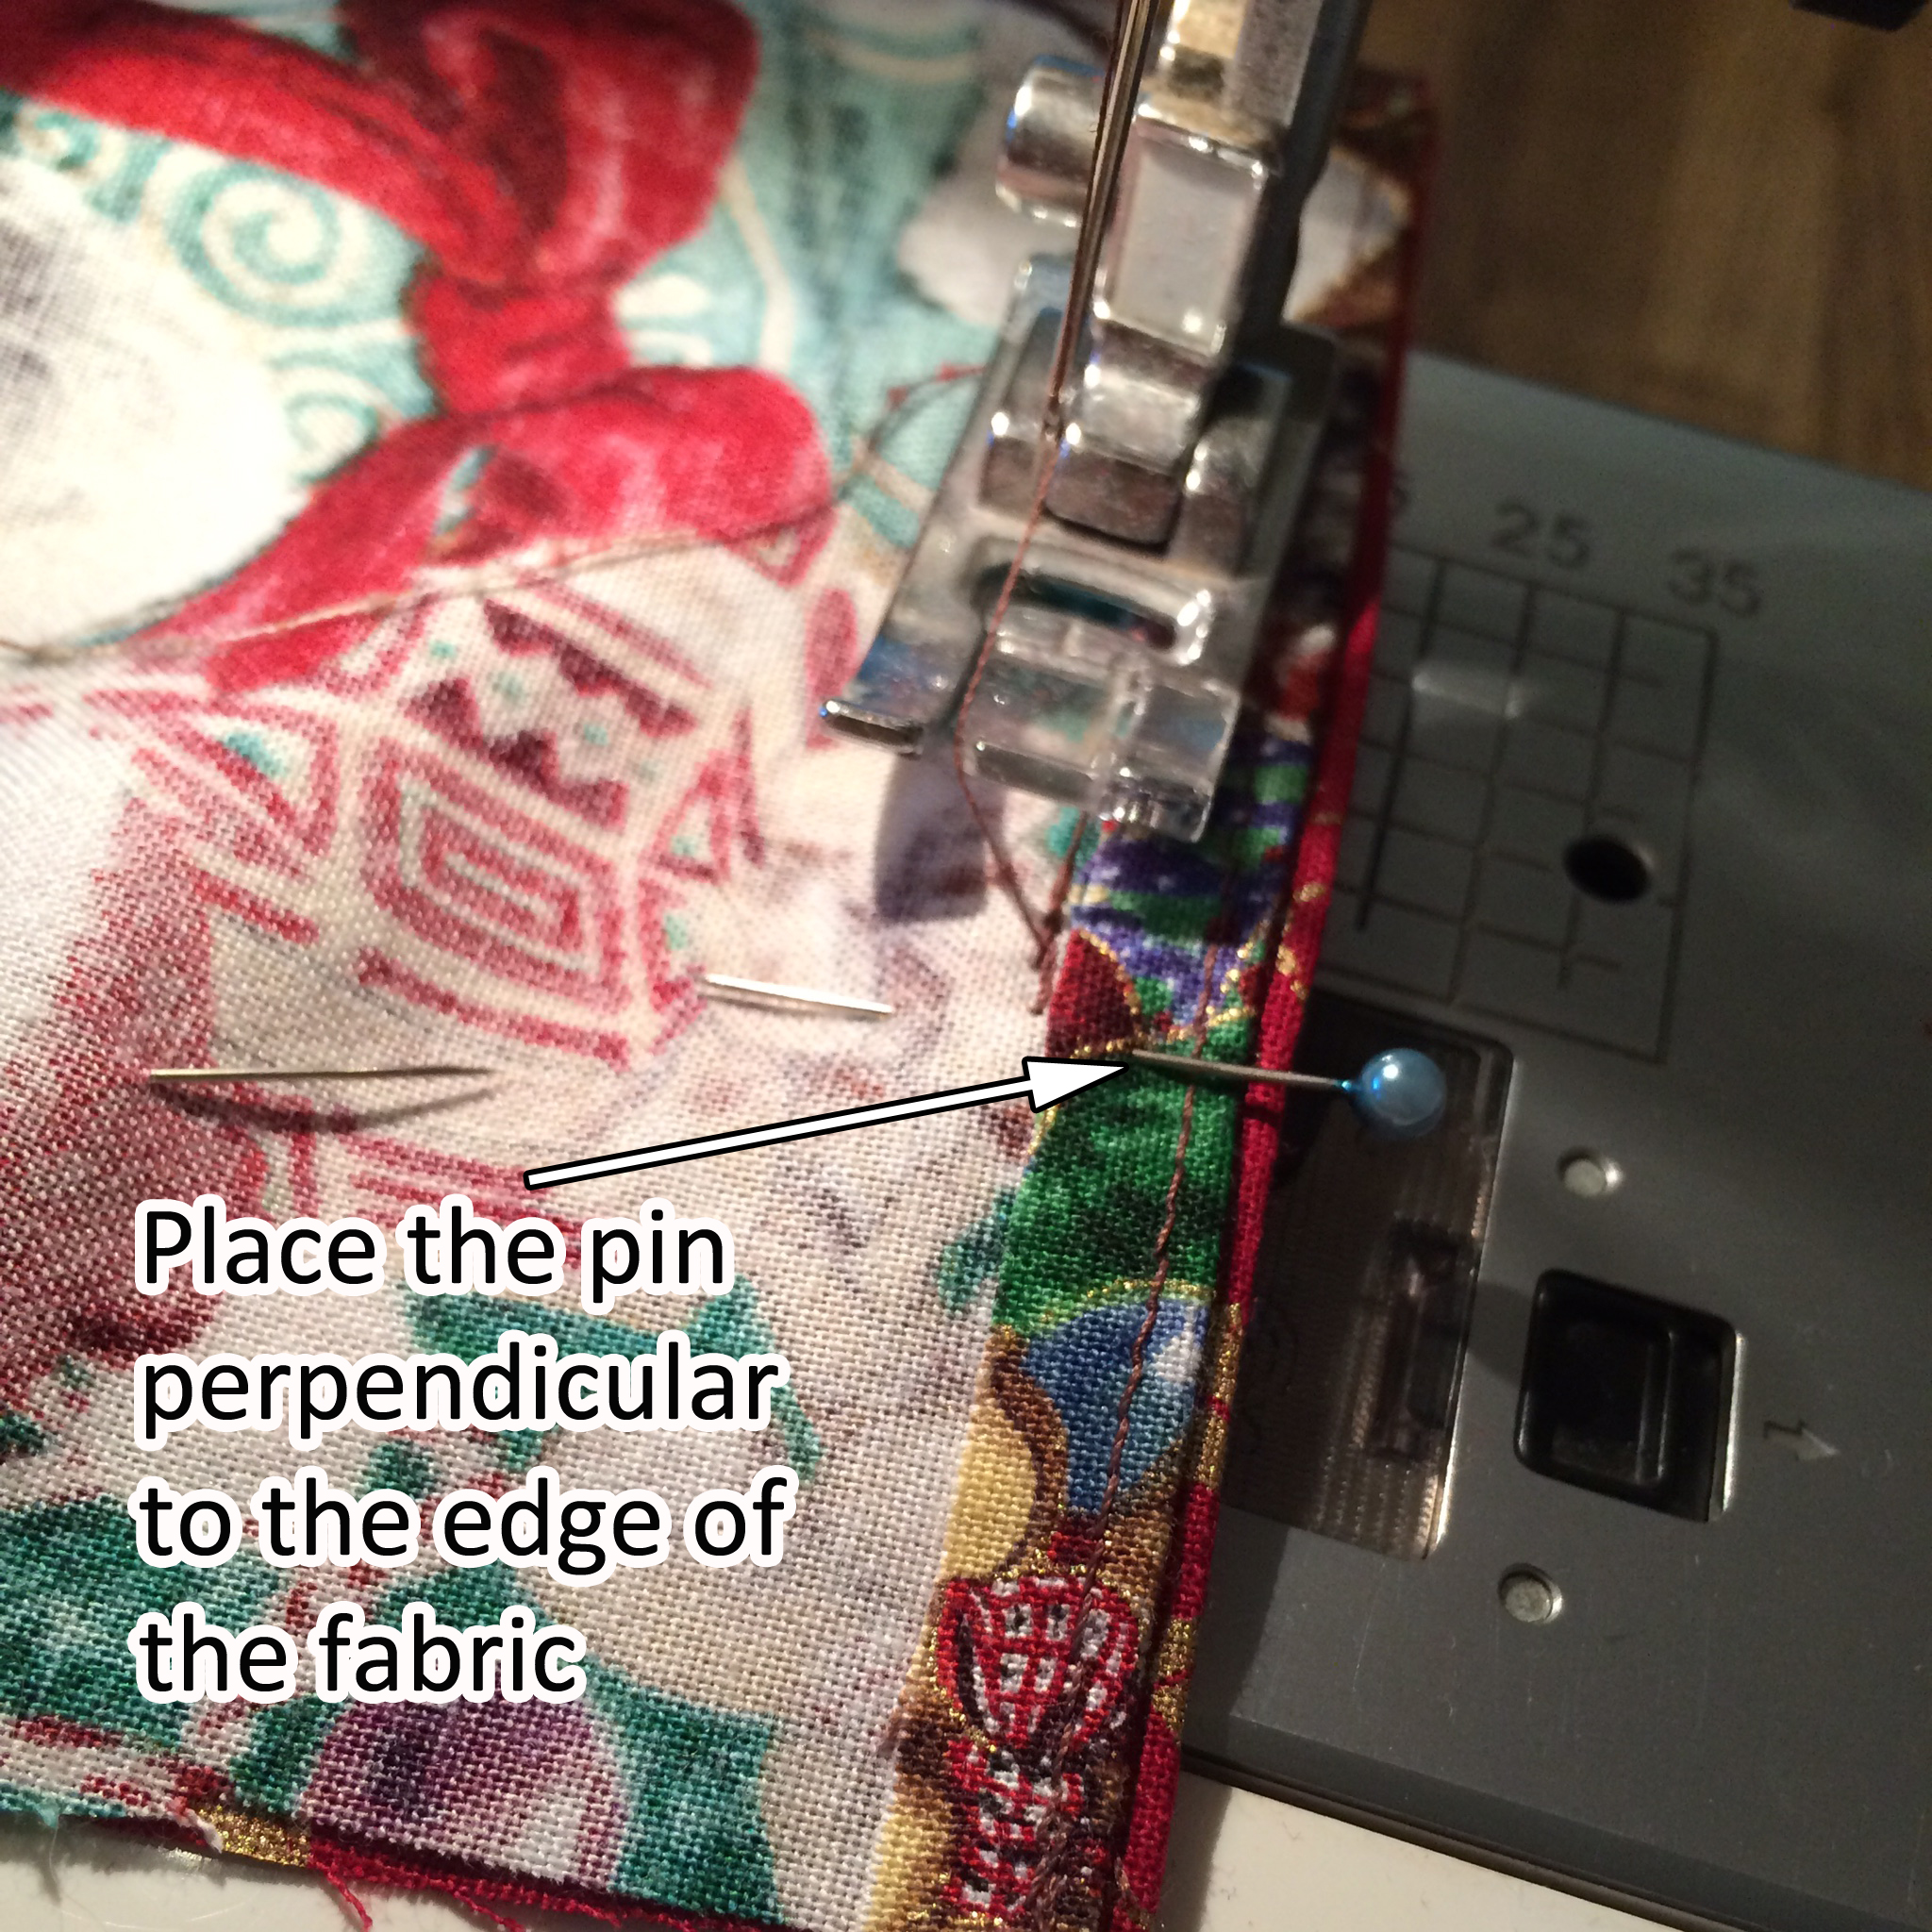 With right sides together, pin the two pieces of fabric together. Once pinned, get out your ruler or tape measure because we have to mark the four (4) sections for the apron string tube along the armholes. As you can see on the illustration, measure 1 1/2″ inches from the bottom of the armhole towards the hem of the apron. Place a pin perpendicular to the pins you used to pin the fabrics together. Do the same on the other side. Then measure 1 1/2″ from the side of the apron top along the topside of the apron. (The pictures do a much better job of showing this than I do explaining this.) Begin sewing with a 1/2″ seam allowance around the perimeter of the apron. Start about 1/3 of the way from the bottom edge (picture helps) and continue around until you reach your first pin. Stop sewing, backstitch to secure your seam and resume sewing along the armhole section. When you reach the top of the apron, stop sewing, backstitch to secure your seam and resuming sewing along the top after the 1 1/2″ pin. Continue sewing in this way around the rest of the apron until you reach about 1/3 along the bottom of the apron on the opposite side. Stop sewing, backstitch to secure your seam and remove your apron from your machine. You’ll notice you’ve left a gaping hole – that’s needed because we’re going to be turning our apron inside out.
Step 5: Turning apron inside out and top stitching
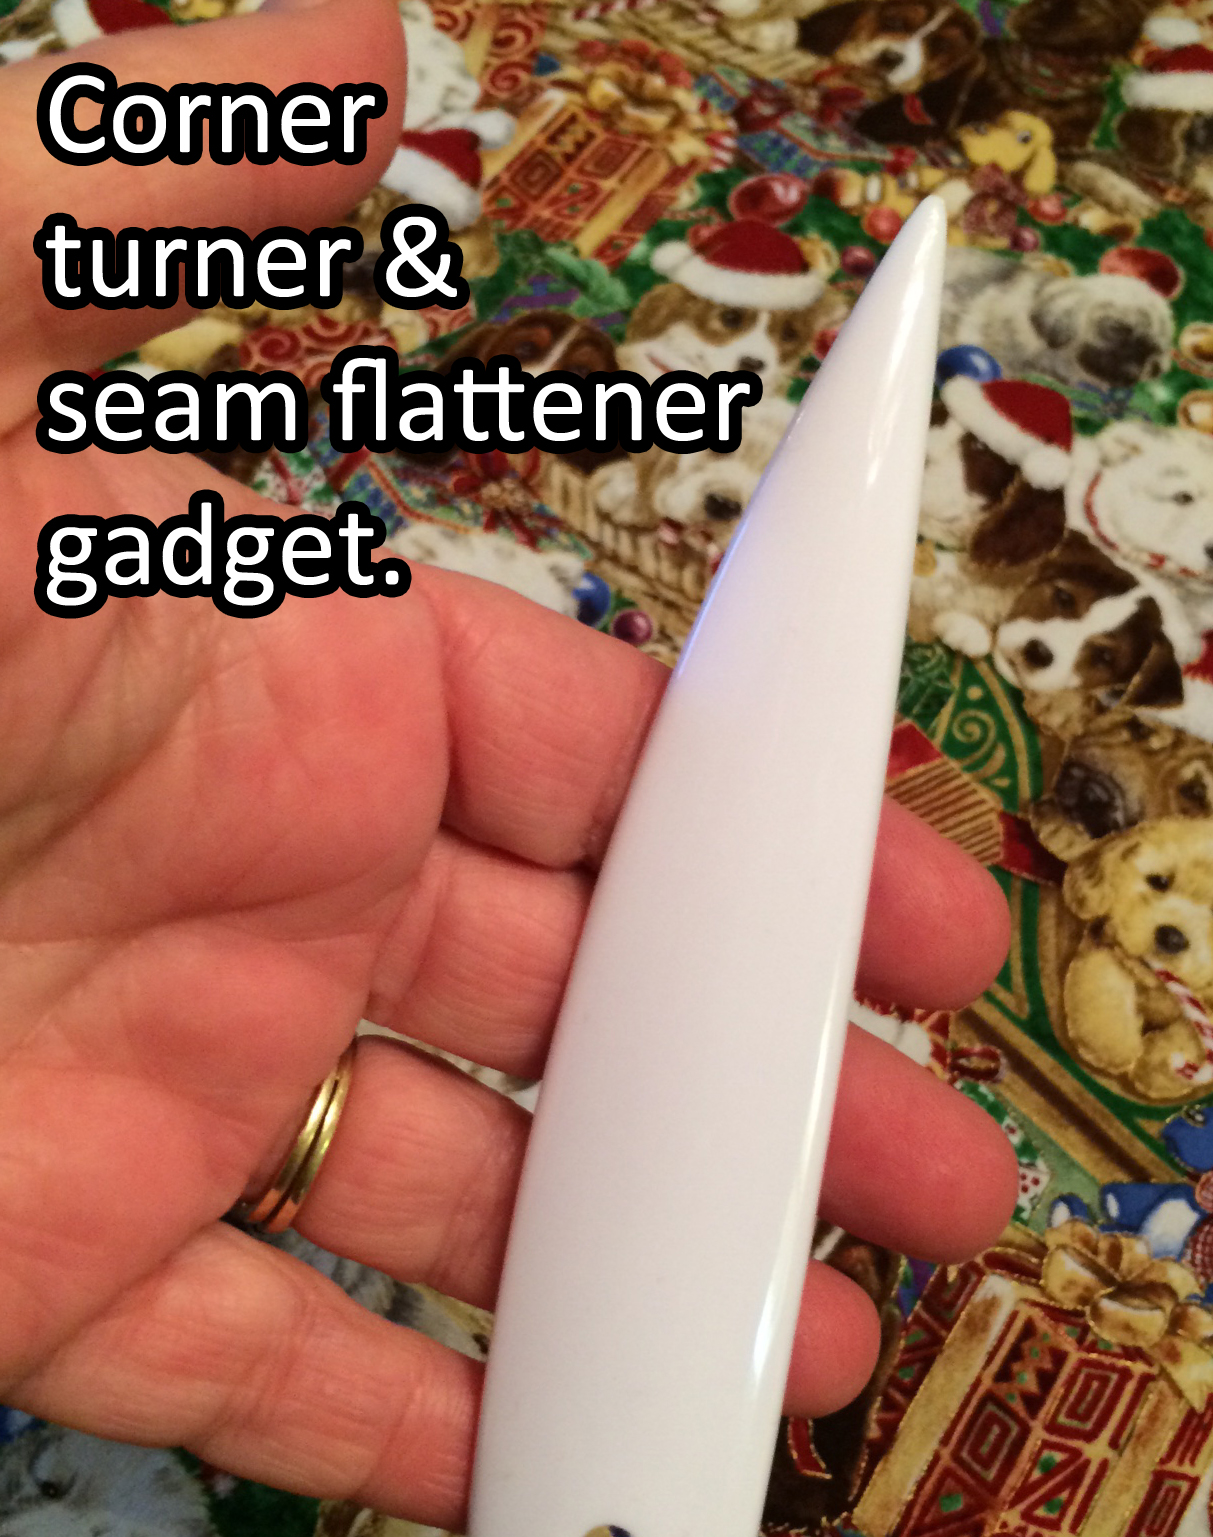
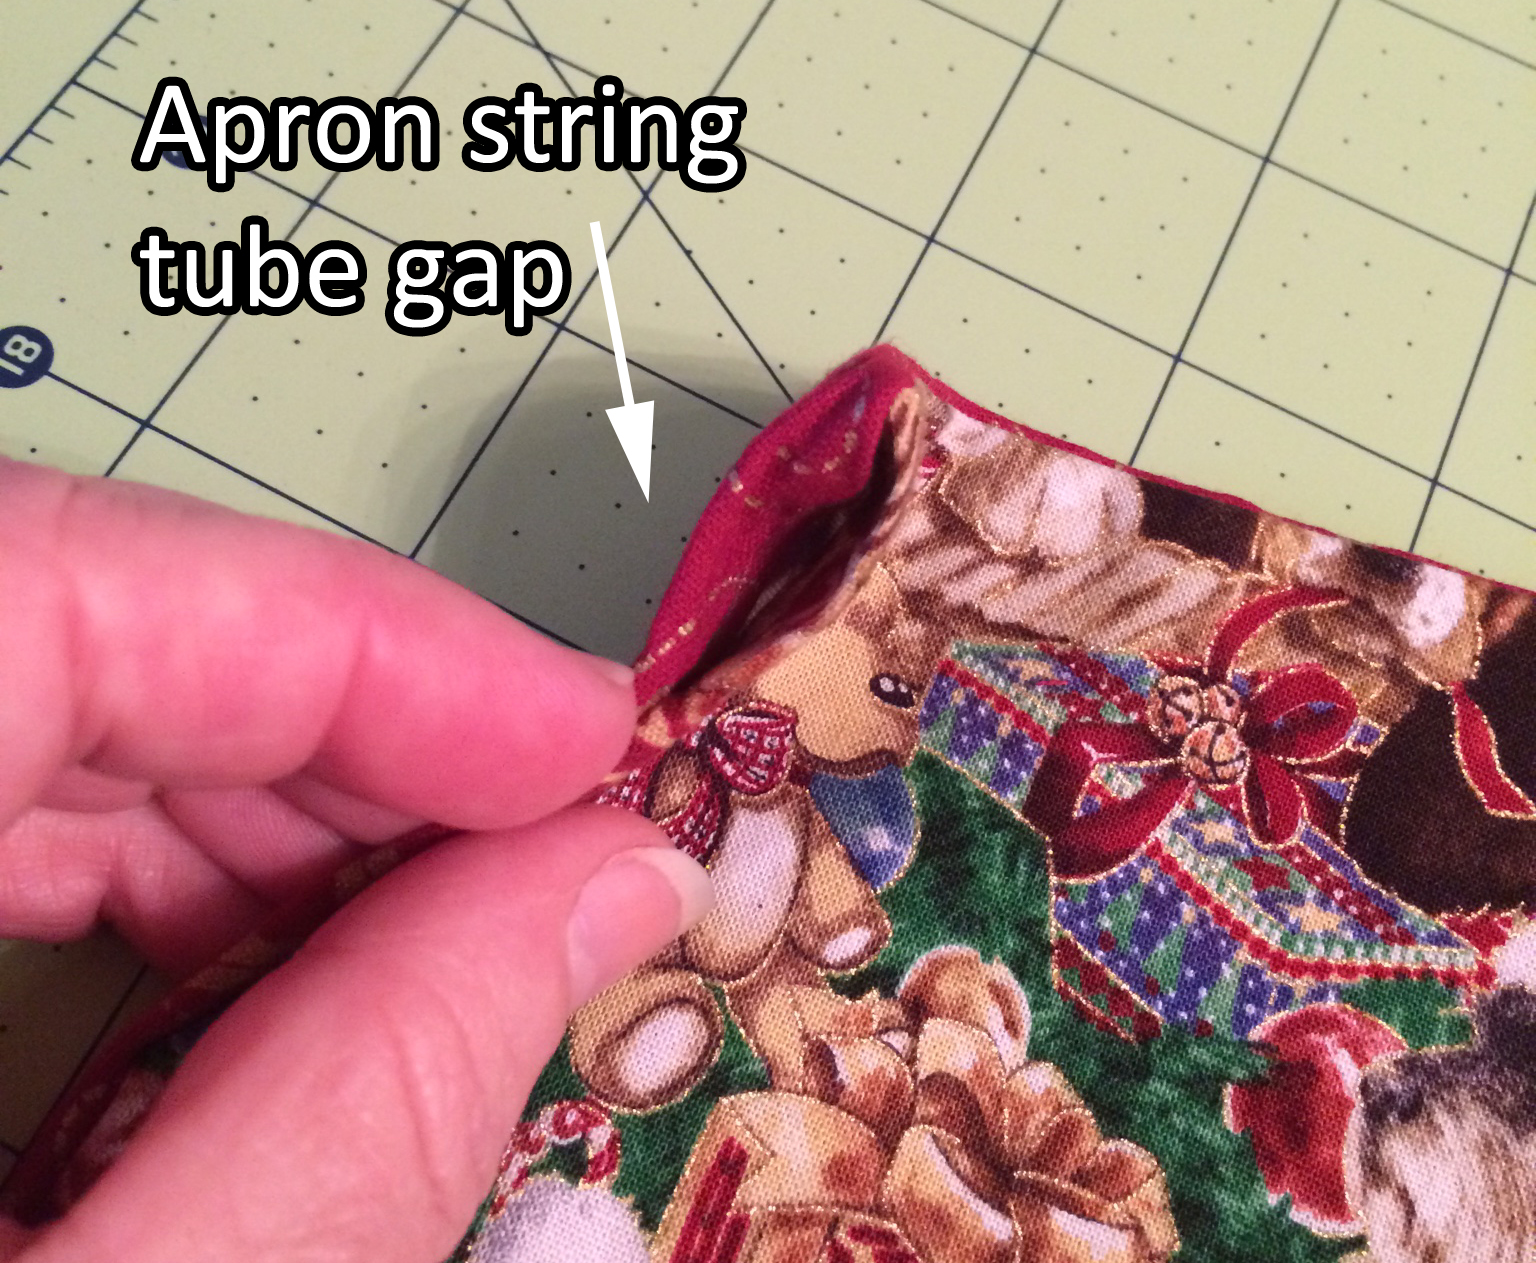
Turn the apron inside out and flatten out the seams by pressing against them from the inside of the apron. Use a handy pointer tool like the one in the picture or a pair of closed scissors to push out the corners. Once you’ve flattened your apron, go over it with the iron just to make sure the seams are flat and the edges from the hole at the bottom are ironed in line with the seams. Then at the lower right edge (as you’re looking at your apron), begin top stitching about 1/8″ from the edge. This will do two things: 1. Close up the gap at the bottom and 2. Give you a nice finished edge. REMEMBER: Don’t top stitch over the apron string gaps. Sew right up to them, backstitch to secure your thread and resuming sewing around the perimeter of the apron until you reach where you started.
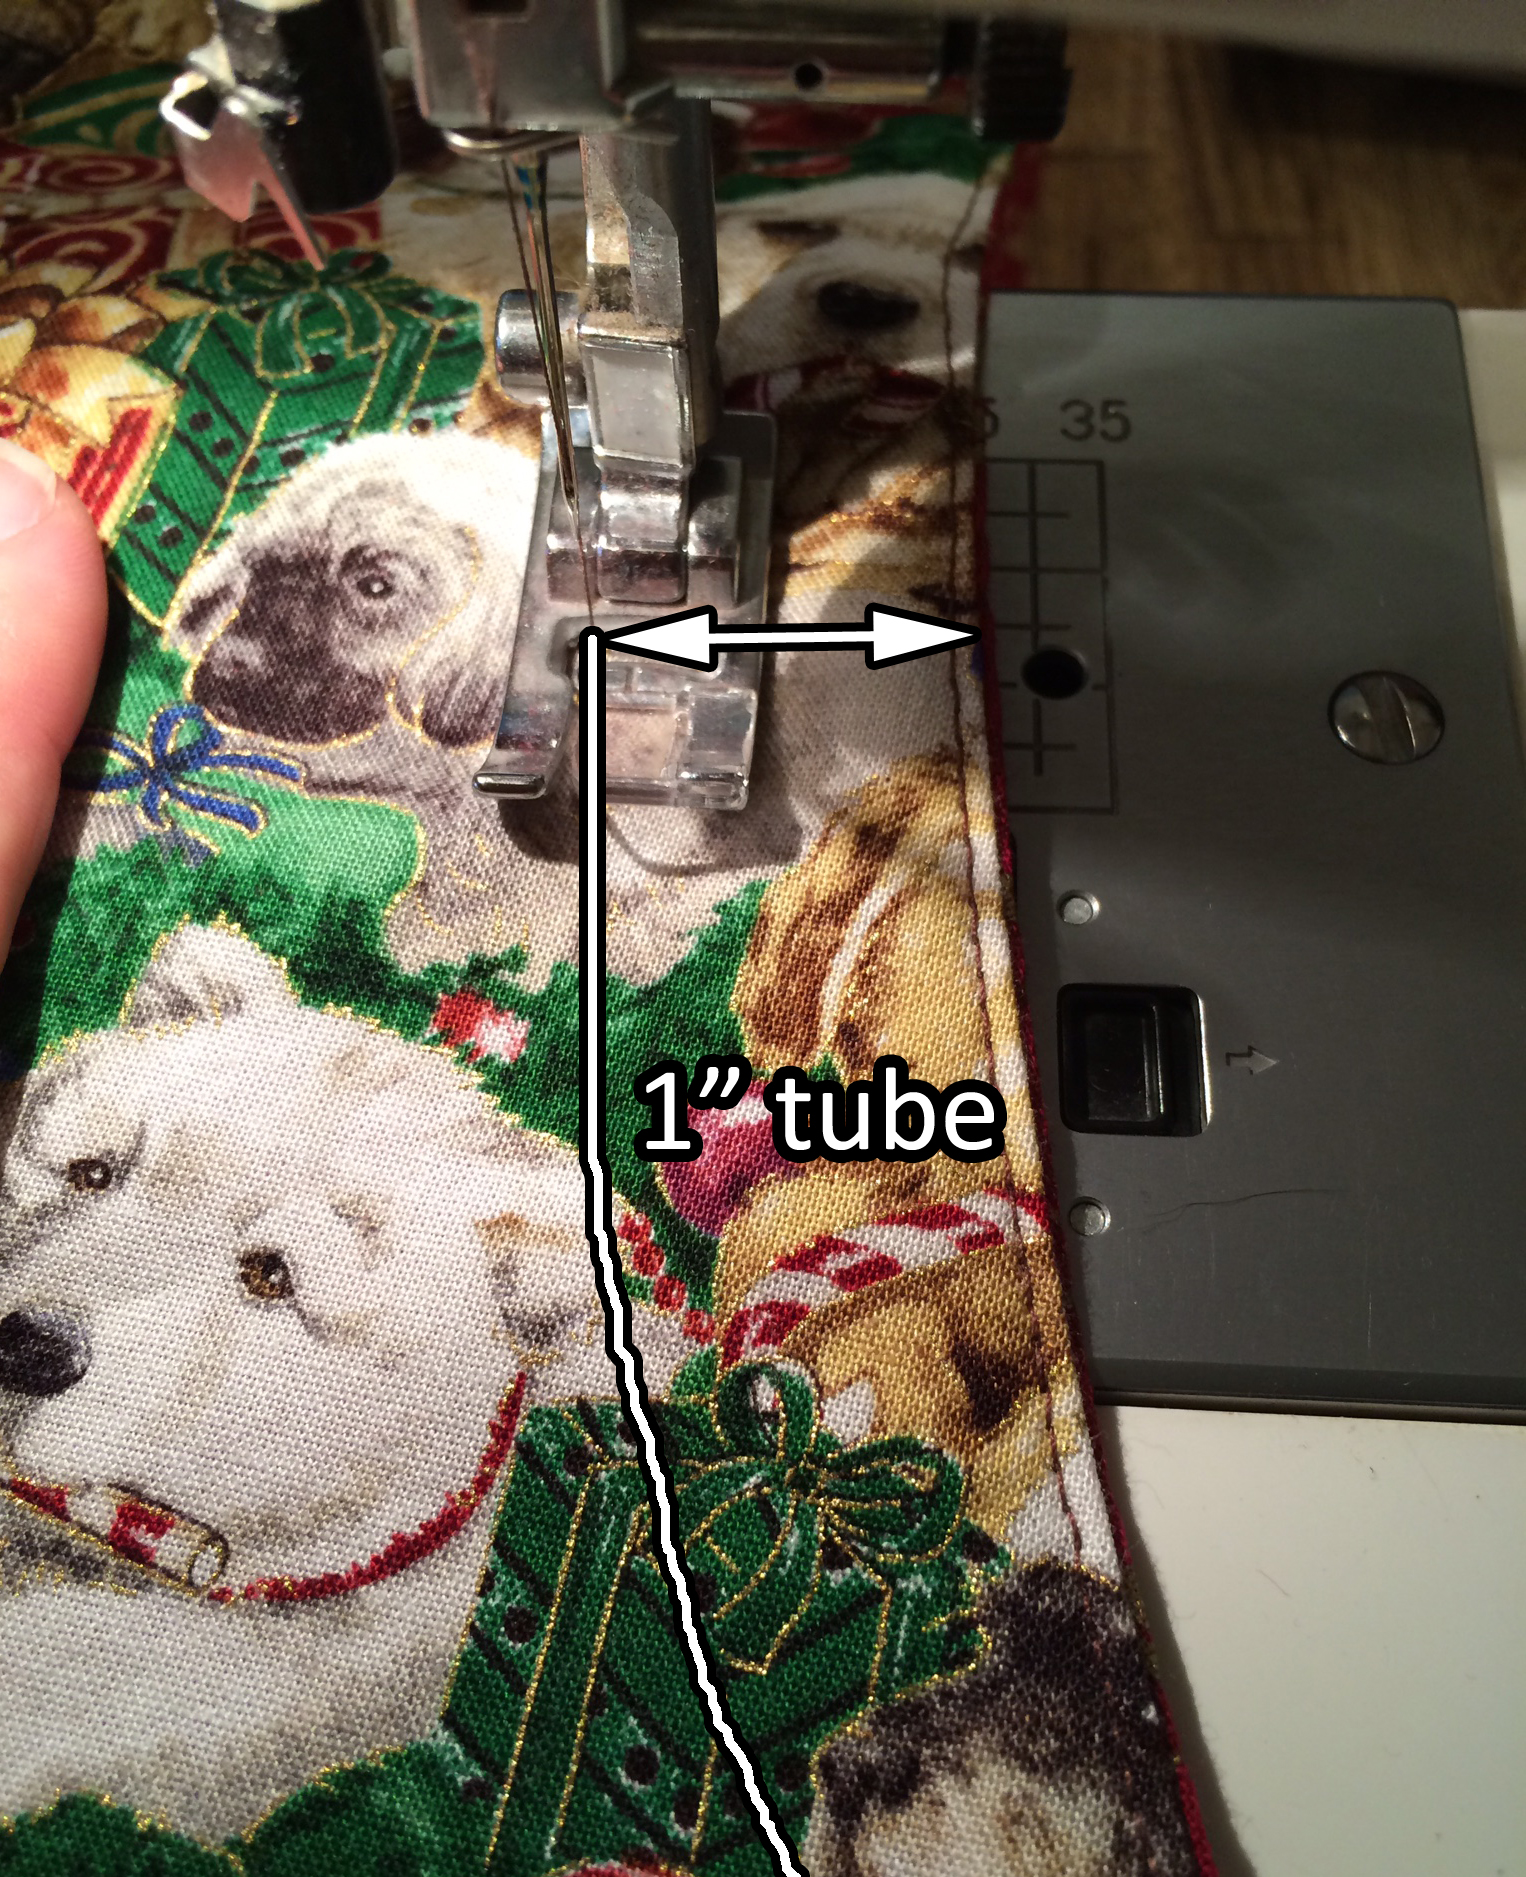
Step 6: Sewing in the apron string tubes
Beginning at the lower edge of the gap on the left side, sew along the armhole curve, keeping 1″ away from the edge the whole time until you reach the top of the apron. Backstitch and cut your threads. Move to the other side and repeat sewing the tube on the right side. And voila your apron is done…. almost.
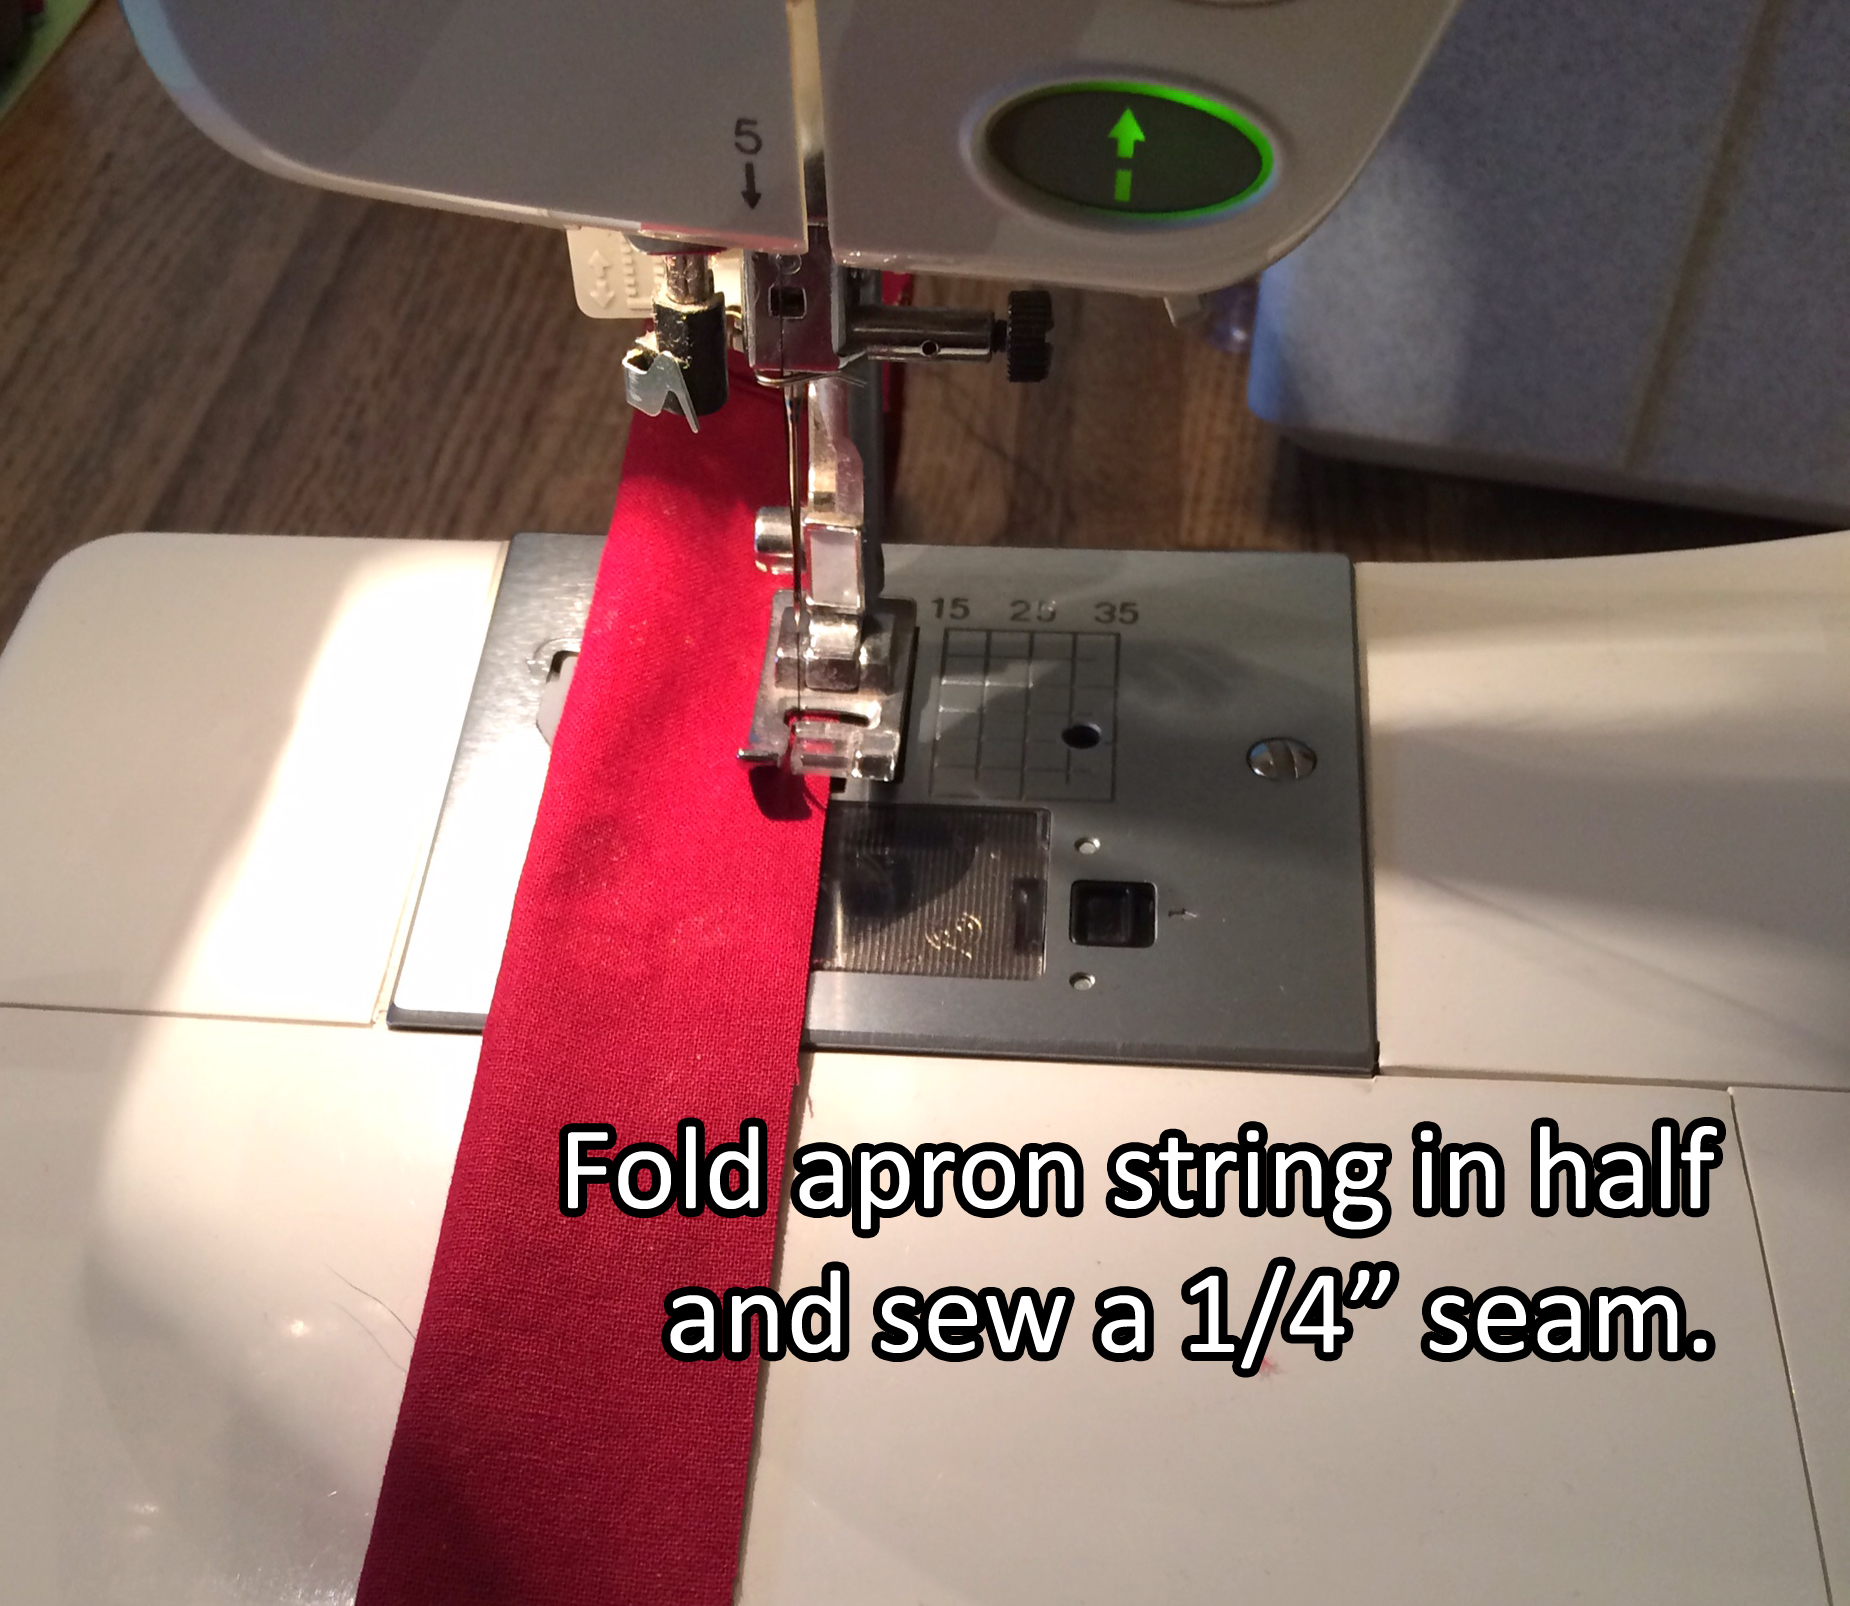
Step 7: Making the apron strings
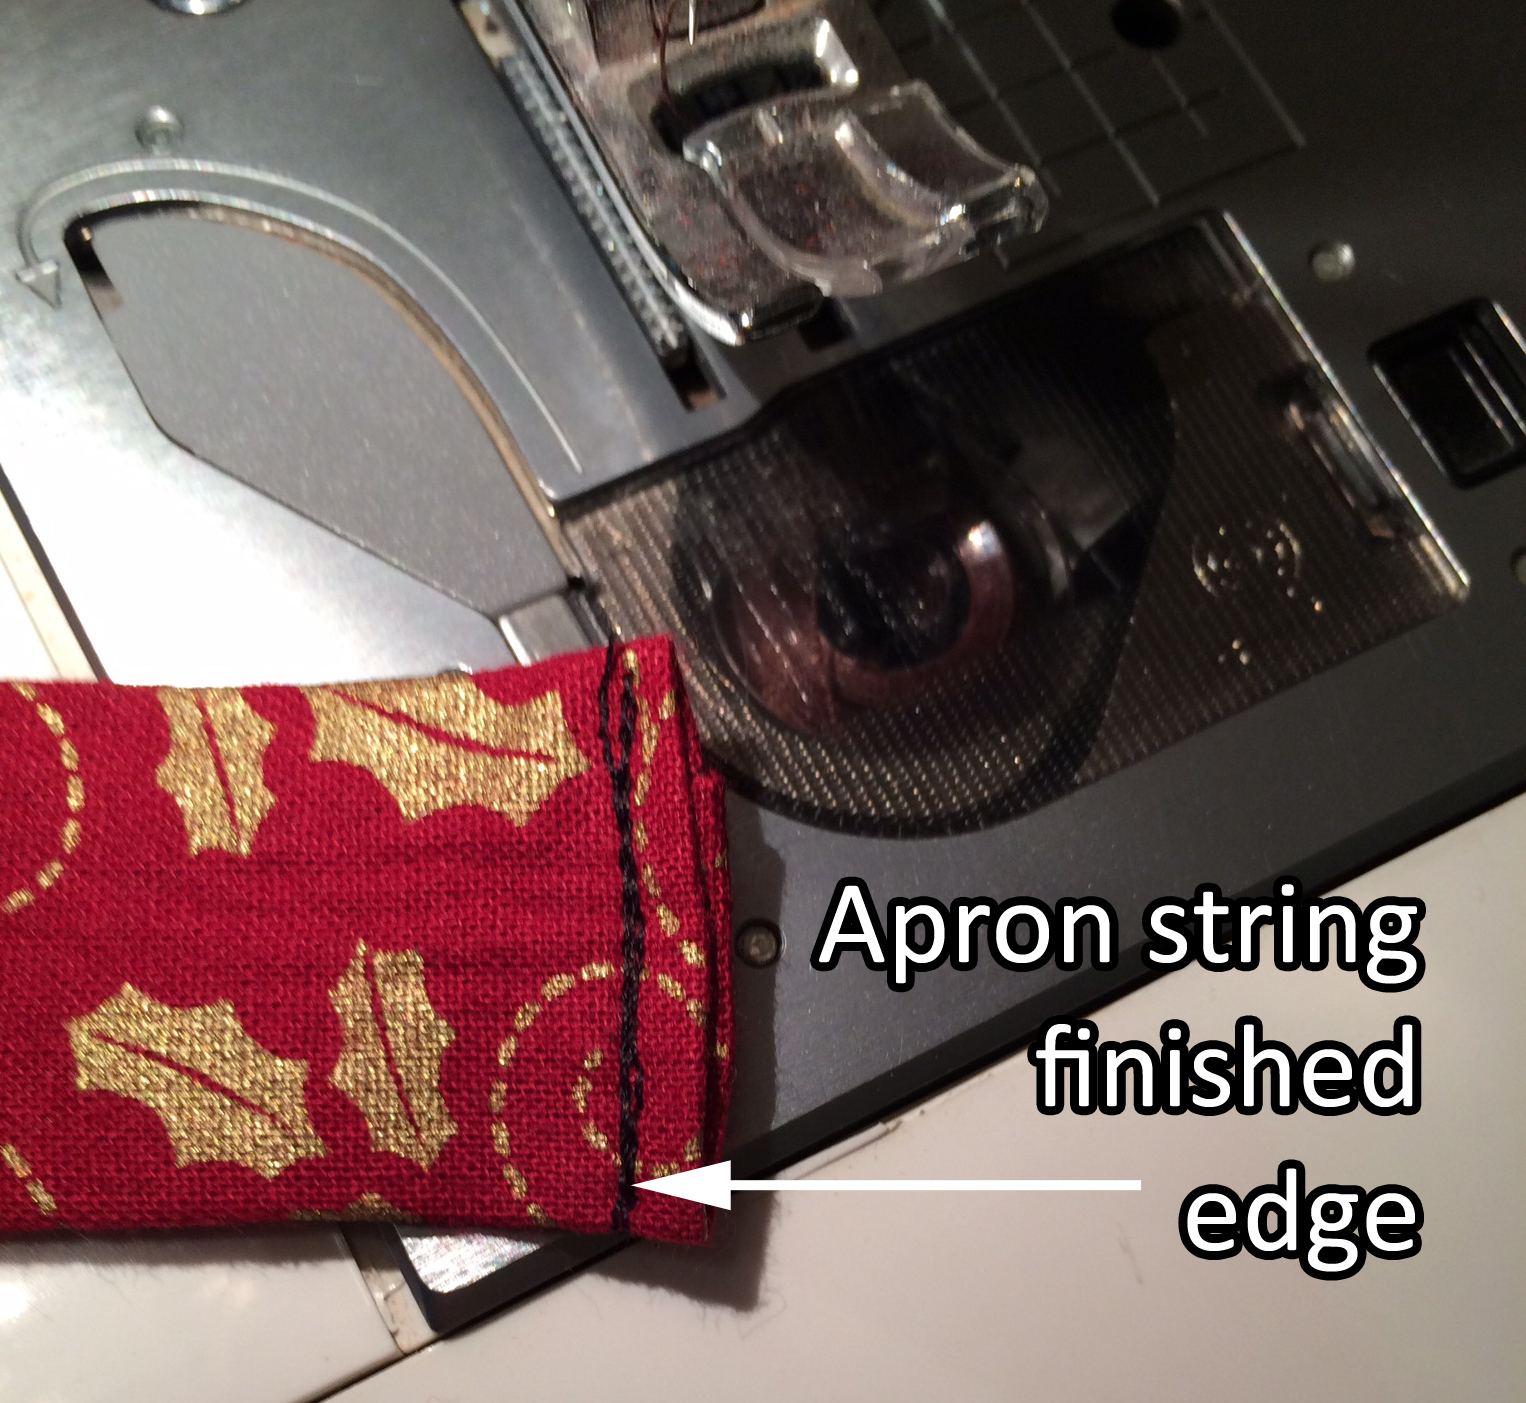
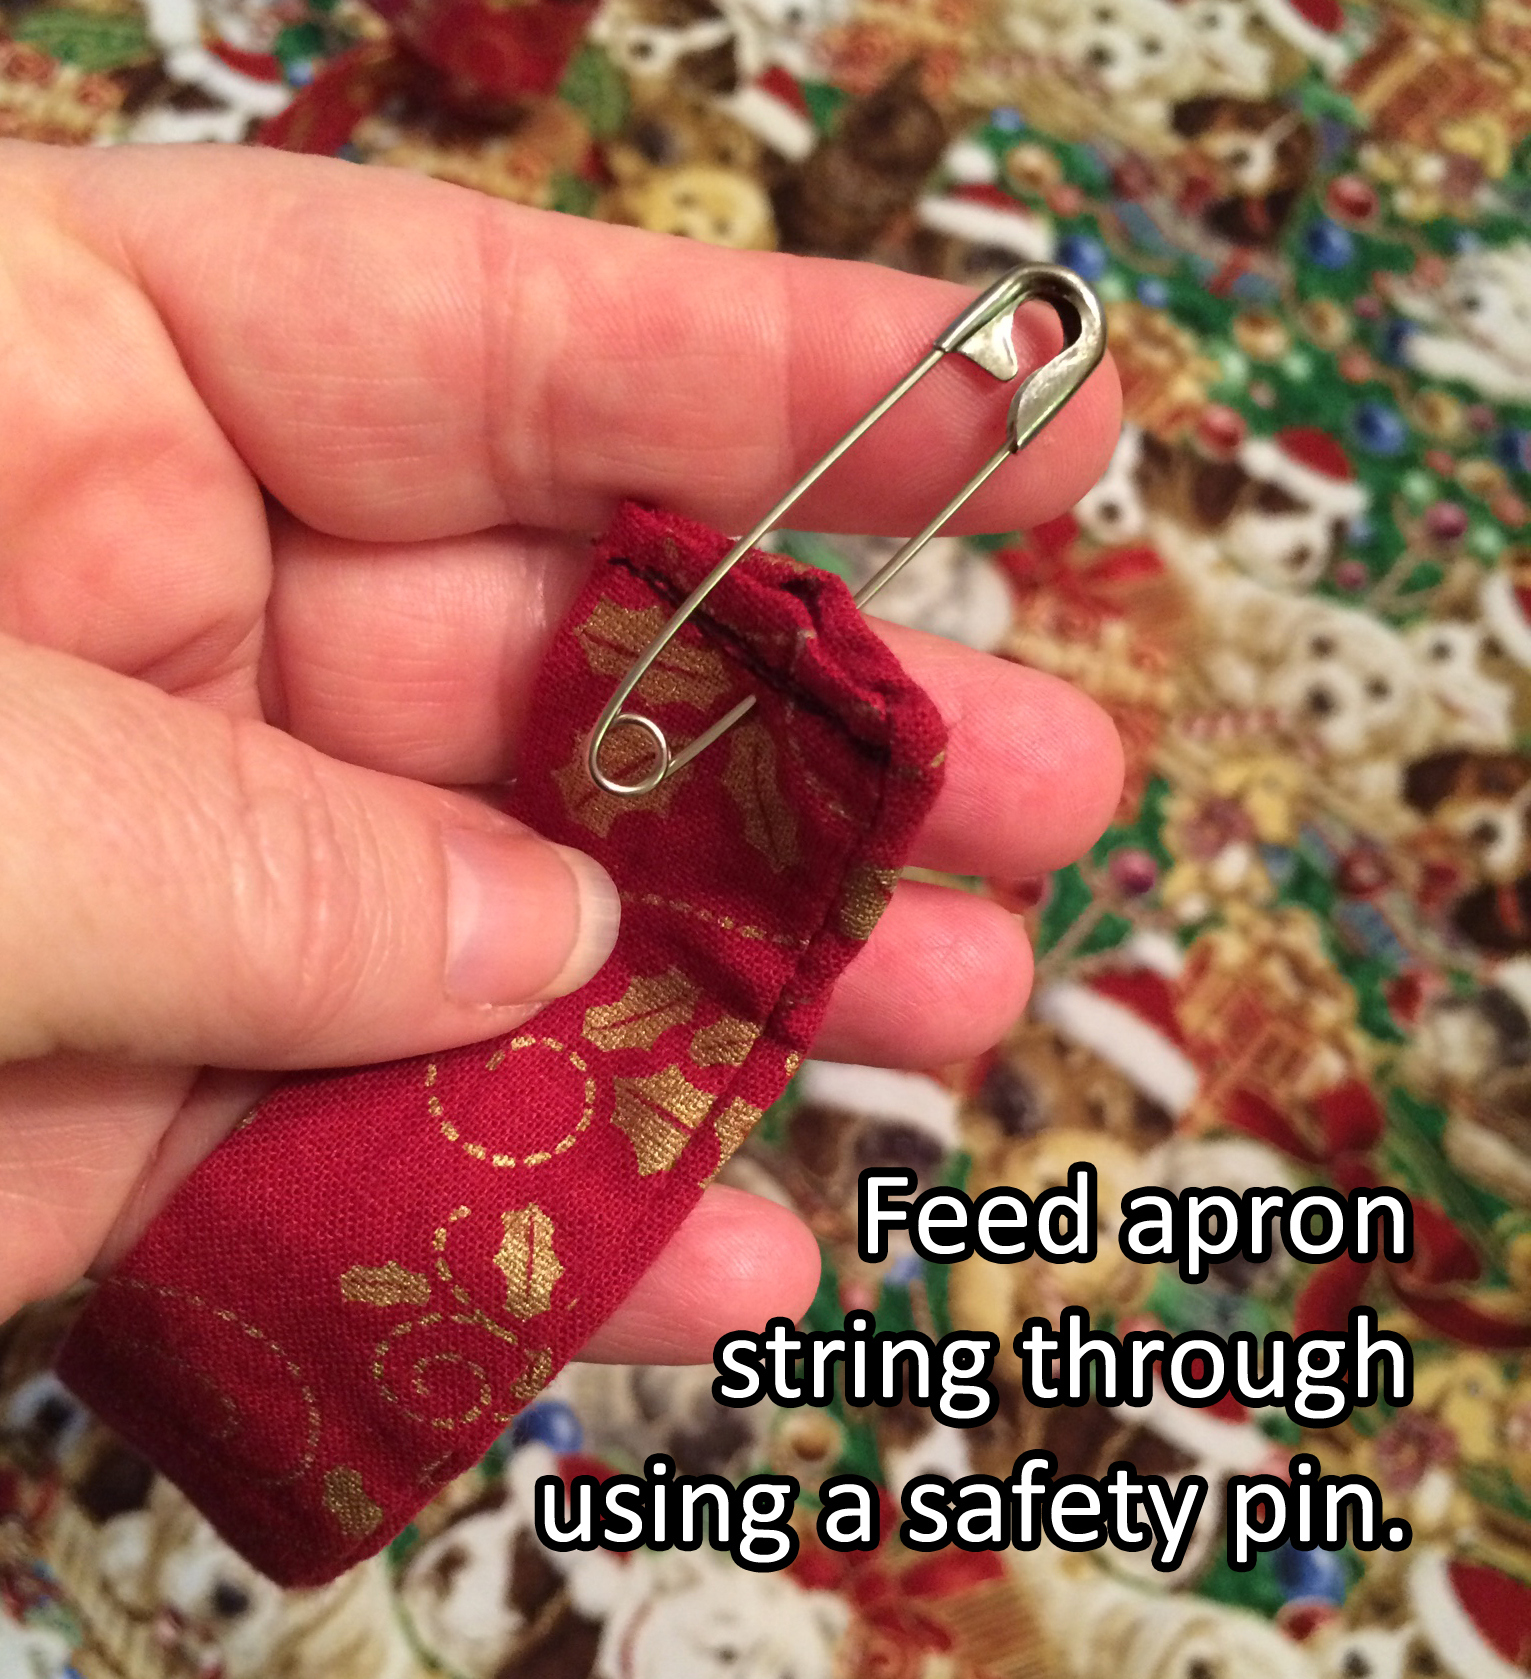
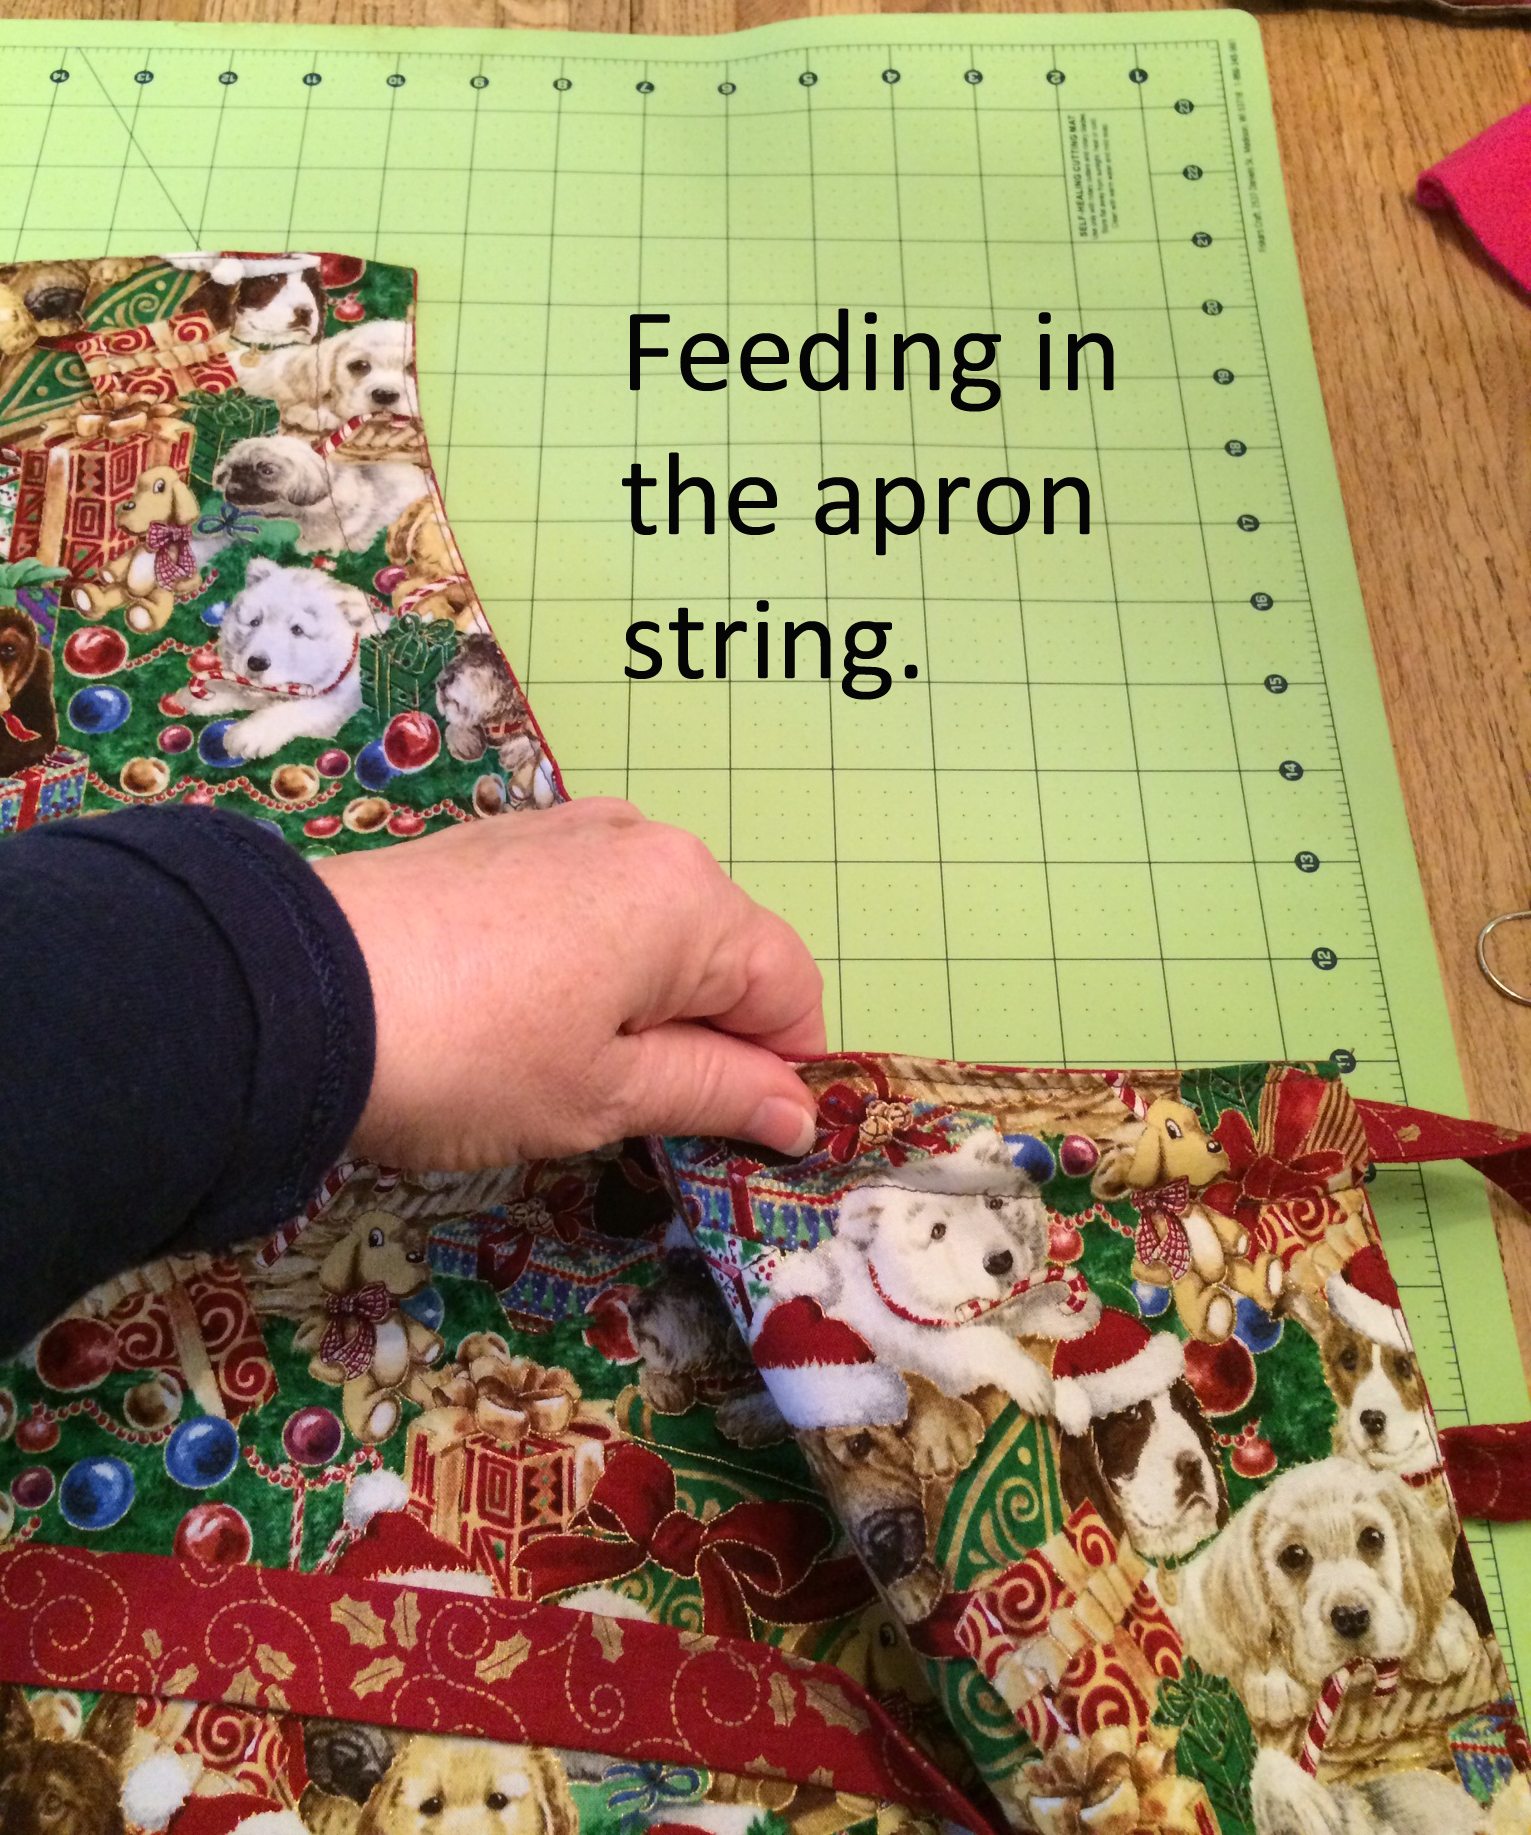
Remember the excess fabric? Choose which print you want to use for your strings, or possibly use a combination of both, and cut lengths of fabric 2 1/2″ wide. After you’ve cut as many 2 1/2″ lengths as you can out of the leftover fabric, sew them all together into one long strip. I like to have long apron strings, so I make mine super long, but the length is up to you. Then fold the strip in half (right sides together) and sew a 1/4″ seam along the length of the string. Then turn the string inside out (using a safety pin) and iron flat. Finish the edges and feed into the armhole tubes using the same safety pin.
I must say it’s easier to make something that it is to describe ‘how’ to make it. If you have any questions, please don’t hesitate to ask.
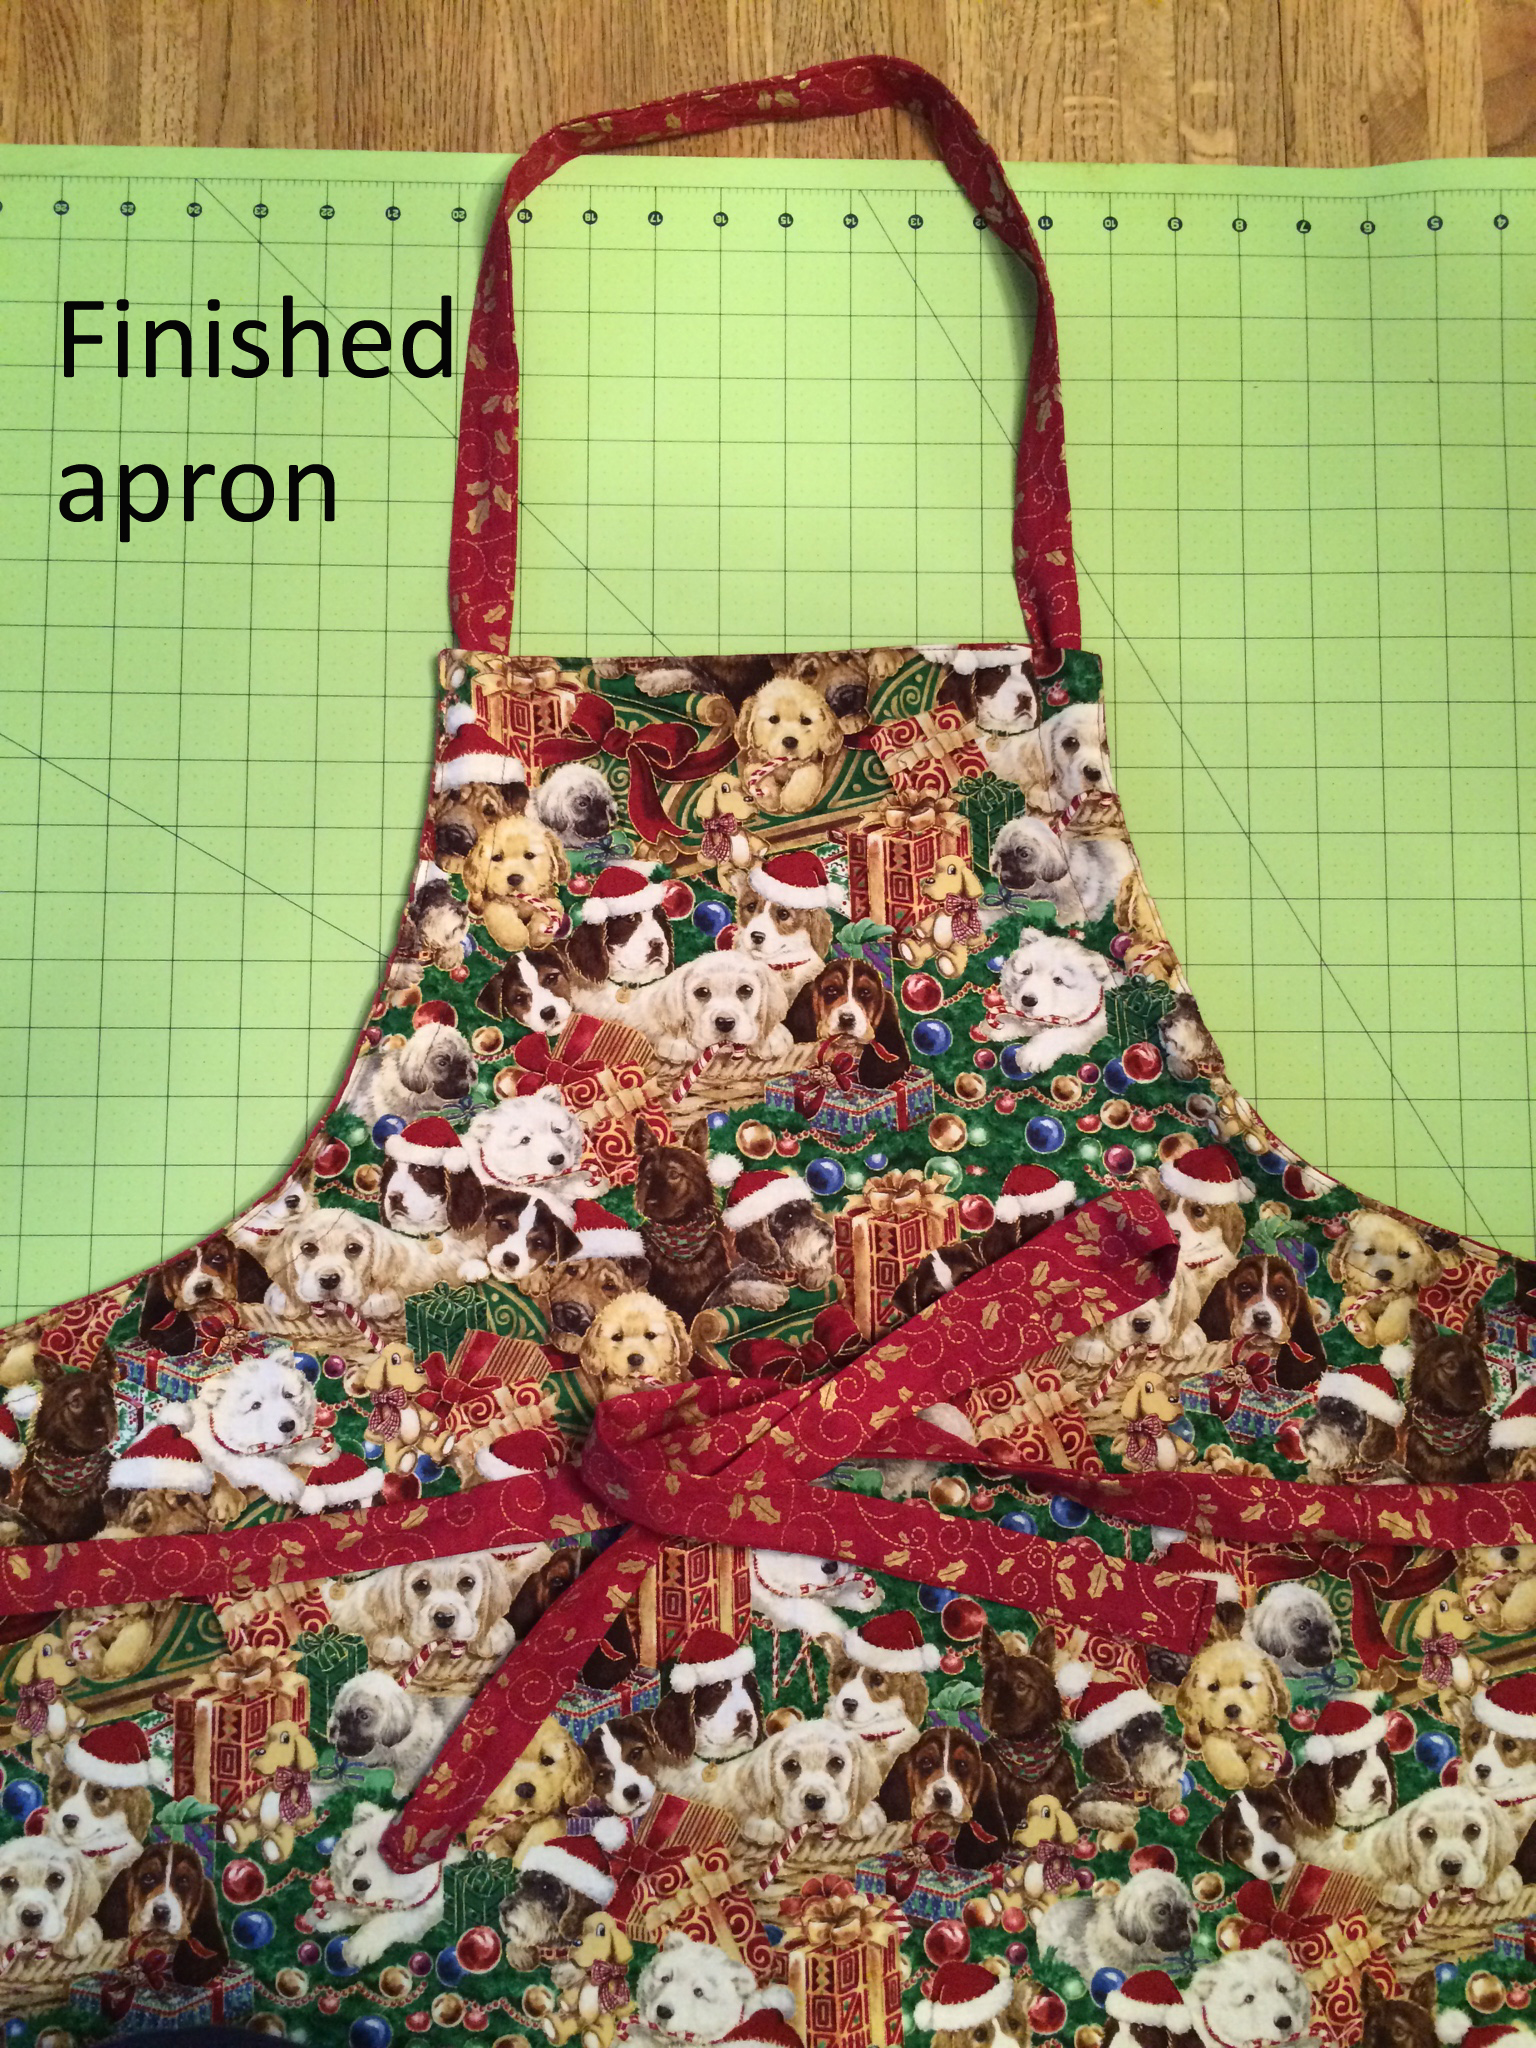
Here’s the finished apron. I apologize for the terrible quality of the pictures of me wearing the apron. I was using my phone camera with a timer and the dogs thought I was playing so it’s really a miracle I actually have these pictures. I think you get the idea.


In our defense, when you run back and forth really fast, that’s dog speak for “Let’s play!”

Nice Aprons.